Differential Side Seals
Posted: Sat Nov 05, 2011 6:31 pm
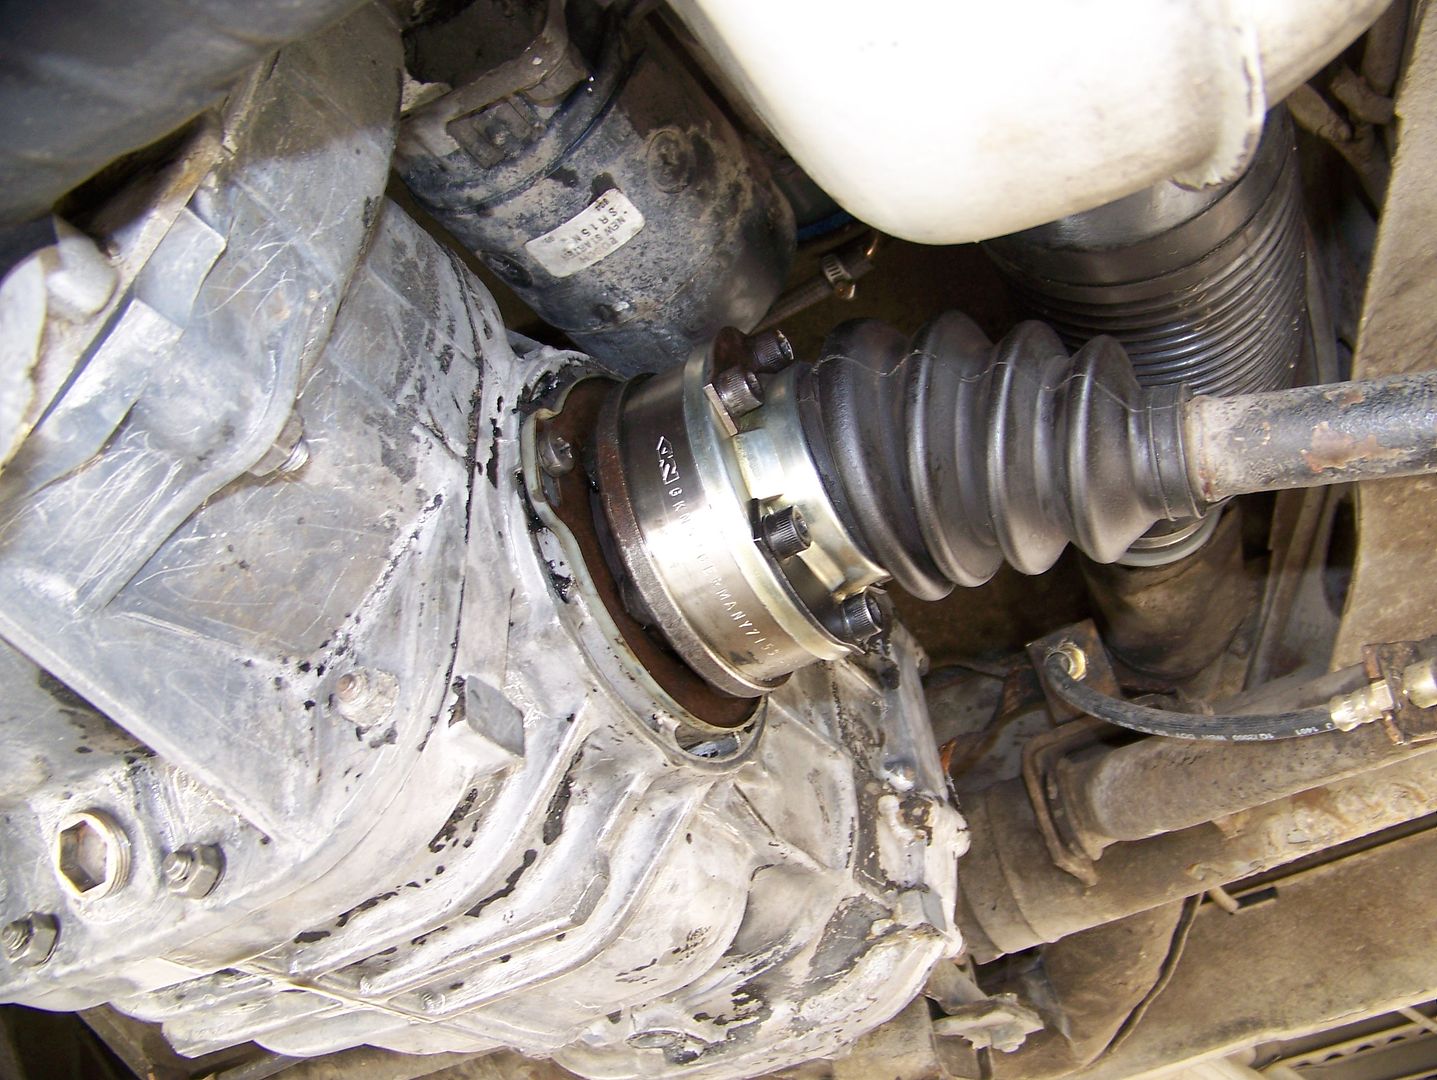
Many of us have drooling transaxles at the center ribs under the CVs. It is an easy diagnosis if your transaxle is not hidden under decades of caked-on dirt and undercoating.
Step 1) Clean the area very well. I used a screwdriver to chip the caked-on dirt off dry (much easier to sweep up than attacking it with solvents). Wipe down your CV joints very clean and get the insides of the screws with a small screwdriver. Then I used a water-based spray degreaser (Purple Power) and a trip to the local carwash to get the minor remaining crud out of the crevasses.
Step 2) Take down just the inside CV joint on the side you are working on. Plastic bag it if you are enjoying Santa Ana winds in the sandy desert. Loosen only a 1/2 turn the two phillips screws that hold the side cover lock plate. Wipe out the inside of the drive flange until you can see the blue rubber cap. Stab it in the middle and get a screwdriver inside the center and find a pry point to pull it off (it is metal framed).
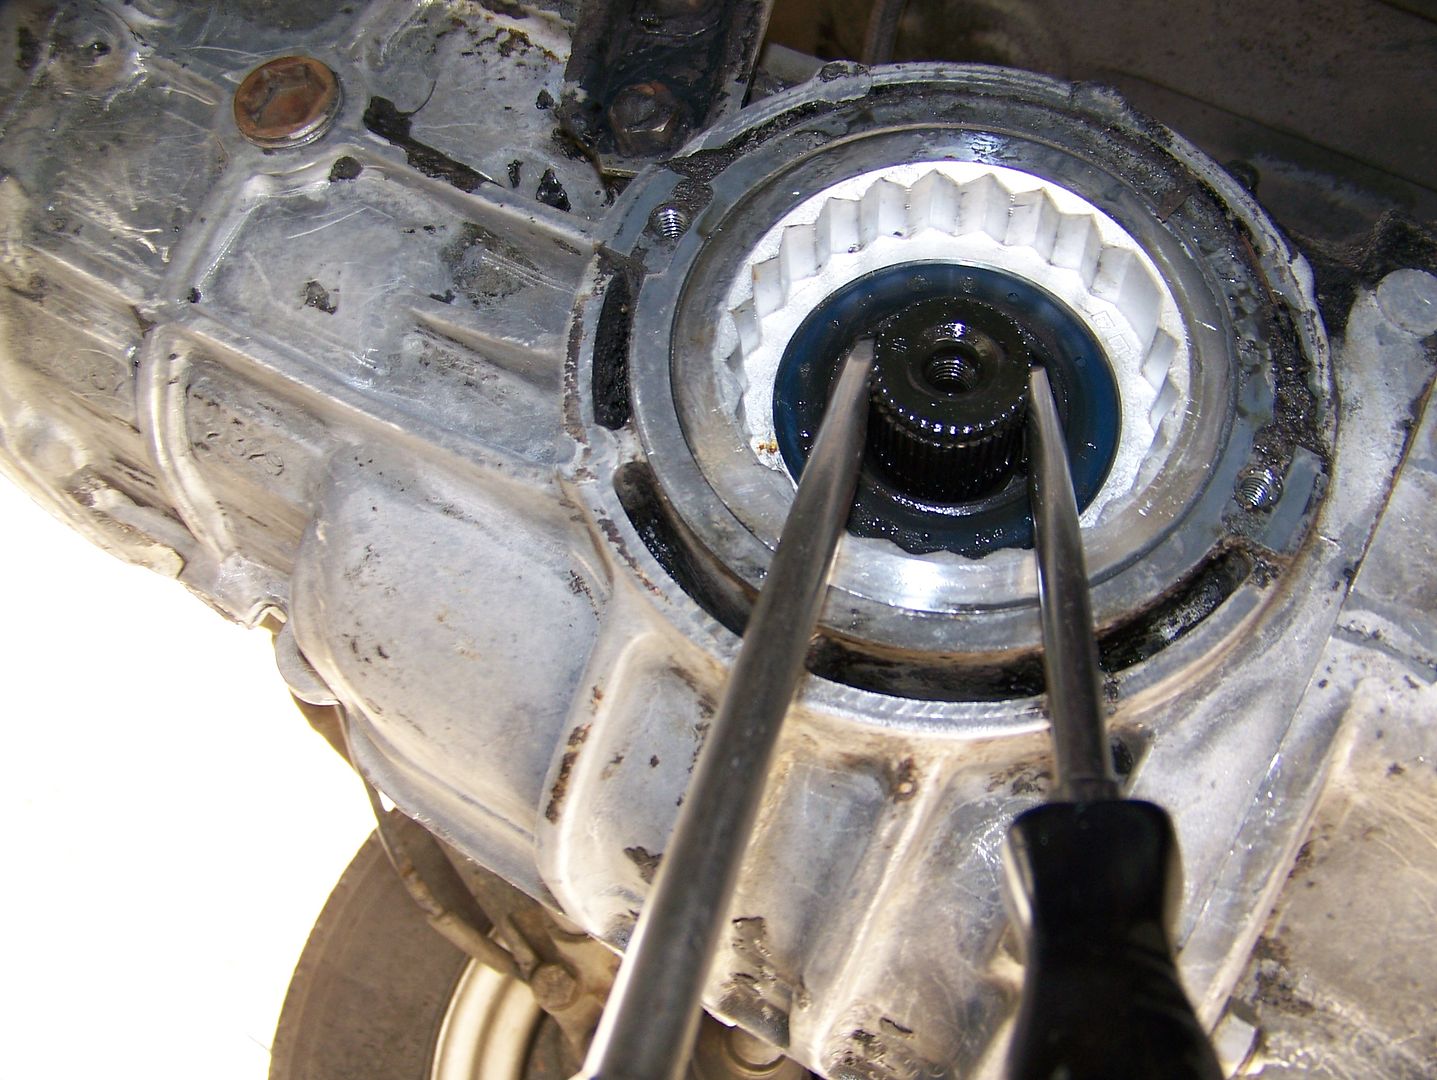
Step 3) You must remove the flange retaining circlip, it is exactly like a CV hub circlip, but in a less accessible location. An expanding circlip plier will make this easier. Use two large flat bladed screwdrivers against the side cover retainer screws (Phillips) and pry the flange off the differential drive shaft. Oil will now pour out, just put a tray under it, we like this oil leaking out to help keep the differential bearings clean.
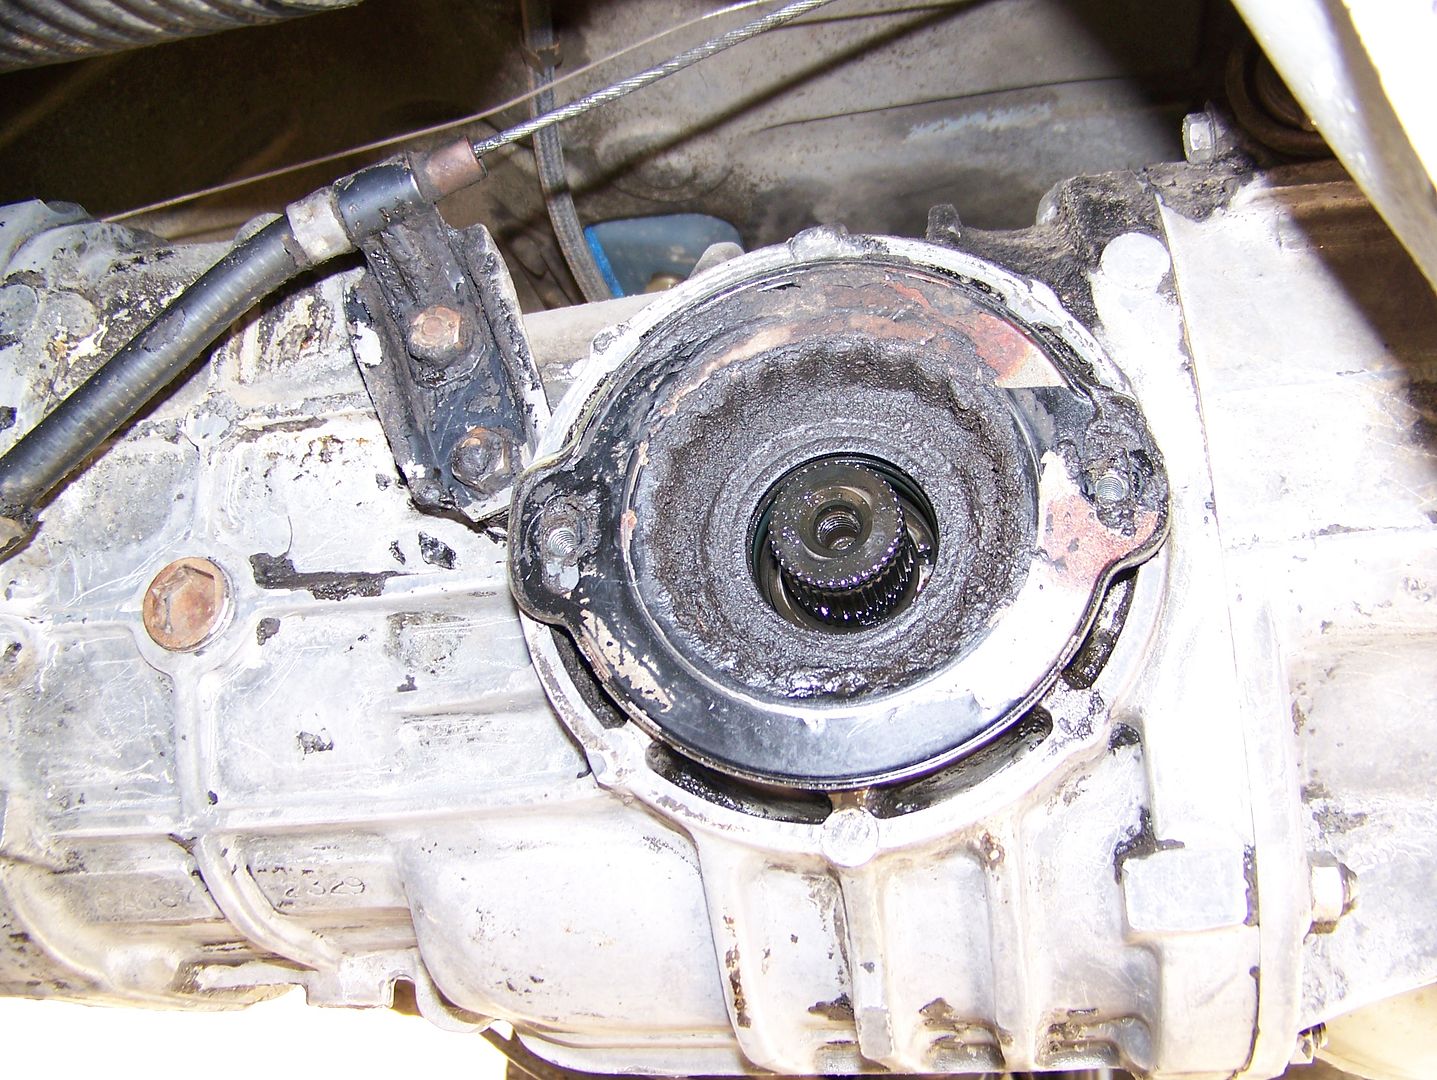
Step 4) Even with all of your preparatory cleaning, you still have a mess. Do NOT clean this side cover lock plate! Just remove it with caution:
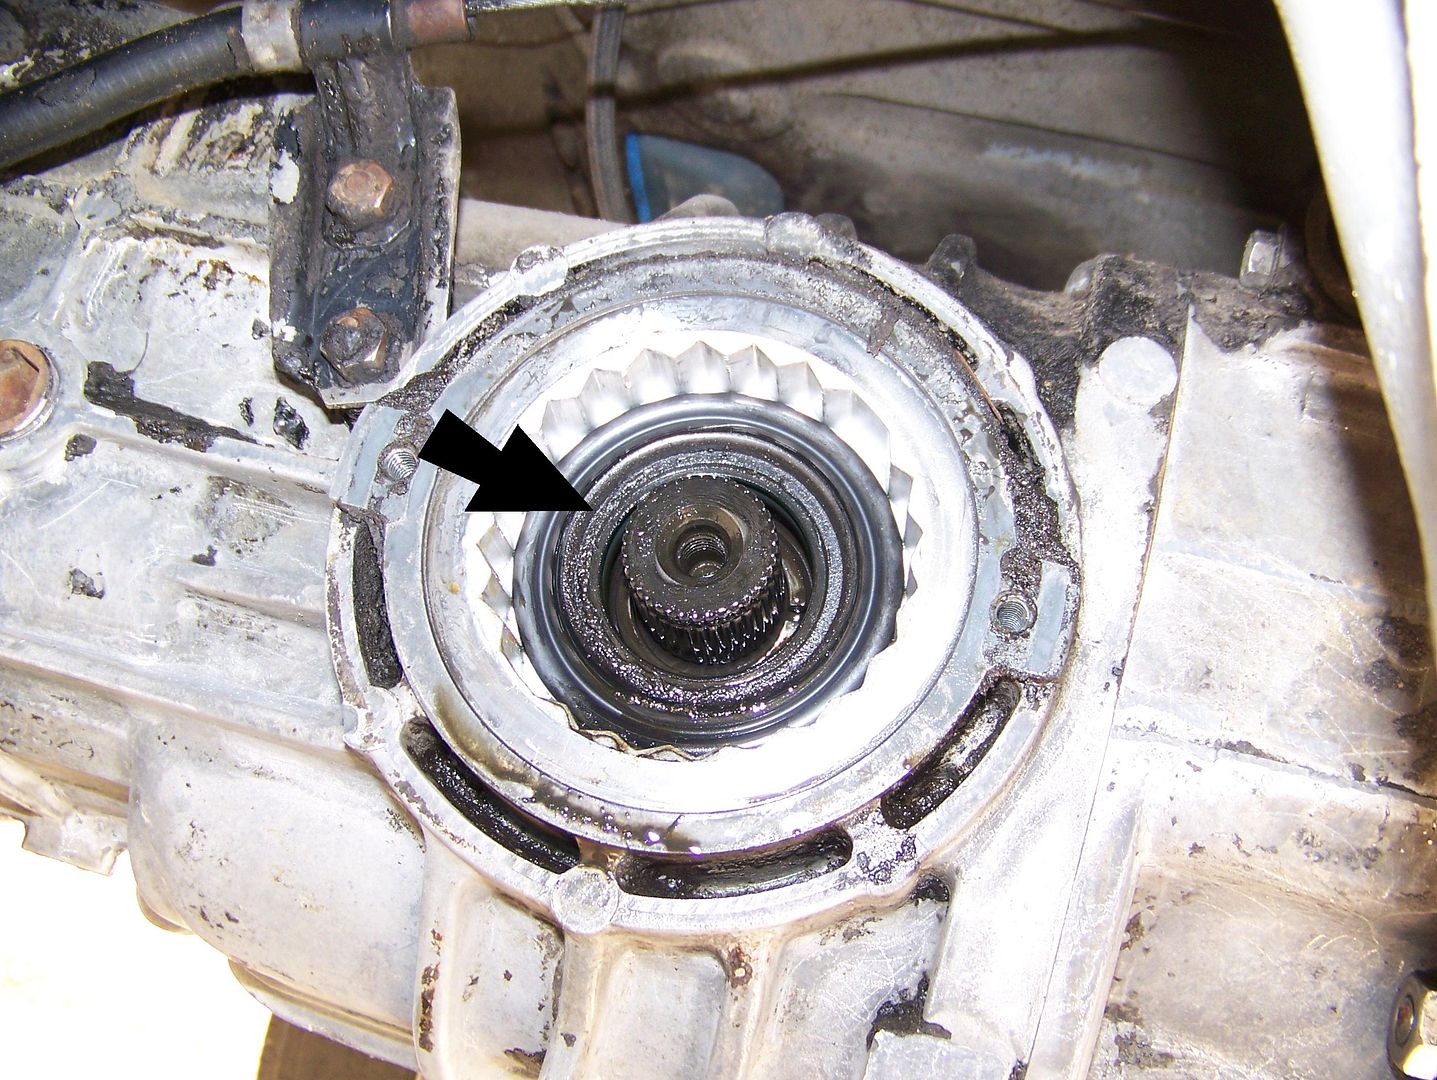
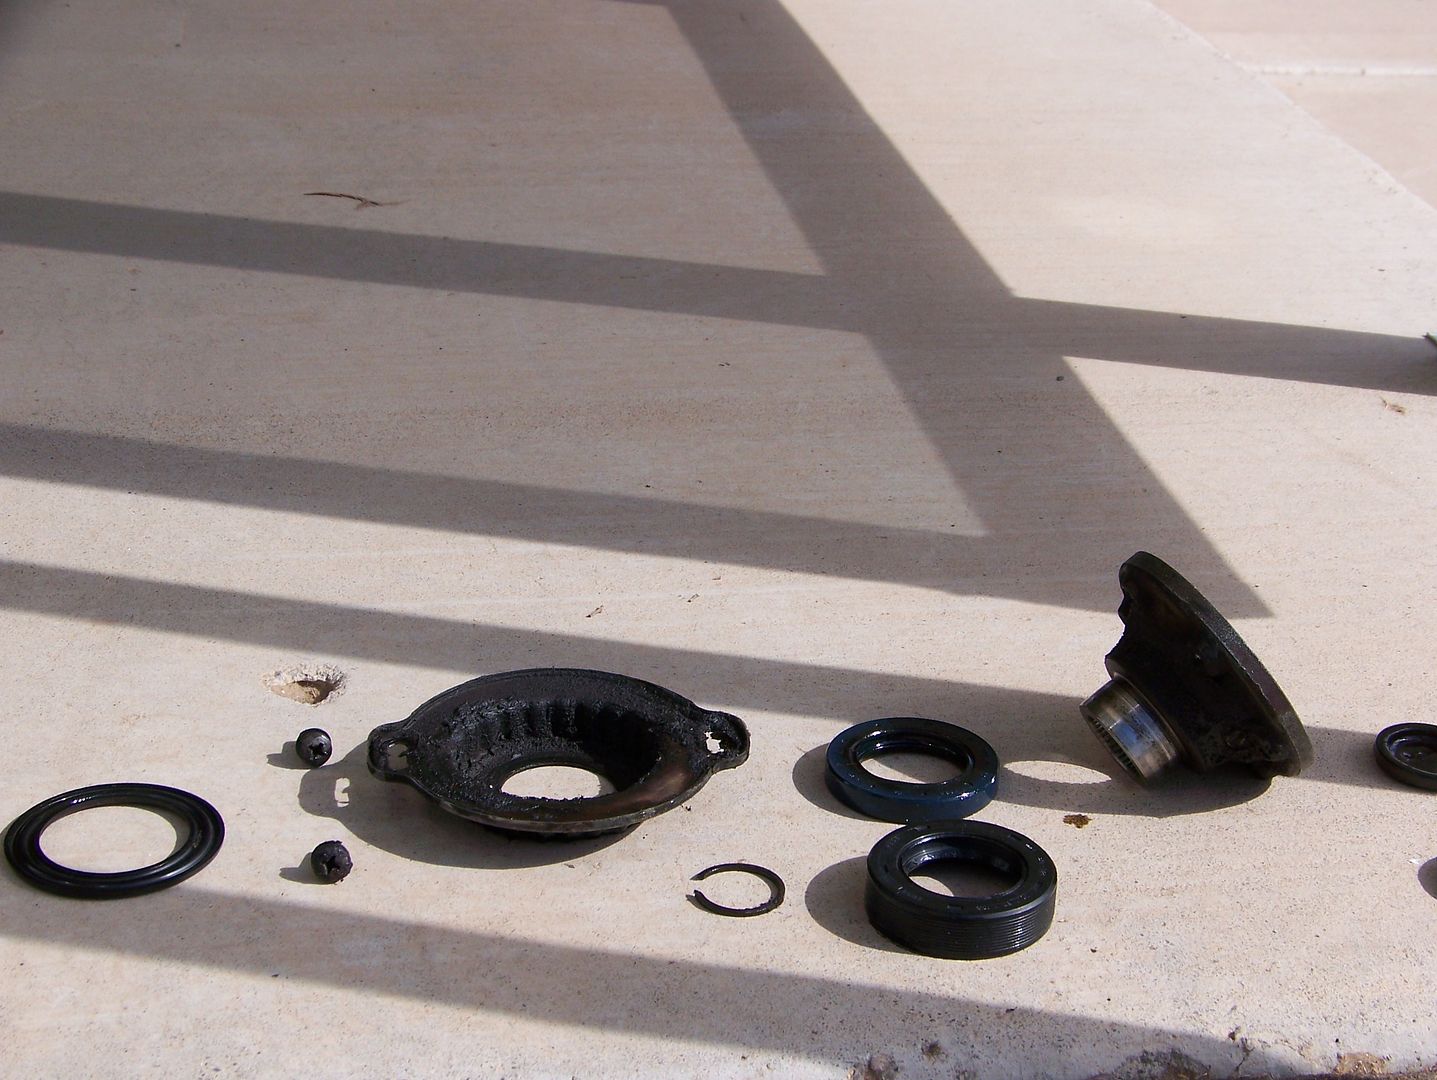
Step 5) This is an intermediate dust seal that you may or may not have. It is contaminated with grit (arrow points to threat of cataclysm):
Pull out the dust seal (dust?) taking care to not allow it to get away from you and flop or catapault any muck onto the driveshaft or into the differential bearing:
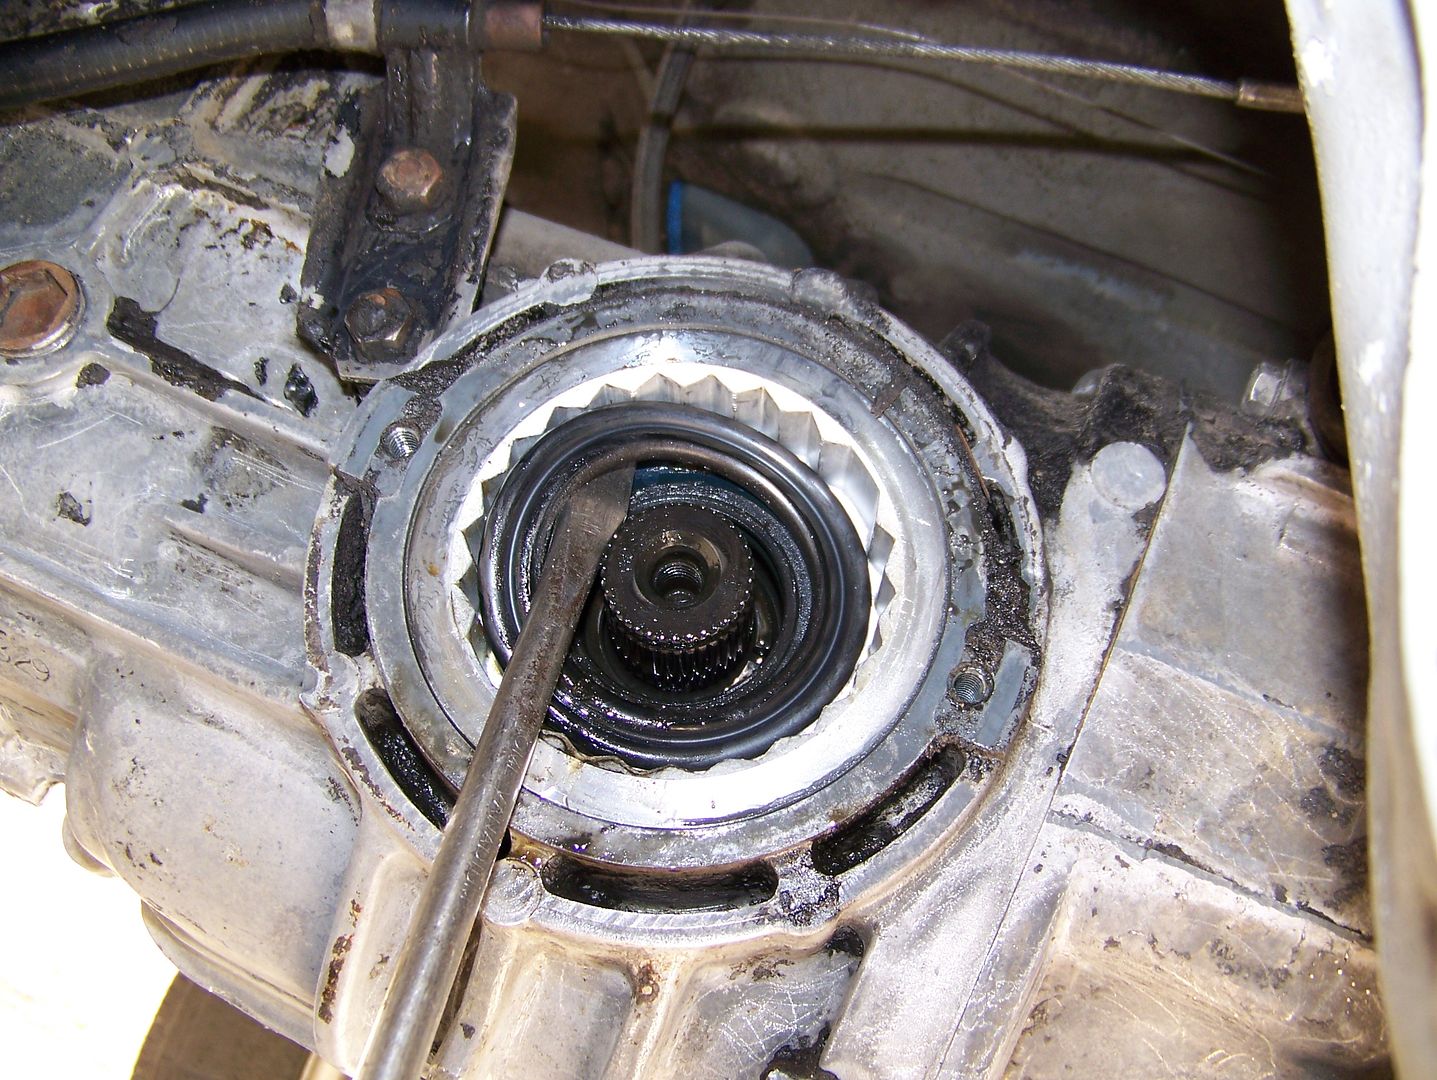
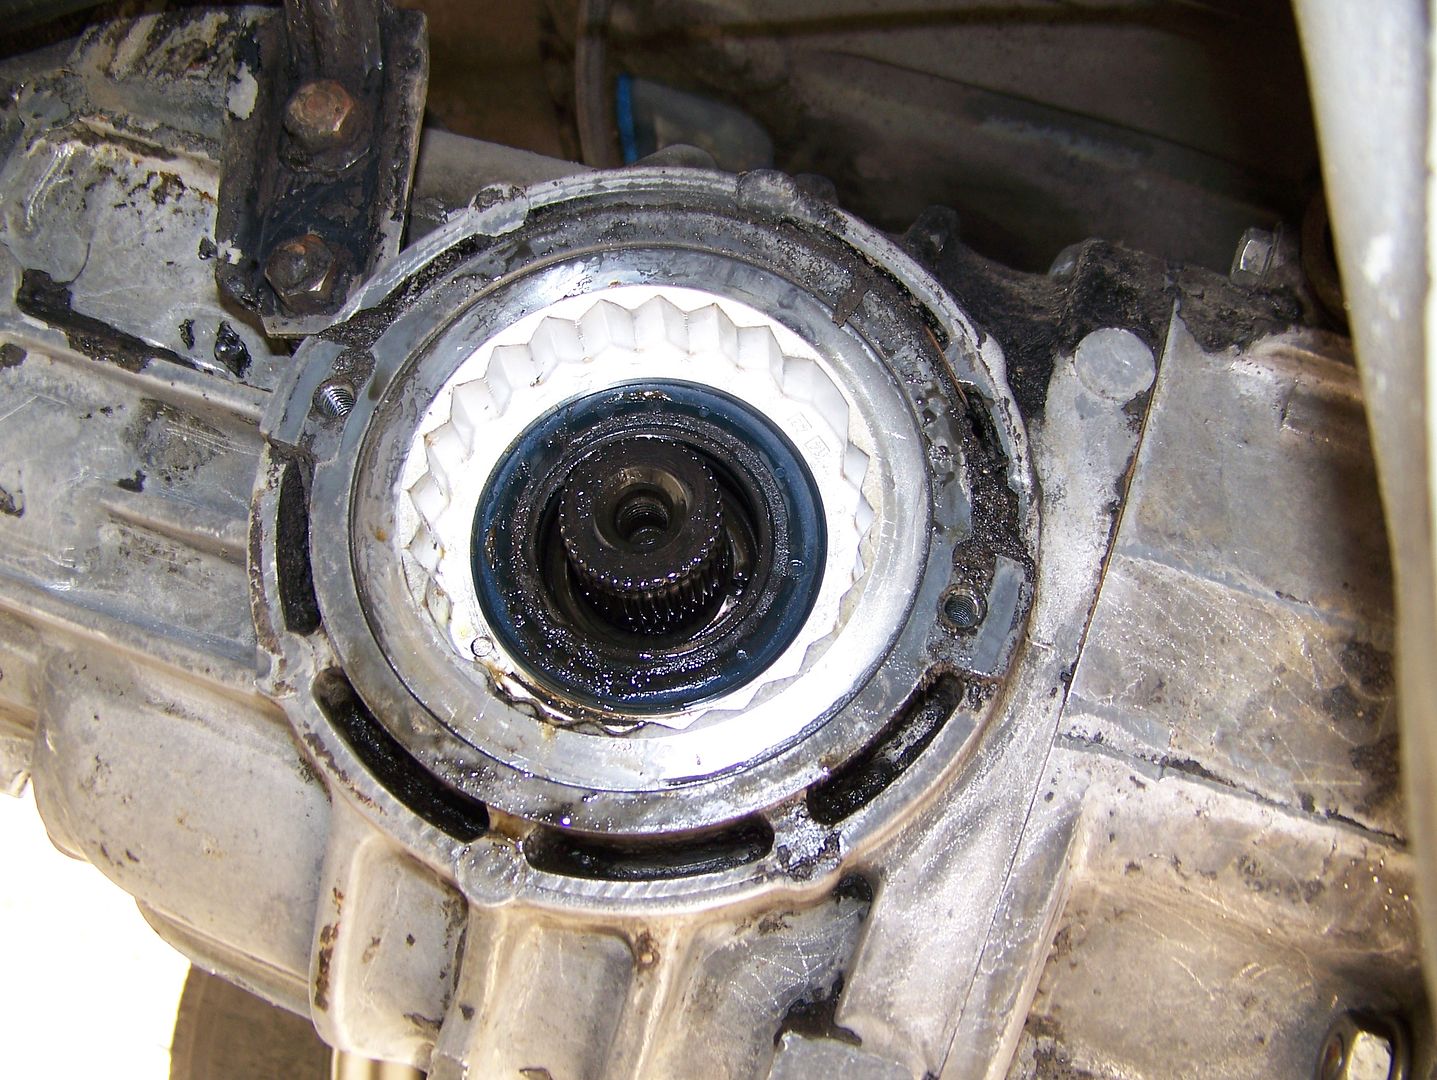
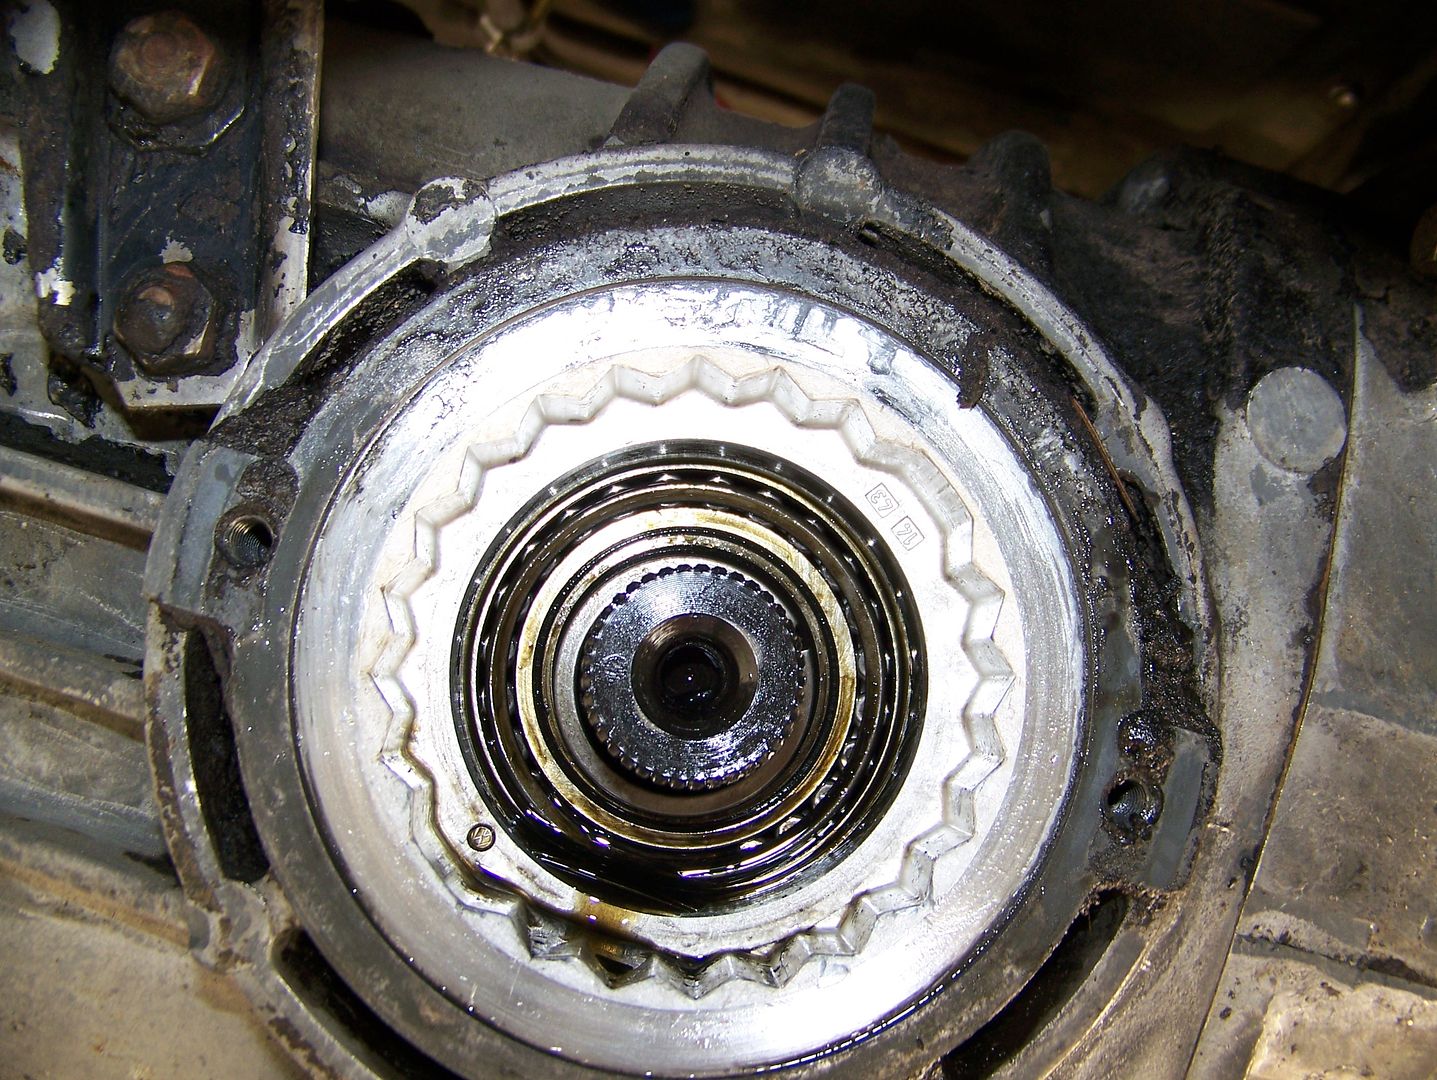
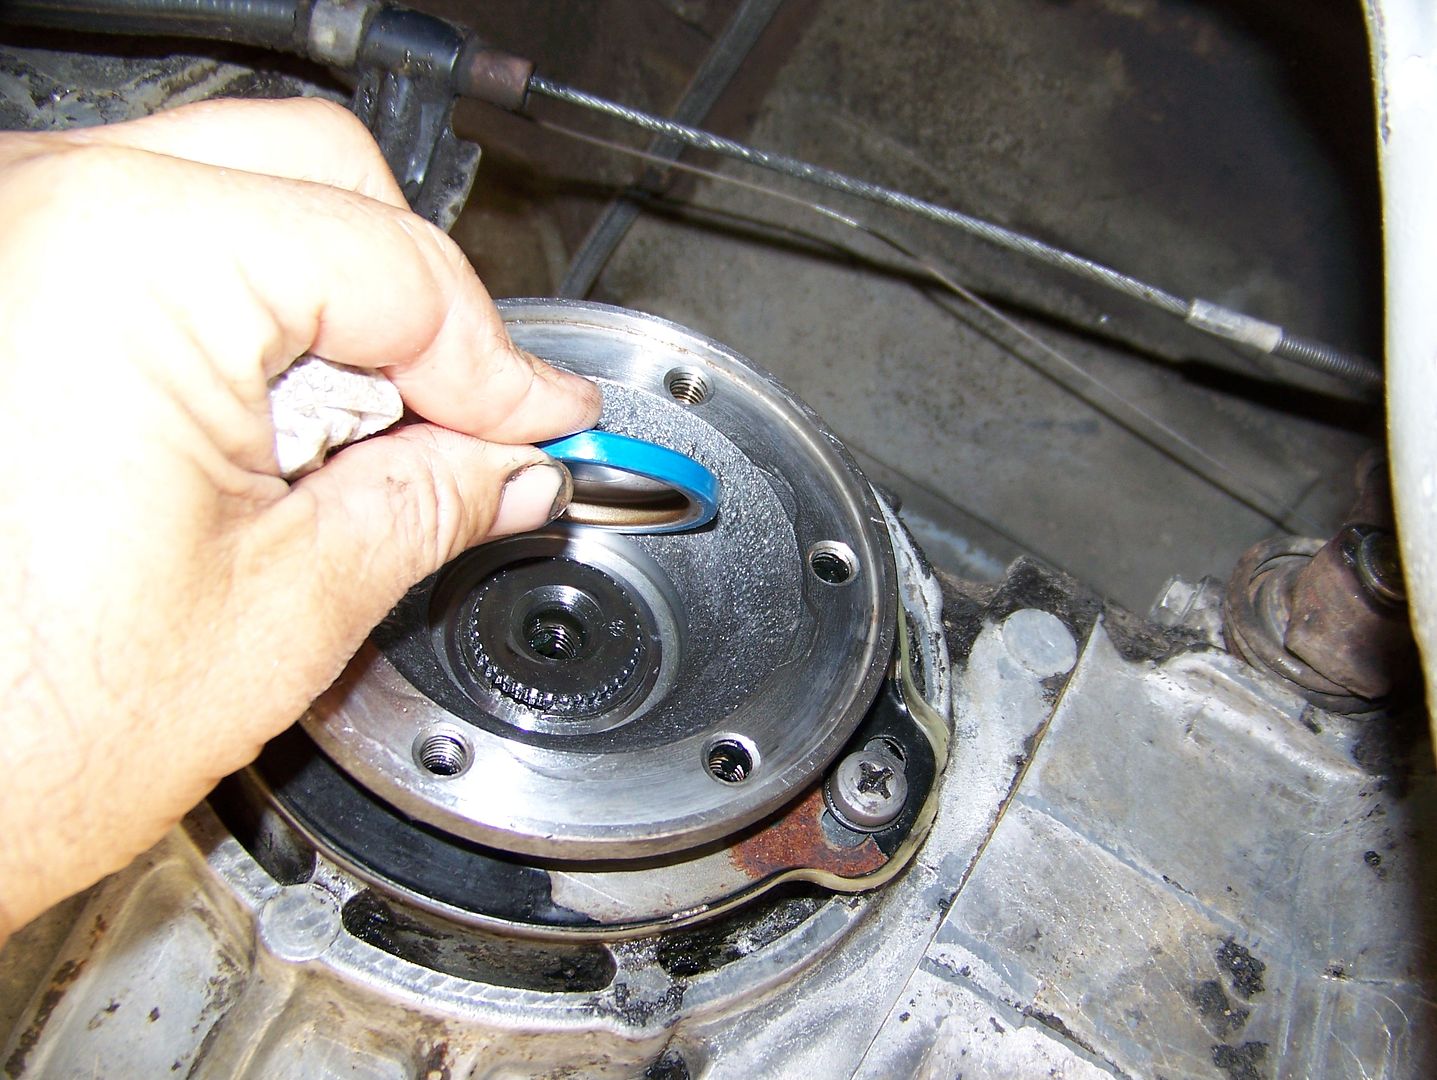
This is the offending side cover seal. You can see that even with the dust seal, dirt can get in there deep. Wipe it radially away and downward from the inside. Not nutso hospital clean, just get rid of the surface crud, visible here:
Step 6) With your two largest regular blade screwdrivers, pry the side cover seal out. It will require a careful application of force. Do not jab the screwdrivers in the hole indiscriminately. Just catch the metal of the seal and pry out with both screwdrivers equally. The bottom of the side cover is a decent fulcrum for your screwdrivers:
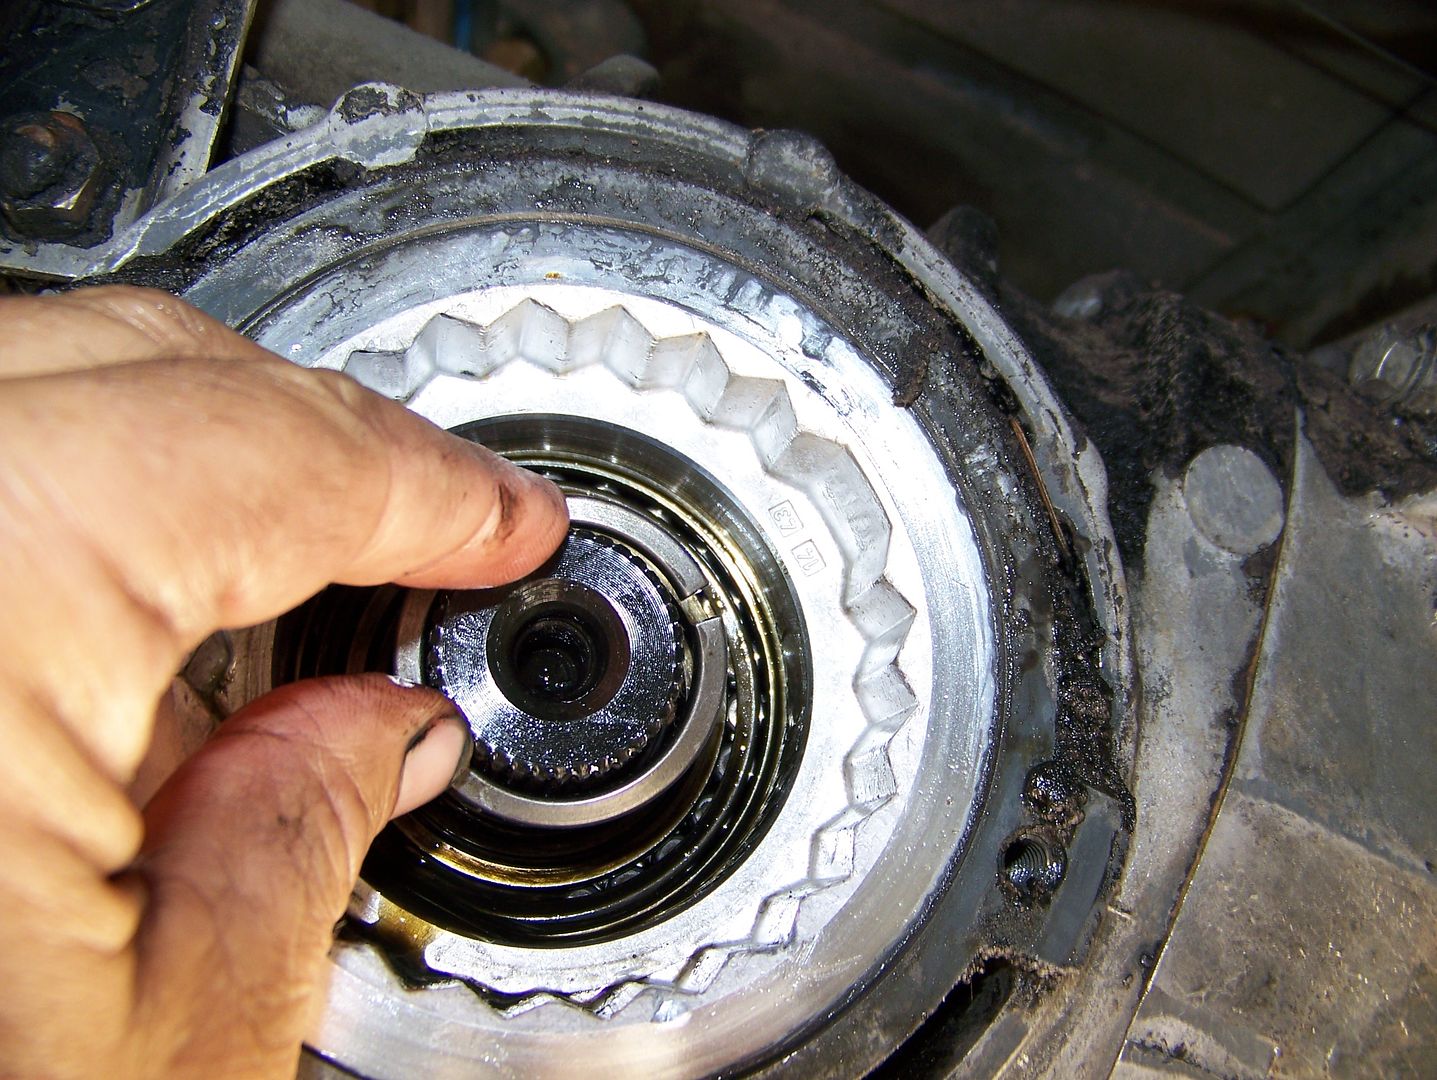
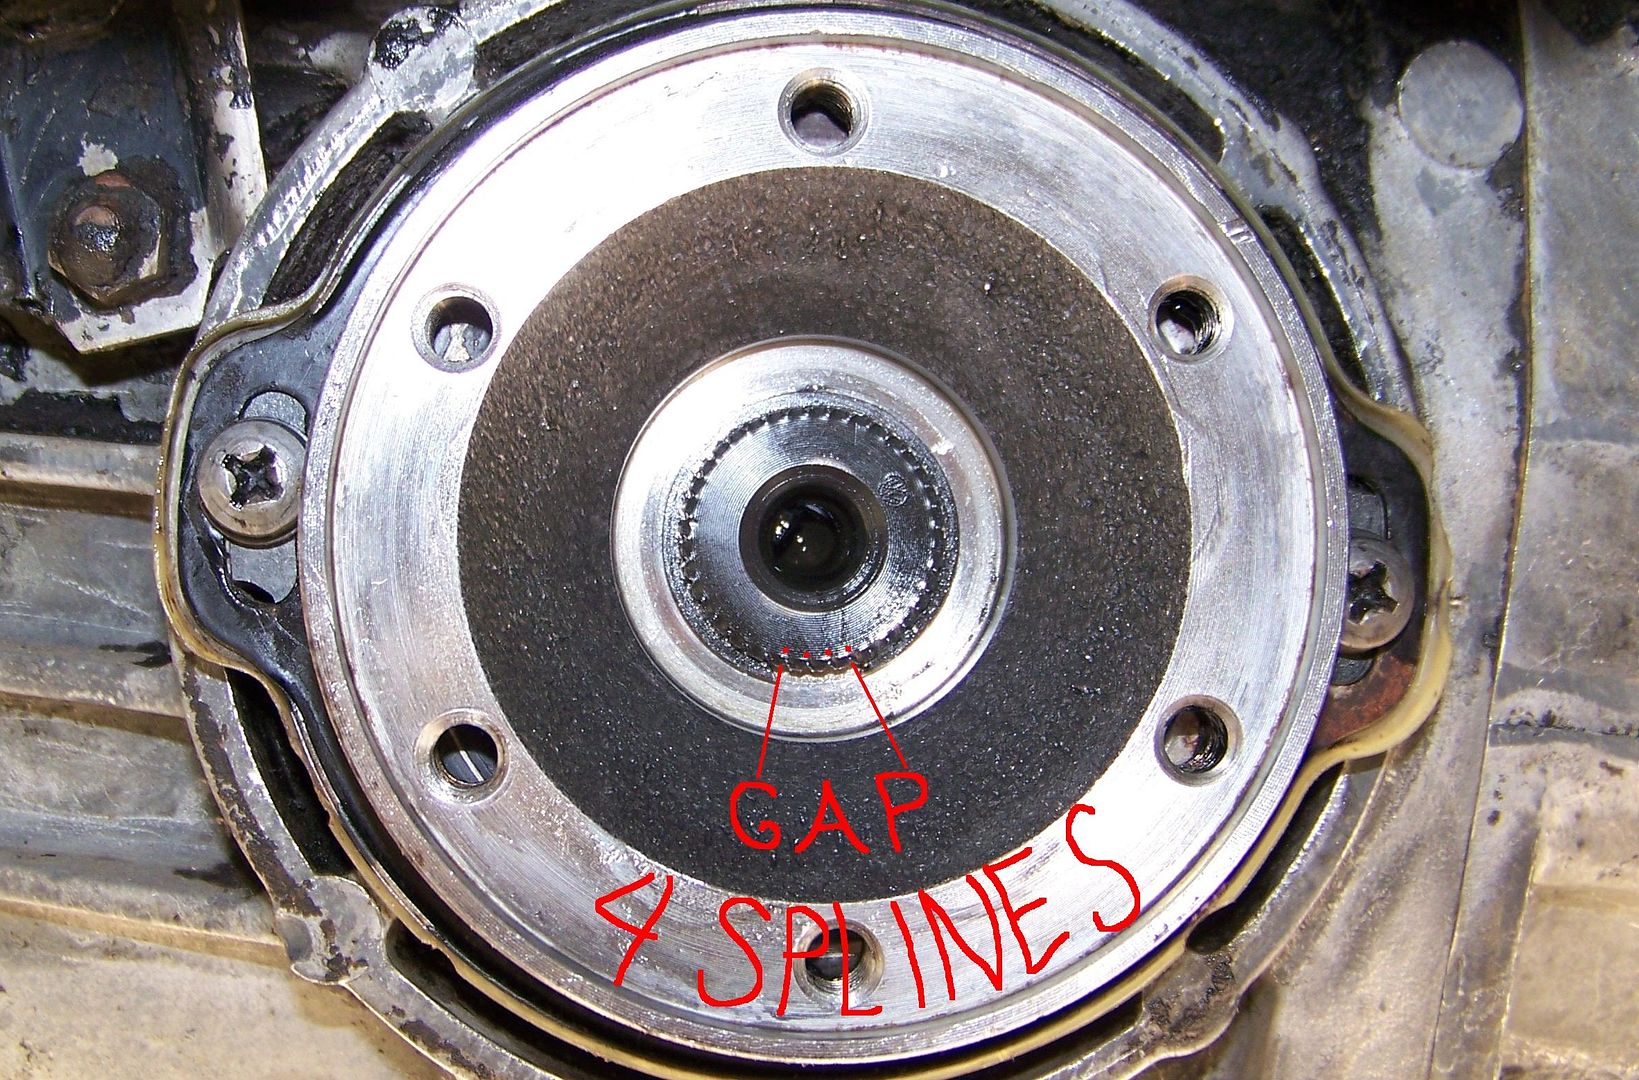
Here you can see the differential roller bearing-that-must-remain-scrupulously-clean, behind the weird split washer that looks like it was bent due to some horrible impending failure. Just make sure that this washer remains with the smaller side towards the bearing. It actually serves as a "wavy washer" to keep the flange pushing against the circlip:

Slapped back in the hole:
Notice how hidden it appears once it is in place:
Step 7)
*clean the dust seal, taking care to scrape out the valleys so they can enjoy a whole new era of preventing road splash from reaching your new side cover seals,
*clean and tap flat the circlip you pried out (if you bent it up dead, find a spare CV circlip)
*clean the plastic spacer and the lock plate (whose paint may shed off in plasticky-looking shards)
*clean the machined, CV-facing side of the flange, but leave a nice sheen of grease on the outside surface, like a seasoned cast iron skillet, to prevent rust
*stuff the differential driveshaft/bearing area with a paper towel (that will quickly load up with transaxle oil, good) and clean the side cover all the way out past the lock plate retaining screw holes.
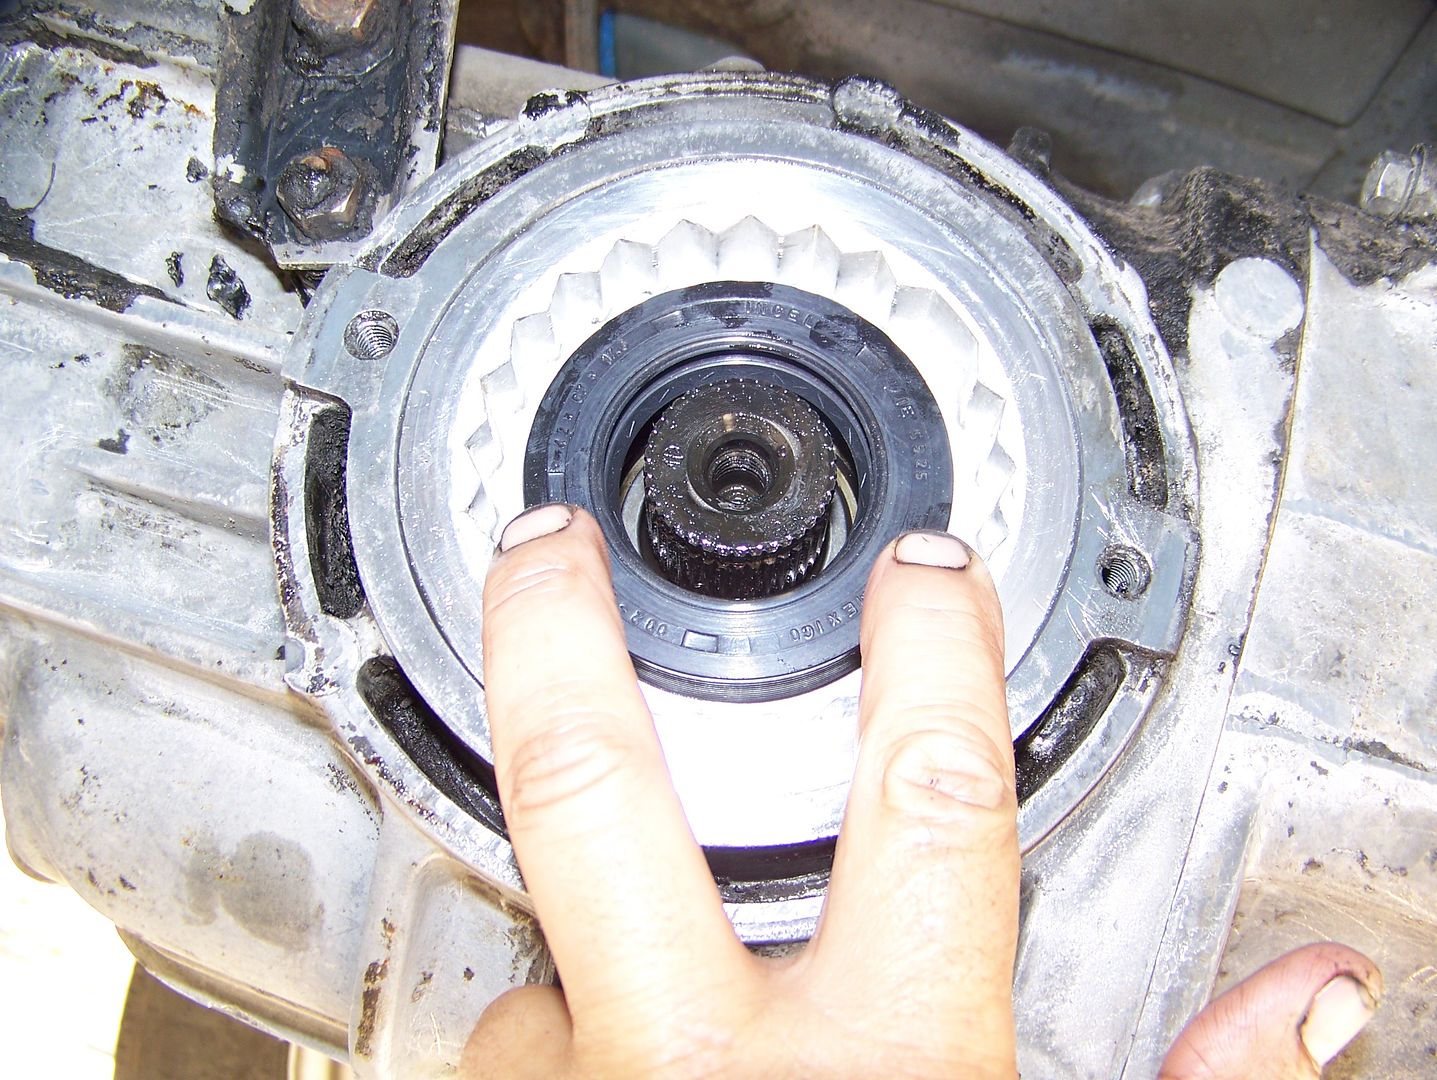
Step 8 ) Place the new side cover seal in the opening with your hand to make sure it is true:
I have a nightmare sandrail style seal that I may never be able to remove ever again, it is twice the thickness of the stock seal:

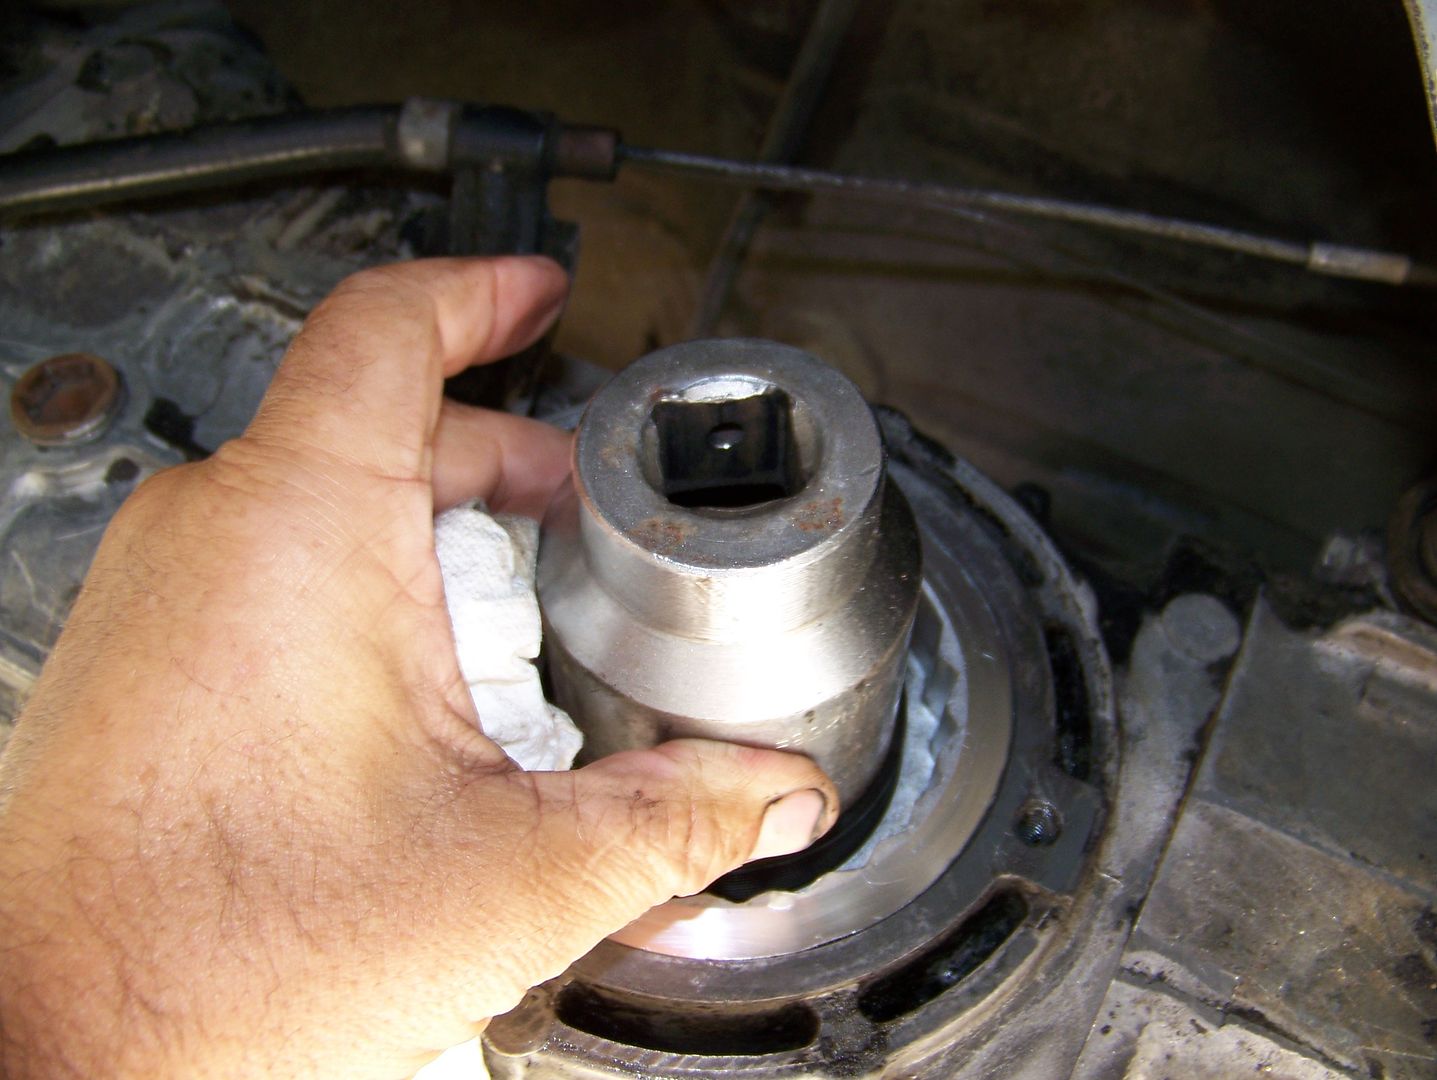
Tap into place with a 46mm axle nut socket. We are using this big socket not to get a dead center knock-it-in, but to allow us to have plenty of contact area between the wall of the socket and the edge of the seal as we tap it in. I have received word that if you hit it dead center the seal will bend inward at the center. As a matter of fact, any seal needs to be driven in at the outside walls. Just make it flush with opening, or slightly (1/2 mm) protruding if you also have miles and miles of extra sealing depth like my sand seal and would like to have a more positive contact with the dust seal when you cinch down the phillips screws in Step 9:
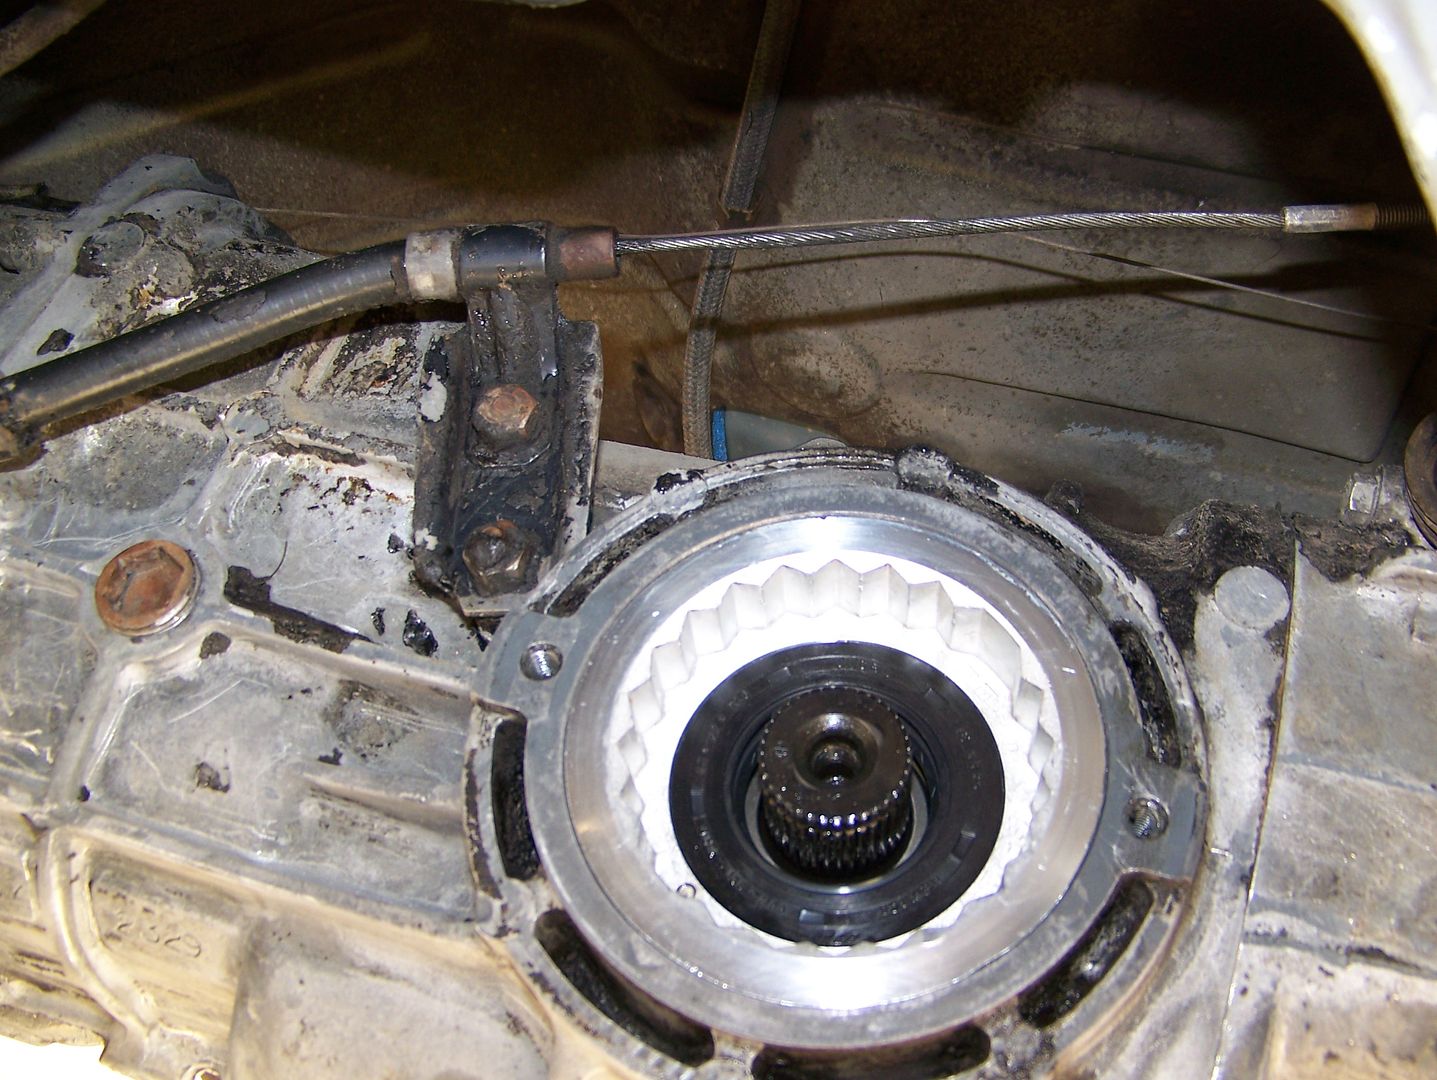
Here is my seal installed with a millimeter protrusion:
Step 9) Slap the clean dust seal in the hole and follow it with the plastic sleeve and lockplate. Screw down the phillips screws to "snug +"
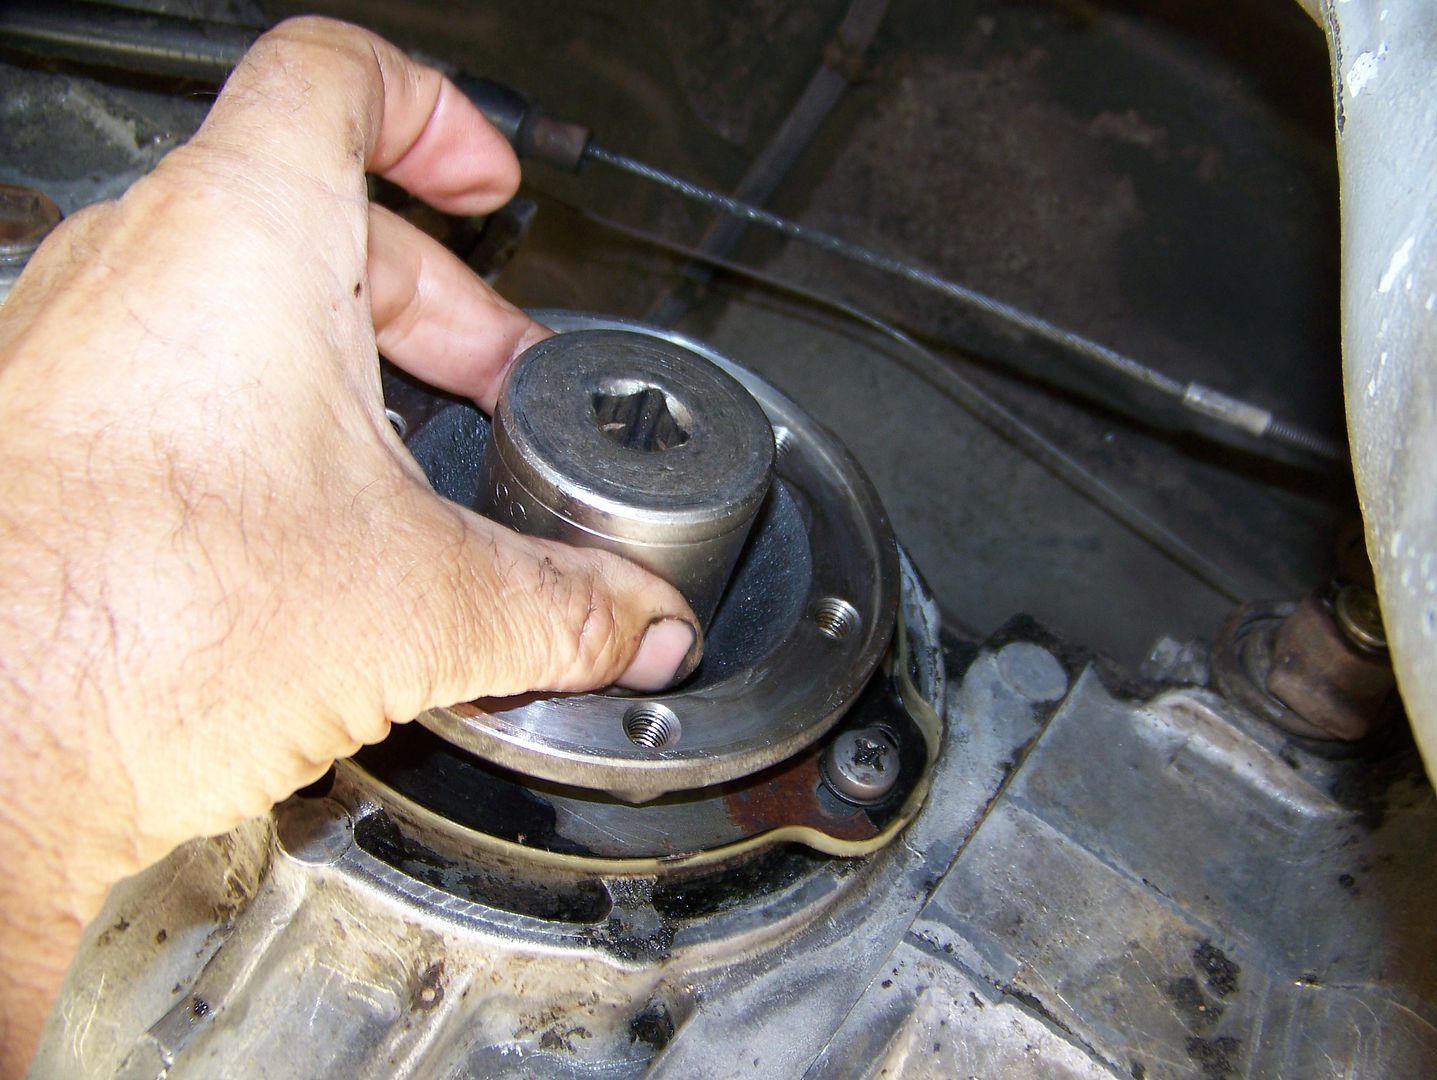
Step 10) Apply a coat of moly grease to the sealing surface of the flange and the splines in the middle. Slide onto the differential drive shaft splines and tap into position with a 36mm socket:
The best method to then get the circlip on is to set the open end of the circlip against the splines of the differential driveshaft. Apply the ends of the expanding plier to the edges of the circlip while resting it lightly against the driveshaft. Firmly hold your other hand's fingers to the inside radius of the circlip and be ready to push down hard as you pry open the edges of the circlip with the pliers. It will dutifully slide over the end of the driveshaft. Drive it into its groove with a screwdriver blade and make sure it is home (the edges should be as close as they were before you tried to get it off)
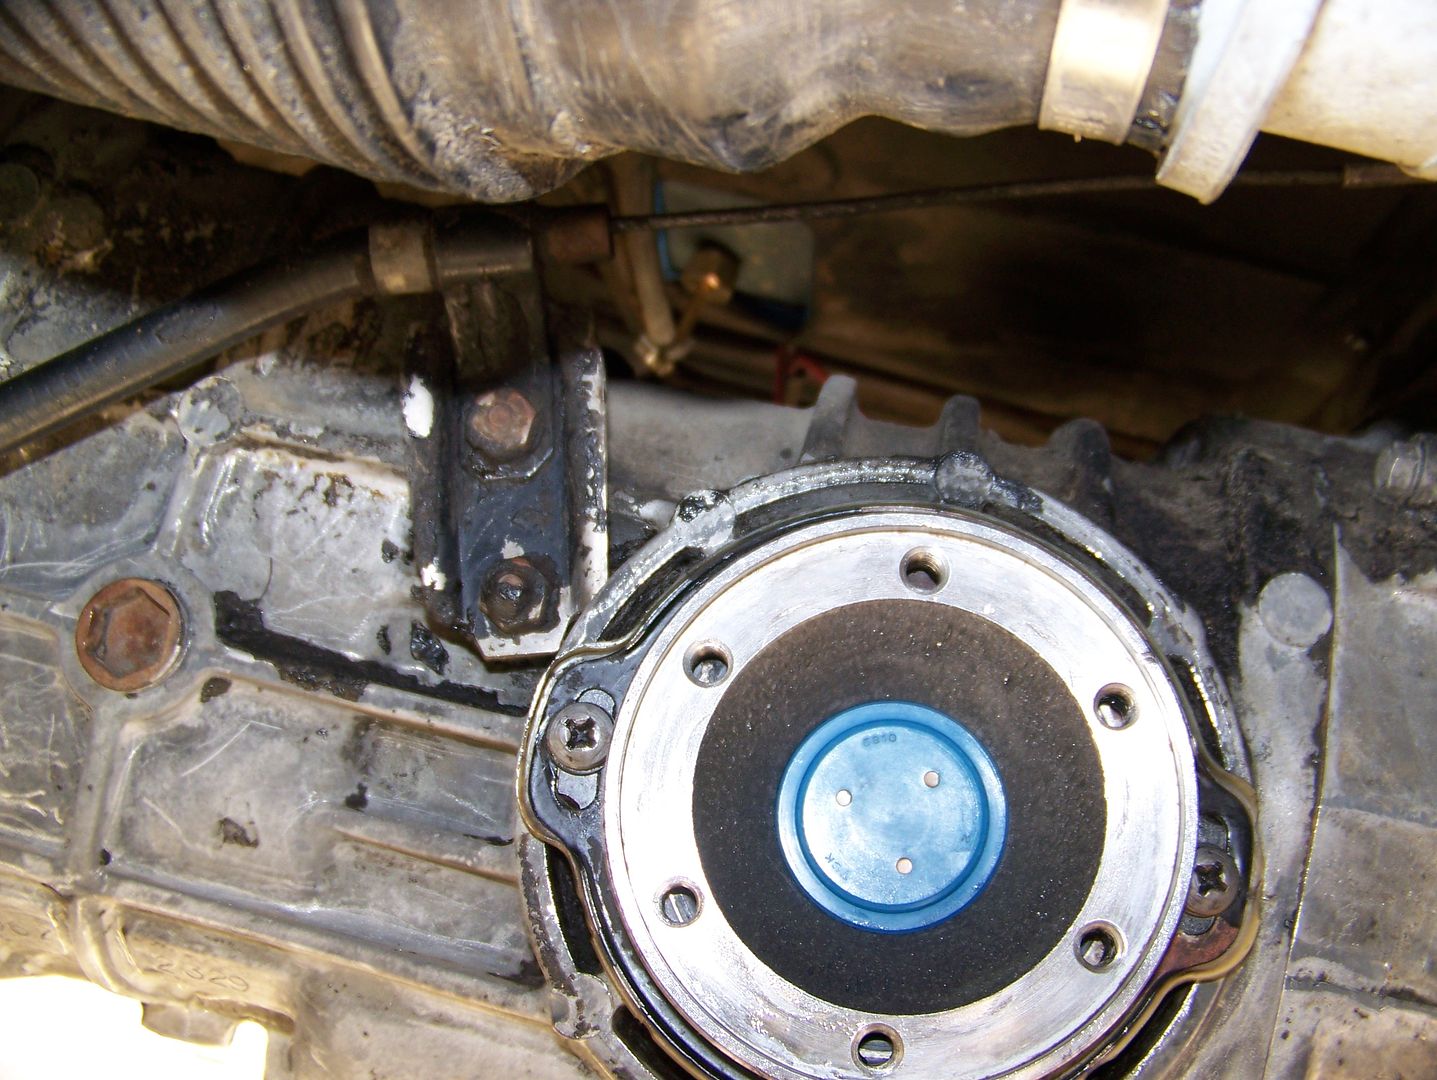
Step 11) Install new blue cap with flat surface out.
Step 12) Ready to reinstall the CV and notice that cleanliness is good:
Installed and Complete. No more drooling gear oil mucking up the transaxle and misting the engine.
Step 13) Replenish transaxle oil, right?
Wrong.
Do the other side now THEN replenish transaxle oil, to the bottom of the fill line.
Step 1) Clean the area very well. I used a screwdriver to chip the caked-on dirt off dry (much easier to sweep up than attacking it with solvents). Wipe down your CV joints very clean and get the insides of the screws with a small screwdriver. Then I used a water-based spray degreaser (Purple Power) and a trip to the local carwash to get the minor remaining crud out of the crevasses.
Step 2) Take down just the inside CV joint on the side you are working on. Plastic bag it if you are enjoying Santa Ana winds in the sandy desert. Loosen only a 1/2 turn the two phillips screws that hold the side cover lock plate. Wipe out the inside of the drive flange until you can see the blue rubber cap. Stab it in the middle and get a screwdriver inside the center and find a pry point to pull it off (it is metal framed).
Step 3) You must remove the flange retaining circlip, it is exactly like a CV hub circlip, but in a less accessible location. An expanding circlip plier will make this easier. Use two large flat bladed screwdrivers against the side cover retainer screws (Phillips) and pry the flange off the differential drive shaft. Oil will now pour out, just put a tray under it, we like this oil leaking out to help keep the differential bearings clean.
Step 4) Even with all of your preparatory cleaning, you still have a mess. Do NOT clean this side cover lock plate! Just remove it with caution:
Step 5) This is an intermediate dust seal that you may or may not have. It is contaminated with grit (arrow points to threat of cataclysm):
Pull out the dust seal (dust?) taking care to not allow it to get away from you and flop or catapault any muck onto the driveshaft or into the differential bearing:
This is the offending side cover seal. You can see that even with the dust seal, dirt can get in there deep. Wipe it radially away and downward from the inside. Not nutso hospital clean, just get rid of the surface crud, visible here:
Step 6) With your two largest regular blade screwdrivers, pry the side cover seal out. It will require a careful application of force. Do not jab the screwdrivers in the hole indiscriminately. Just catch the metal of the seal and pry out with both screwdrivers equally. The bottom of the side cover is a decent fulcrum for your screwdrivers:
Here you can see the differential roller bearing-that-must-remain-scrupulously-clean, behind the weird split washer that looks like it was bent due to some horrible impending failure. Just make sure that this washer remains with the smaller side towards the bearing. It actually serves as a "wavy washer" to keep the flange pushing against the circlip:
Slapped back in the hole:
Notice how hidden it appears once it is in place:
Step 7)
*clean the dust seal, taking care to scrape out the valleys so they can enjoy a whole new era of preventing road splash from reaching your new side cover seals,
*clean and tap flat the circlip you pried out (if you bent it up dead, find a spare CV circlip)
*clean the plastic spacer and the lock plate (whose paint may shed off in plasticky-looking shards)
*clean the machined, CV-facing side of the flange, but leave a nice sheen of grease on the outside surface, like a seasoned cast iron skillet, to prevent rust
*stuff the differential driveshaft/bearing area with a paper towel (that will quickly load up with transaxle oil, good) and clean the side cover all the way out past the lock plate retaining screw holes.
Step 8 ) Place the new side cover seal in the opening with your hand to make sure it is true:
I have a nightmare sandrail style seal that I may never be able to remove ever again, it is twice the thickness of the stock seal:
Tap into place with a 46mm axle nut socket. We are using this big socket not to get a dead center knock-it-in, but to allow us to have plenty of contact area between the wall of the socket and the edge of the seal as we tap it in. I have received word that if you hit it dead center the seal will bend inward at the center. As a matter of fact, any seal needs to be driven in at the outside walls. Just make it flush with opening, or slightly (1/2 mm) protruding if you also have miles and miles of extra sealing depth like my sand seal and would like to have a more positive contact with the dust seal when you cinch down the phillips screws in Step 9:
Here is my seal installed with a millimeter protrusion:
Step 9) Slap the clean dust seal in the hole and follow it with the plastic sleeve and lockplate. Screw down the phillips screws to "snug +"
Step 10) Apply a coat of moly grease to the sealing surface of the flange and the splines in the middle. Slide onto the differential drive shaft splines and tap into position with a 36mm socket:
The best method to then get the circlip on is to set the open end of the circlip against the splines of the differential driveshaft. Apply the ends of the expanding plier to the edges of the circlip while resting it lightly against the driveshaft. Firmly hold your other hand's fingers to the inside radius of the circlip and be ready to push down hard as you pry open the edges of the circlip with the pliers. It will dutifully slide over the end of the driveshaft. Drive it into its groove with a screwdriver blade and make sure it is home (the edges should be as close as they were before you tried to get it off)
Step 11) Install new blue cap with flat surface out.
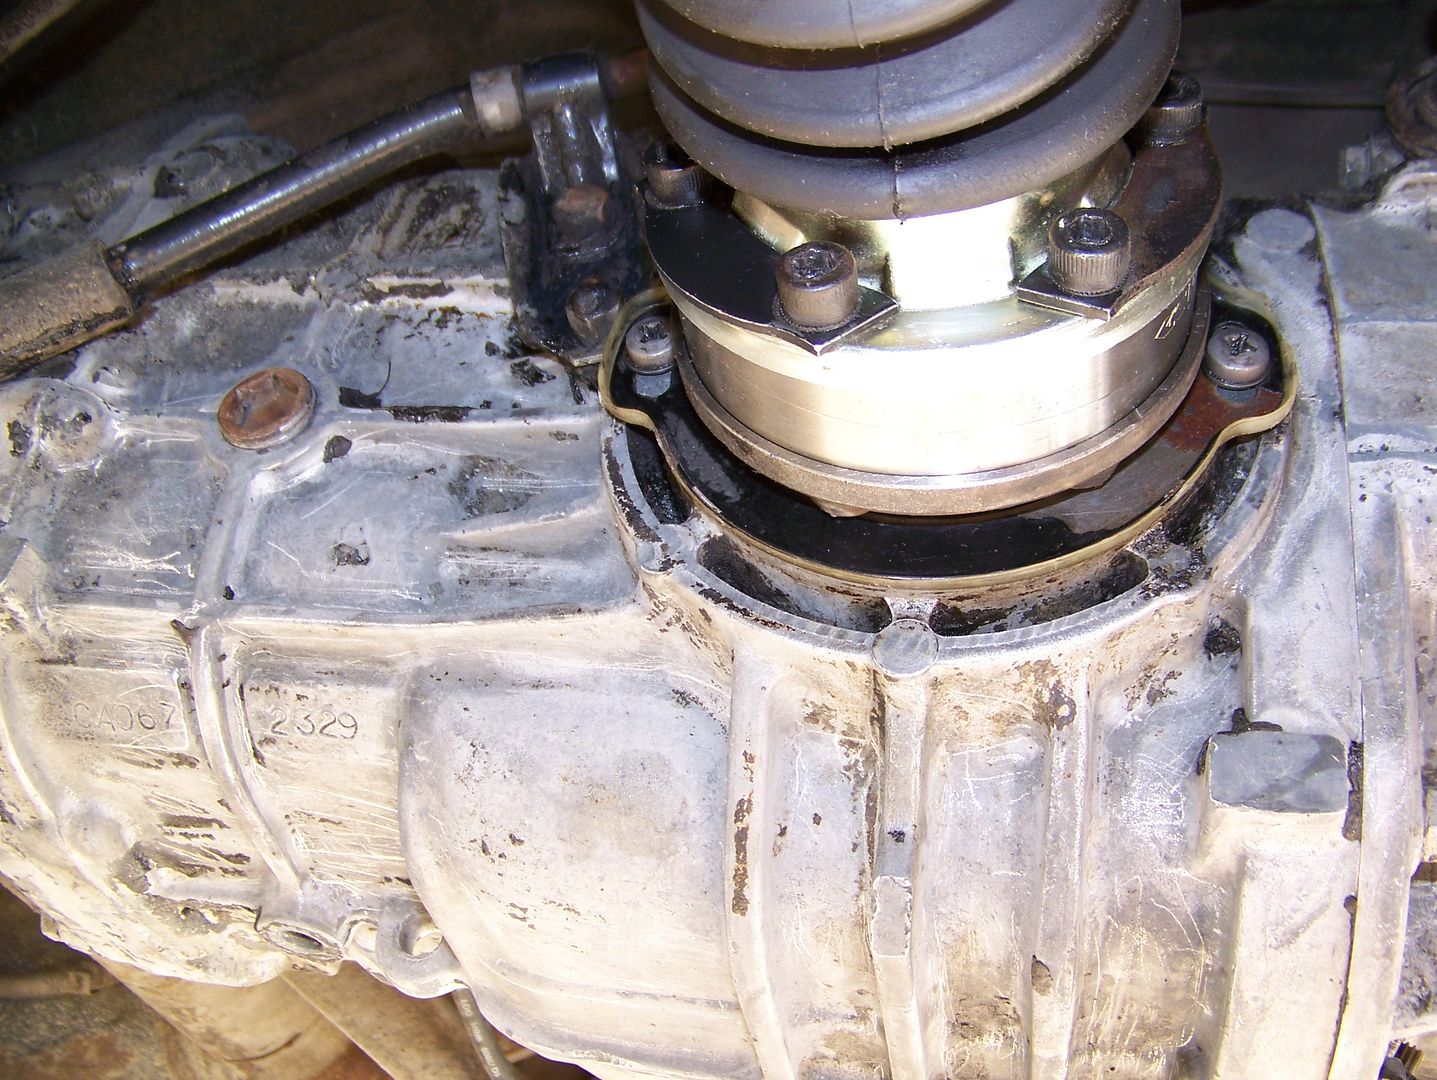
Step 12) Ready to reinstall the CV and notice that cleanliness is good:
Installed and Complete. No more drooling gear oil mucking up the transaxle and misting the engine.
Step 13) Replenish transaxle oil, right?
Wrong.
Do the other side now THEN replenish transaxle oil, to the bottom of the fill line.

