Page 3 of 5
Re: 2.0 liter Engine Build
Posted: Tue Feb 06, 2018 1:49 pm
by SlowLane
wild man smith wrote: ↑Tue Feb 06, 2018 10:53 am
Picture of some sweet shiny heads.
1. If you haven't done so already, be sure to do a
thorough job of cleaning up the casting flash on those new heads.
2. In the same vein, note that the "pockets" of the pushrod-tube bores in the heads on the rocker-arm side have a sharp "step" where the machining operations intersected. That sharp edge can catch and cut your outer pushrod tube o-rings as you are inserting them (ask me how I know). Filing or grinding down the sharp edge to a gentle radius helps to avoid this cutting, and it's better to do that before assembling the head to the engine.
3. What's with the holes in those intake manifolds? Are they for fuel injectors?
4. Umm, I thought you were ditching the straight-cut cam gear setup in favour of a stock helical-cut gear?
5. What the bleep happened to your spare tire well?
Re: 2.0 liter Engine Build
Posted: Tue Feb 06, 2018 1:58 pm
by wild man smith
Re: 2.0 liter Engine Build
Posted: Tue Feb 06, 2018 8:05 pm
by wild man smith
Casting flash, check! Pushrod tube edges, check! Grabbed the straight gear when the mains were changed. Wasn't thinking, had the mind on the keyway alignment, and small time frame to drive the gear on. Heated it in my toaster oven in the garage. Cut a piece of thickwall stnls. tubing for a driver, 5 lb. hammer. the spare tire well was modified to fit a spare battery/solar charge setup. Still have the panel and mount, need a charge controller for it. One project at a time. Cleaned the oil strainer cover plate today, dressed the rim with some real easy filing to square her up. genuine VW part there. Did a bit more engine room insulation, no piccys yet . Waiting on a nylon anti vibration dampner for the case bolts. Rehearsing the assembly steps in my mind, will do this until I find pieces in my paws. Still need to final hone the jugs, and wash em out/oil em up. Onward!

Re: 2.0 liter Engine Build
Posted: Tue Feb 06, 2018 8:46 pm
by Amskeptic
wild man smith wrote: ↑Tue Feb 06, 2018 8:05 pm
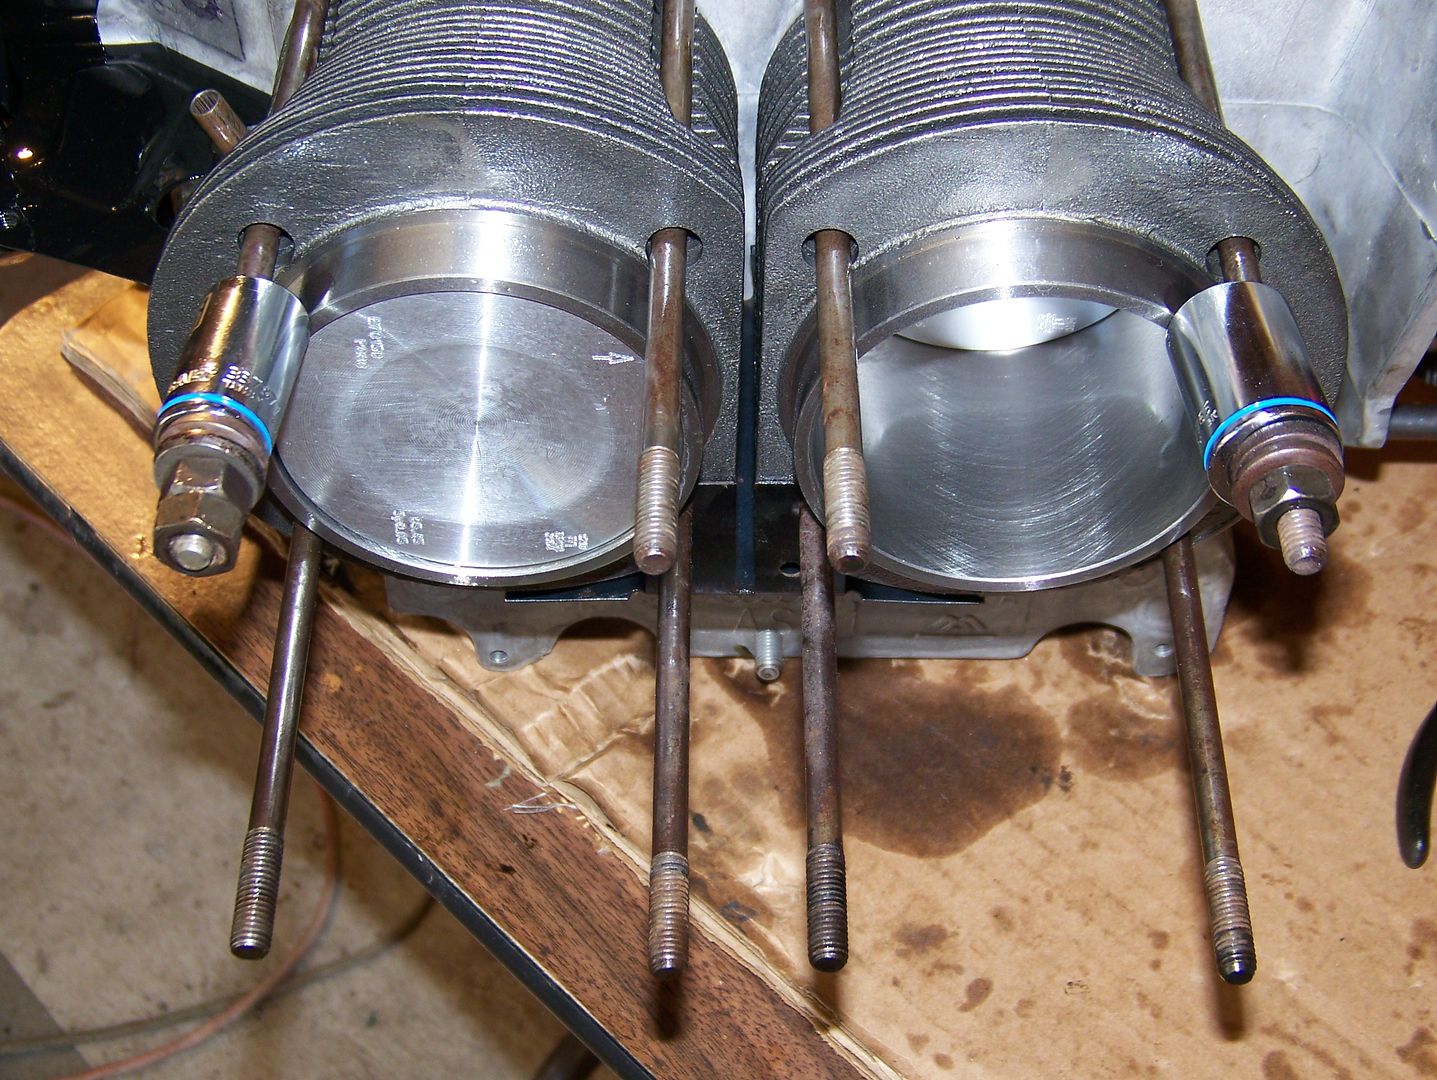
Still need to final hone the jugs, and wash em out/oil em up. Onward!
Scrub cylinders with yellow/green sponge and a huge squirt of Dawn dishwashing liquid.
Rinse with hot water.
Dry with white paper towel. See grey in towel?
Scrub cylinders with yellow/green sponge and a huge squirt of Dawn dishwashing liquid.
Rinse with hot water.
Dry with white paper towel. See grey in towel?
Scrub cylinders with yellow/green sponge and a huge squirt of Dawn dishwashing liquid.
Rinse with hot water.
Dry with white paper towel. See grey in towel?
No?
Oil them right away.
Re: 2.0 liter Engine Build
Posted: Wed Feb 07, 2018 4:44 pm
by wild man smith
Passenger head, chamfered the pushrod pockets, sharp as hell, went until they felt friendly to rubber. fingers can feel ,nice. honed a nice crosshatch in all 4 jugs, need to wash and dry em now. Lapped the cylinders on Pass side to the head, cleaned the compound thoroughly. Used dots to number them am on the 1 and 2 cylinders now. Found a base shim still stuck to #1, used a single edge blade to tease it off, stainless brush cleaned the sealant. Could have been a screwup with uneven shims had I not caught it. The brass fittings are for a "Balance Tube" hooking up the two sides of the engine, may help in carburetor balancing. I will run a TEE to plumb in the modern Vacuum Assisted disk brake canister. More Later, pics later. Mike
Re: 2.0 liter Engine Build
Posted: Thu Feb 08, 2018 7:18 pm
by wild man smith
Worked on this bit today, faced the mounting surface with sandpaper on a flat surface, filed the casting flash off, gave her a polishing with cotton bobs plus red rouge.
Re: 2.0 liter Engine Build
Posted: Fri Feb 09, 2018 9:26 am
by Amskeptic
wild man smith wrote: ↑Thu Feb 08, 2018 7:18 pm
Worked on this bit today, faced the mounting surface with sandpaper on a flat surface, filed the casting flash off, gave her a polishing with cotton bobs plus red rouge.
Did I forget to mention that VW had little machining stripes left by the milling table that helps prevents leaks? You do not want gasket surfaces to be too smooth. Yes, you want dents and divots and rust and gasket remnants removed, but do not go below the milling table stripes. You will see them everywhere. They help the case sealant, they help the green gaskets, they help the valve cover gaskets. You will note that AMC heads are stupidly over-polished where the cork valve cover gaskets are supposed to go, thus, we have problems with the tried and true grease-on-cork method.
Colin
(I would not go so far as to use polishing agents of any kind near the lubrication system components)
Re: 2.0 liter Engine Build
Posted: Fri Feb 09, 2018 10:04 am
by wild man smith
These parts get washed in the kitchen sink after being worked on. The gasket face was leveled with 800 grit on a known flat surface, there is some nice "Grab" for the gasket material. The outside got polished cause I like the look of Shiny Stuff. Glad to have your input, I do tend to get carried away in this stuff sometimes, it is just that time disappears when I am in the shop. This engine build is just what the DR. ordered for an old guy like me. 5 more days , I will be 67 years on this planet. I reckon 210 days into this , started with cleaning/painting, replacing 10 year old rotted tires, and a decision to get her as good as possible engine wise. In no big rush, I have a friend who sews coming over to sew up my empty coffee bag curtains(Brazil Coffee), goes with Brazil pistons, cylinders, and the two new taillight assemblies I installed. Still have the original Hella taillight lenses. The Front turn/markers got new gaskets and bulbs, still need rubber on the vent door. and a Blue heater control lever. The cable is repaired/lubed. Under dash grounds are cleaned, the Headlight switch is replaced, fuse box cleaned with new fuses. Overall, the wiring is in ok shape, the copper is somewhat flexible, insulation still flexible. Past "projects" I have had this much fun with were a 64 Ford 3/4 ton 2wd Pickup with positrac, and a 232 straight six, 4 speed . Easy, basic stuff, simple as a rock. The 71 Coupe De Ville got a rebuilt powerplant, 472 bored .040 over, aluminum manifold, 4bble carb, drove that one for 8 years up in Alaska. The Shovelhead, a 77, got a top end rebuild. Split case, roller main bearings with a forked rod. 82 cubic inch. The starter solenoid got loose one time near White Sands, one solenoid bolt backed out. Fixed it with a piece of wood jammed in to use the electric foot. Impressed the hell out of the girlfriend!. Hping your spring will be productive and enjoyable. Thank you for your interest and help. Mikey
Re: 2.0 liter Engine Build
Posted: Fri Feb 09, 2018 10:40 am
by wild man smith
First vehicle at age 17 was a WW2 Whizzer motorized bicycle, the junkman dropped it off at our place, knew I was a budding wrench. 69 Corolla fastback, 71 VW Van, Dodge Coronet, late 60's slant six, 64 Ford Fairlane Convertible, 390 V8, 74 Toyota Corolla, 51 Dodge pickup, Flathead Benelli 1 cylinder motorcycle, 67 Econoline in WPB Fla., new engine/tranny in that one, drove it to ALASKA, got married along the way.1979 timeframe. 64 Ford 4x4 after that one, handy in Alaska when building a cabin. 64 International bread Van, gotta have a place for stuff, right? Couple of full size Jeep Wagoneers, 360 V8's. 78 AMC Harley Shovelhead, 69 Caddy hearse, a Datsun with a wood flatbed, another Ford with a wood flatbead, 78 GMC one ton, dually 454, propane/gas dual fueled. Nissan camper, built two more big twin clone bikes, rode one to Phoenix, the White swing arm with the windshield. Sold the Black rigid to a pal, his son in montana still has her on the road. 04 Toyota Corolla, currently @ 372 K on odometer, Wife has an 01 Nissan Pathfinder, Chopper is a 78 Honda SOHC 750. AND, the fun van in progress. Just enjoy driving a vehicle I have put my hands on. ALL have been fun!!

Re: 2.0 liter Engine Build
Posted: Fri Feb 09, 2018 4:22 pm
by SlowLane
Unfortunately, your polishing efforts will go largley unappreciated, since that oil filter adapter ends up well hidden tucked up in behind the oil cooler.
Now, when you get to installing the rocker arms, pay attention to the orientation of the rocker arm shafts. The bores which go over the mounting studs have a chamfer on one end. That chamfer needs to go towards the head so that the rocker shafts don't hang up on the shoulders of the studs. Although it's common practice with the Type 1 engines to flip the rocker shafts over to get an unworn surface for the rockers to work on, it isn't an option on the type 4 engine (unless maybe you cut a chamfer on the other end of the bore. Not sure how well that would work).
Re: 2.0 liter Engine Build
Posted: Sat Feb 10, 2018 12:57 pm
by wild man smith
I will enjoy changing my oil filter when I see the polished part. Yeah, kinda silly, obsessive, and wouldn't be done on the side of the road in Montana, but, I had the polishing stuff for the chopper, and it was nice to see a 41 year old part look good. Thank you for the rocker shaft tip. it is appreciated. That is what is good about a chat room such as this. Gave a thorough cleaning to the fill pipe/dipstick piece, kept the machined gasket holding tool marks intact, just got a nice even square surface, micro clean. kitchen sink is getting a workout with this project. HAHA. My Rocker shafts are in real good shape, even when this old motor was worn, she always was full of clean oil. Main problems were the worn out cylinder heads, leaky sealing between heads and cylinders, and the mid mounted progressive carb setup. Lotta raw fuel/icing difficulties at times. Was great for doing 55/60 all day on a long drive, but around town, hard to drive.( feather throttle on takeoff, points in a mechanical advance only distributer. Piston pin bushings were pretty loose also, carbon build up from rich mixture on old carb. Been patching this one up for 10 years, comes a time to renew from the mains out, using best available parts, and cleanliness in assembly. Question for anyone who knows, the white nylon vibration dampers which slip over the 6 big case bolts, position them so there is equal amount in each case half right? First bolt to be cinched up is the lower one that has a copper washer and holds the oil pickup assembly? Have cylinders to wash, the honing looks nice , been a while. One head and set of barrels lapped, have the base shims in hand. pistons are ringed, feel good with respect to groove ring clearance. Purchased new piston pin circlips, "square end" facing out when installed. Cleaned all threads on case bolts, all fasteners thread on by hand smoothly, ditto head studs and nuts. Got new washers for the head studs, PO used a mix of various thicknesses here, some looked pretty worn(Soft Metal).
Re: 2.0 liter Engine Build
Posted: Sat Feb 10, 2018 4:49 pm
by wild man smith
Cleaned and organized shop area, cleaned up some wiring in the engine room. Have a new high grade bolt for the fan center bolt, old one has been off and on numerous times. Purchased new hardware for the exhaust ,pipes and muffler, so much easier than fighting old, bent, rusty stuff. gaskets in shop. Faced the exhaust manifold to head surface(Mill Bastard file), went across both at once. new studs and nuts here. Anneal the copper rings, right? gonna check their fit first, Colin lined me out in a previous post on that. Off till Monday, enjoy yer weekends all.
Re: 2.0 liter Engine Build
Posted: Sat Feb 10, 2018 5:00 pm
by Amskeptic
SlowLane wrote: ↑Fri Feb 09, 2018 4:22 pm
pay attention to the orientation of the rocker arm shafts. The bores which go over the mounting studs have a chamfer on one end. That chamfer needs to go towards the head so that the rocker shafts don't hang up on the shoulders of the studs.
There is sufficient clearance to flip rocker shaft surfaces over. That is how I got 1/2 million miles on the Road Warrior's rocker arms and shafts. I wondered about that chamfer. Were there ever sealing donuts like on early Type 1 40 horse heads with the through rocker bolts/nuts?
Colin
Re: 2.0 liter Engine Build
Posted: Sun Feb 11, 2018 11:49 am
by SlowLane
Amskeptic wrote: ↑Sat Feb 10, 2018 5:00 pm
SlowLane wrote: ↑Fri Feb 09, 2018 4:22 pm
pay attention to the orientation of the rocker arm shafts. The bores which go over the mounting studs have a chamfer on one end. That chamfer needs to go towards the head so that the rocker shafts don't hang up on the shoulders of the studs.
There is sufficient clearance to flip rocker shaft surfaces over. That is how I got 1/2 million miles on the Road Warrior's rocker arms and shafts. I wondered about that chamfer. Were there ever sealing donuts like on early Type 1 40 horse heads with the through rocker bolts/nuts?
Colin
You might have gotten lucky. There sure as heck wasn't sufficient clearance when I bolted (er, nutted?) the rockers onto my new AMC heads. Granted, the interference of the unchamfered ends to the stud shoulders wasn't immediately obvious, but there was something amiss with the valve adjustment, and when I removed the rockers to investigate, I could see the little shiny burrs on the stud shoulders where the shaft bore edges had dug in. Perhaps it is only an issue with Vanagon rectangular port heads. Or it could just be individual head differences. Dunno.
I don't recall exactly if there were sealing donuts. I don' t believe there were on my engine. But it's only been thirteen years since I did the rebuild, and memory isn't what it once was.
Re: 2.0 liter Engine Build
Posted: Sun Feb 11, 2018 5:25 pm
by Amskeptic
SlowLane wrote: ↑Sun Feb 11, 2018 11:49 am
You might have gotten lucky. There sure as heck wasn't sufficient clearance when I bolted (er, nutted?) the rockers onto my new AMC heads.re were on my engine.
Very likely that AMC has larger diameter stud bases. Stock German head, notta problem.
Colin