
Kubelwagen's engine meltdown
-
drober23

- Addicted!
- Location: Metro Detroit
- Status: Offline
Re: Kubelwagen's engine meltdown
No idea on Claude's Buggies, but I am enjoying this thread. It is nice to see folks helping each other out there!
DJ
'75 Westfalia, '79 Deluxe
(plus more busses than sense)
In a time of chimpanzees I was a monkey
'75 Westfalia, '79 Deluxe
(plus more busses than sense)
In a time of chimpanzees I was a monkey
-
Gypsie

- rusty aircooled mekanich
- Location: Treadin' Lightly under the Clear Blue!
- Status: Offline
Re: Kubelwagen's engine meltdown
Pix or it didn't happen...
So it all started when I wanted to get better gas mileage....
-
mamasunshine
- I'm New!
- Location: Portland, OR
- Status: Offline
Re: Kubelwagen's engine meltdown
I hope starts clearing up for ya soon. Can't have gotten much done today with the rain.
"Never part with your dreams or aspirations. For though you may still exist, you have ceased to live." -HDT
'81 air-cooled autotran Cali tintop transporter Vanagon
'81 air-cooled autotran Cali tintop transporter Vanagon
-
tristessa

- Trusted Air-Cooled Maniac
- Location: Uwish Uknew, Oregon
- Status: Offline
Re: Kubelwagen's engine meltdown
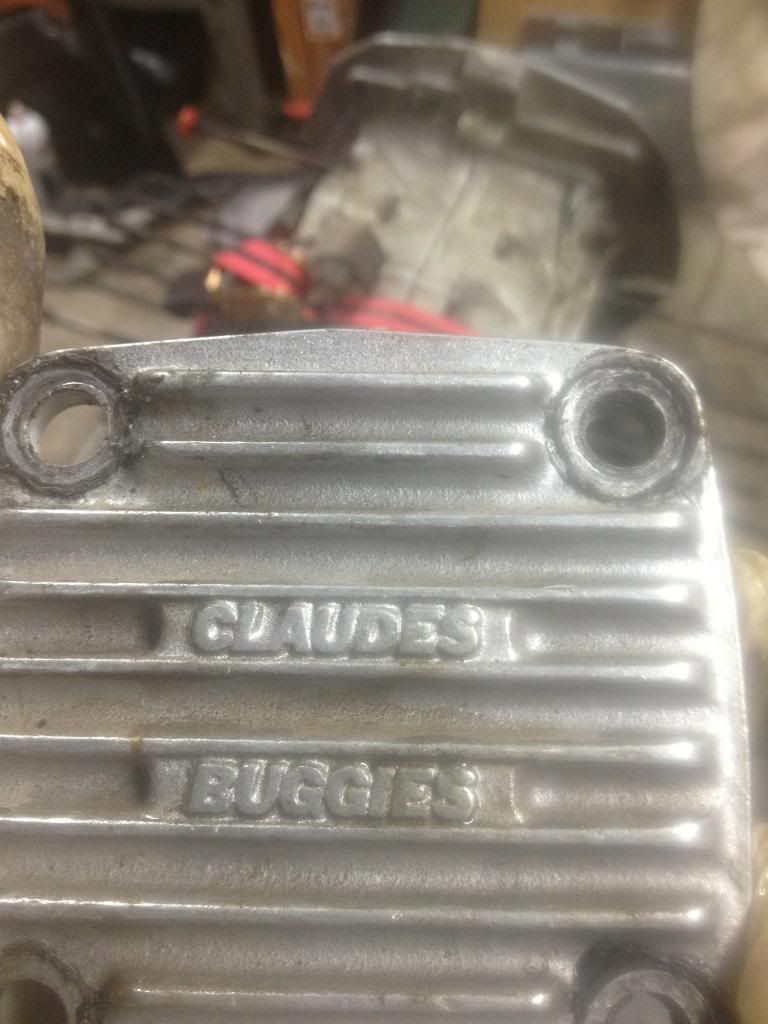
Claude's Buggies is the old name for CB Performance...
Remember, only YOU can prevent narcissism!
-
Kubelwagen

- Addicted!
- Location: Portland, OR
- Status: Offline
-
Kubelwagen
- Addicted!
- Location: Portland, OR
- Status: Offline
Re: Kubelwagen's engine meltdown
Some pictures, for those who don't want to see the whole album.
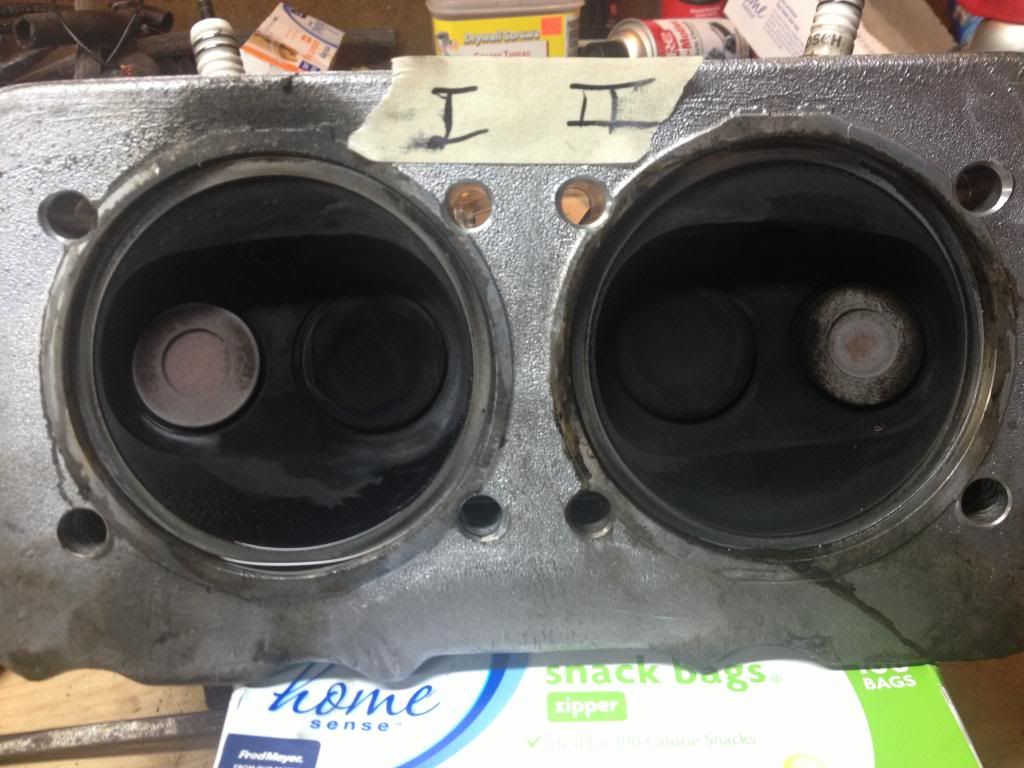
Head w/ 1 and 2. Some blow by:
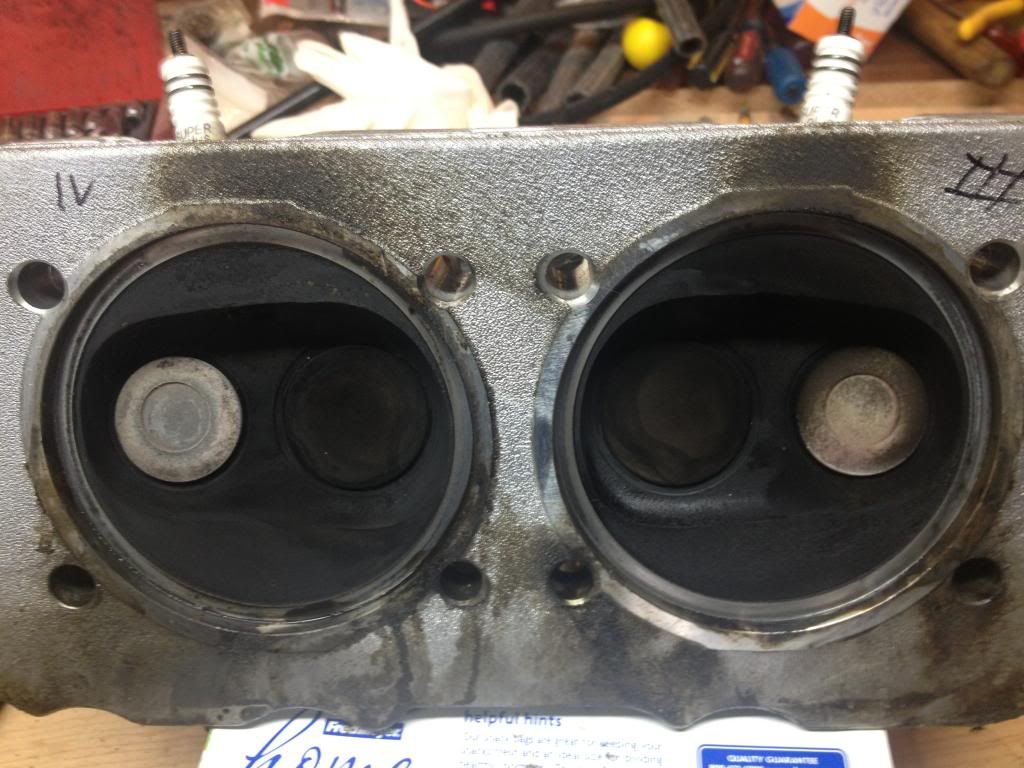
Head w/ 3 and 4:
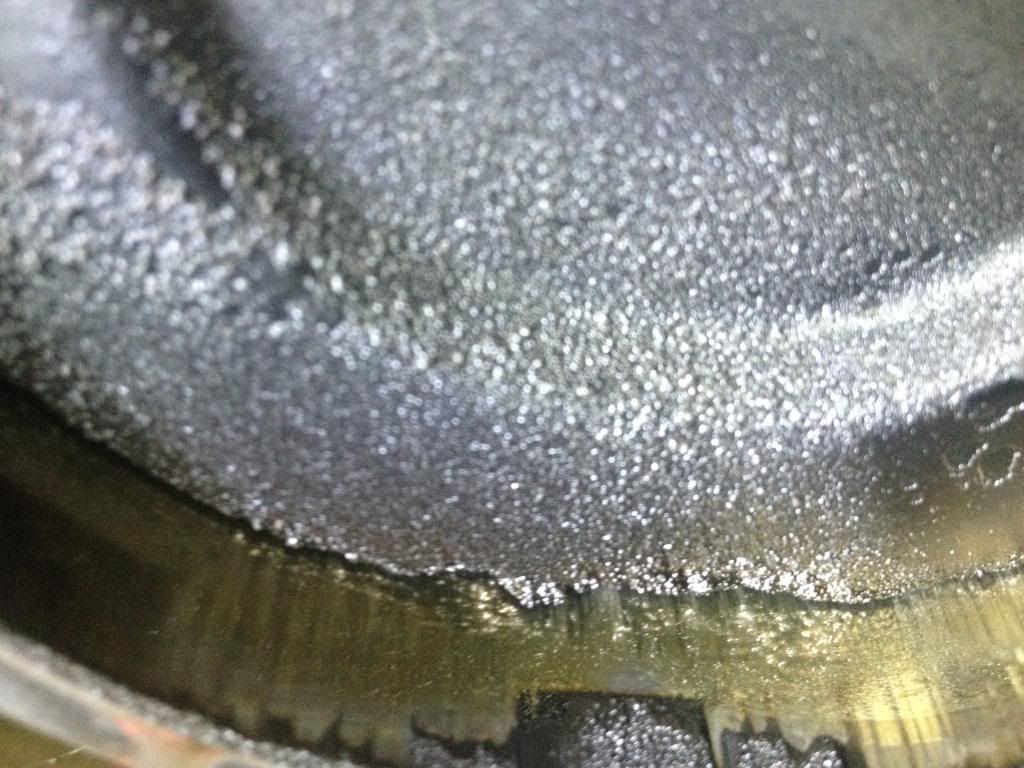
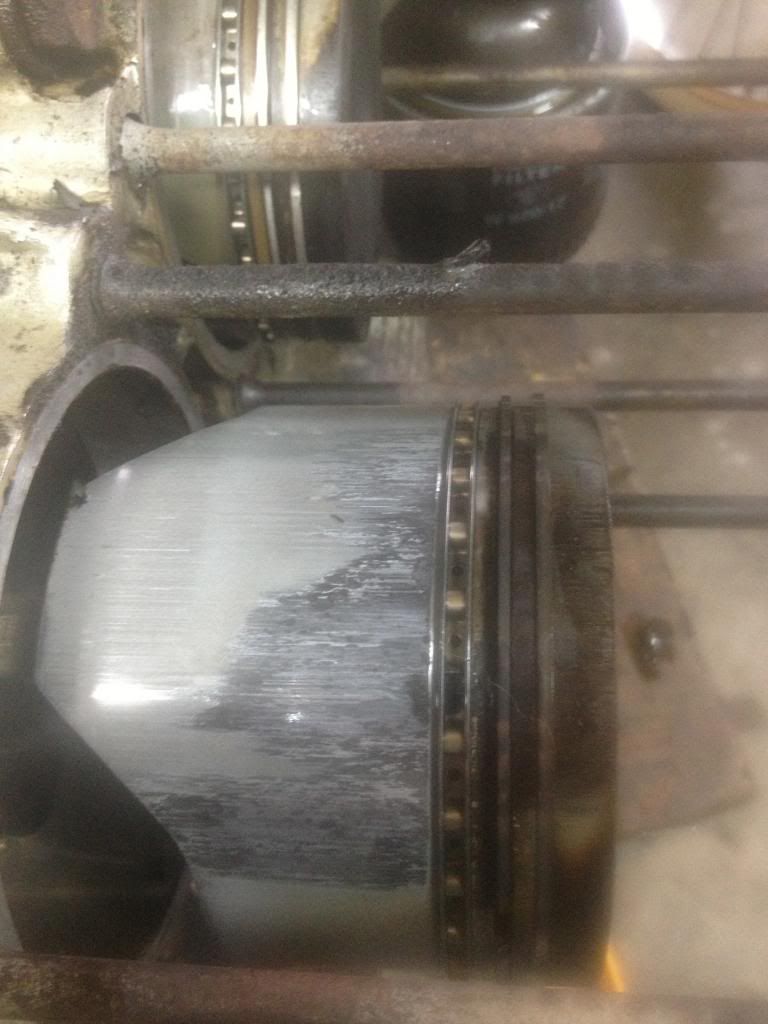
P&C damage on #3, yuck:
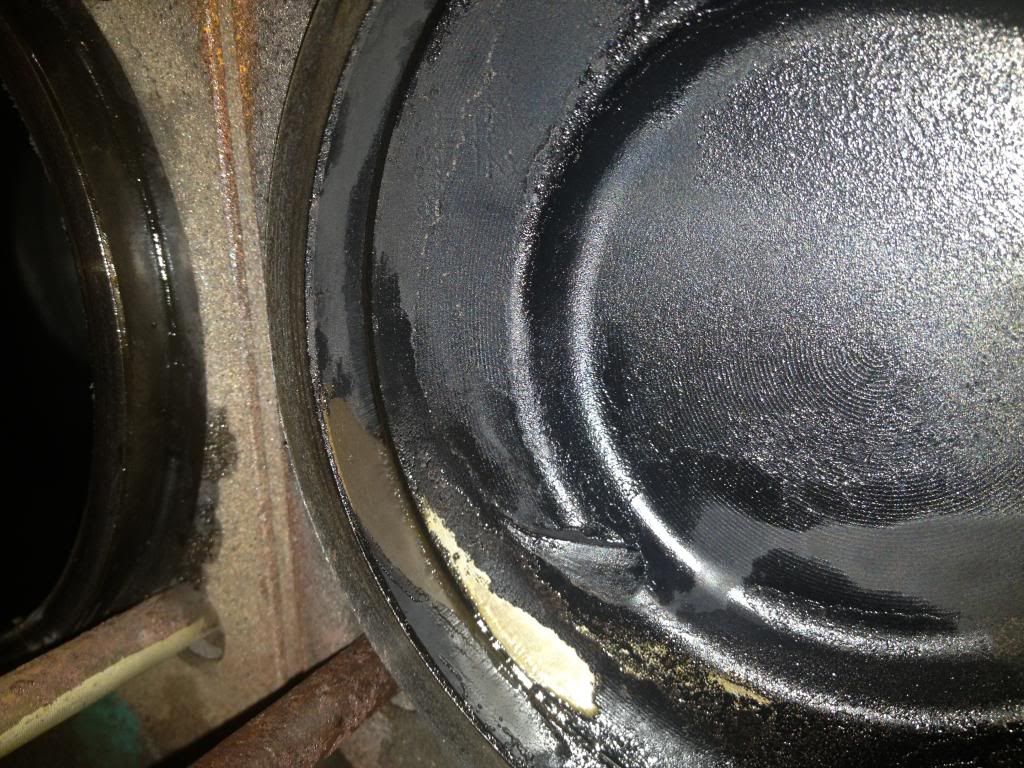
Mystery dent on Piston (I think this was #1):
Lots of piston scuffing, #3:
The non-stock oil pump, insides:
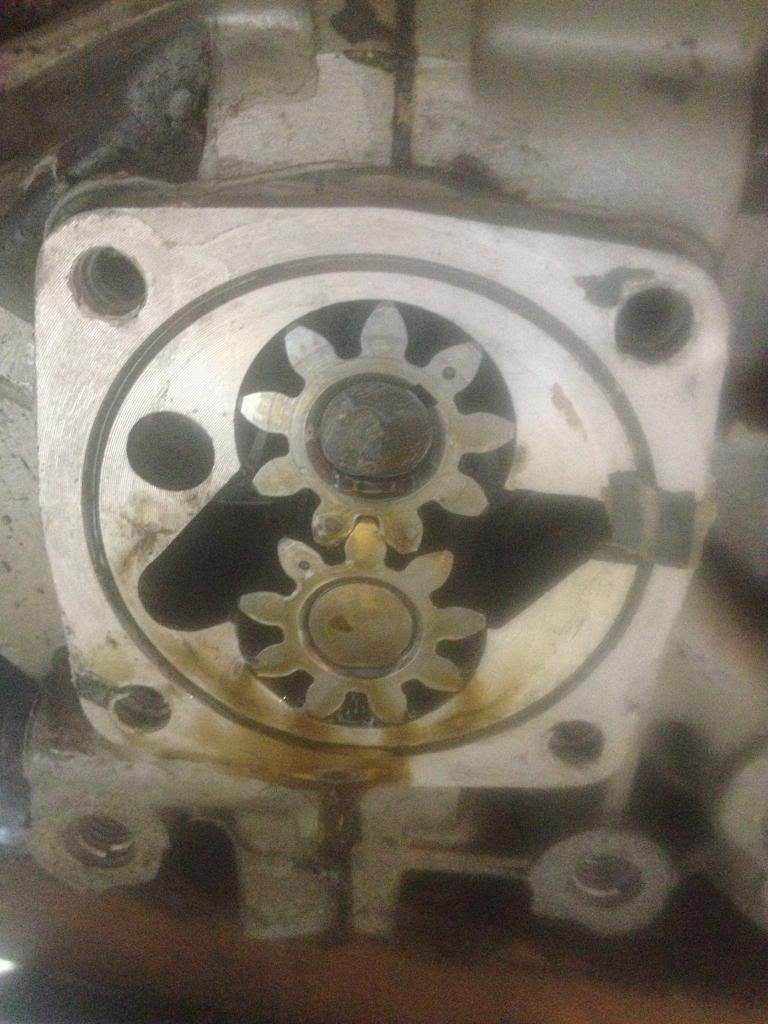
Mystery oil pump outsides:
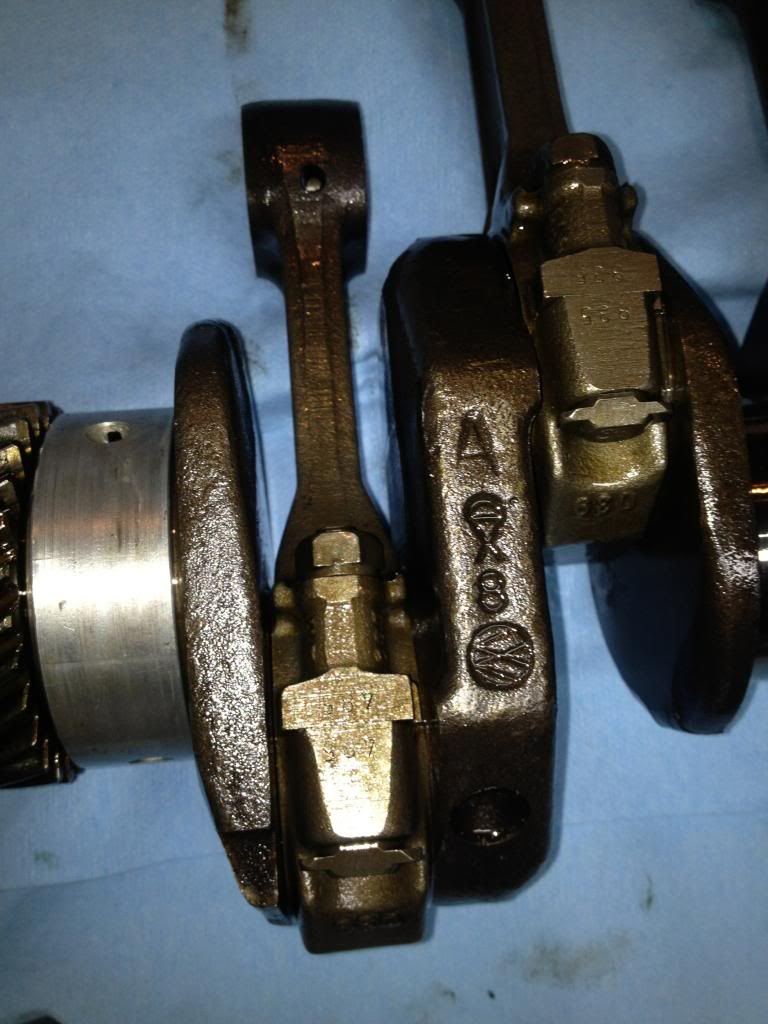
Rods - note that the numbers only show up on some of them (that is, they are flipped) is that a big deal?
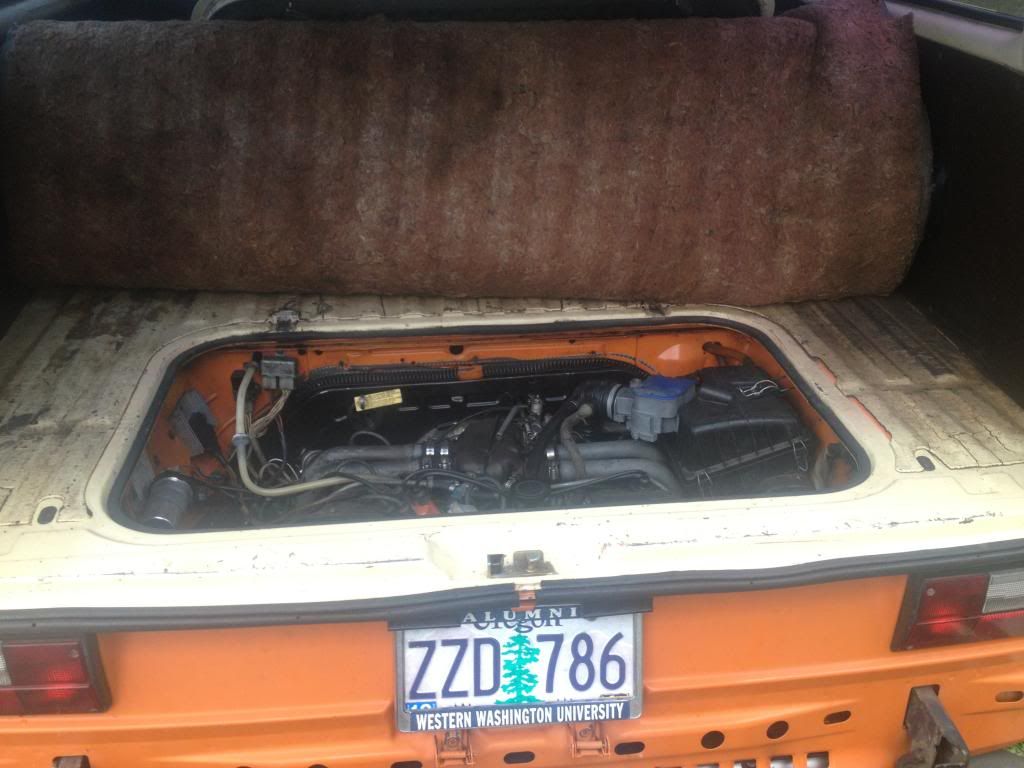
Donor engine - it is now sitting on the floor of my garage waiting for guidance on the pinion bearing:
Head w/ 1 and 2. Some blow by:

Head w/ 3 and 4:

P&C damage on #3, yuck:

Mystery dent on Piston (I think this was #1):

Lots of piston scuffing, #3:

The non-stock oil pump, insides:

Mystery oil pump outsides:

Rods - note that the numbers only show up on some of them (that is, they are flipped) is that a big deal?

Donor engine - it is now sitting on the floor of my garage waiting for guidance on the pinion bearing:

Patience the 81 Adventurewagen
-
Kubelwagen
- Addicted!
- Location: Portland, OR
- Status: Offline
Re: Kubelwagen's engine meltdown
I'd be dead in the water without all the help I've been getting - thanks everybody! I am learning a lot and looking forward to building my engine back up. WestyFrank and I have thoughts of building another once this is done.drober23 wrote:No idea on Claude's Buggies, but I am enjoying this thread. It is nice to see folks helping each other out there!
Patience the 81 Adventurewagen
-
Gypsie
- rusty aircooled mekanich
- Location: Treadin' Lightly under the Clear Blue!
- Status: Offline
Re: Kubelwagen's engine meltdown
Ok, so now that we have some pix, I can believe that it really happened and these achy muscles aren't just a figment of my overactive imagination.
The extraction of the donor engine went like buttah. The donor is a California model with an auto tranny. The plan, as I understand it, is to have this engine installed so Mike can drive around for work and play for a short time (6 mo or less) while he does a considered and thorough rebuild on his engine.
My thought is to take the donor engine as a unit and slip it up into his rig without doing much to it as the engine sounds pretty good and has had some diagnostics that had good results. The PO had complaints about power (ie she couldn't get it up to speed and hills were problematic).
-Compression testing, as I recall was pretty good (above 100) and consistent all the way around. It had been running pretty good with some issues (ie lack of power) though it is not certain what all the issues are.
-The right rear brake caliper seems sticky and the PO had had some "burning smell" and a very hot wheel when she last drove it that caused her to park it. (She was getting overwhelmed with VW issues popping up.
-The parking break cable ferrule(?) on the drivers side was ziptied over to the side near the wheel (not following the standard route). It looked like the plug clamps that hold the cable up near the vehicle in that area were missing and someone had ziptied it not thinking about how it may affect the workings. This was pulling on the cable and causing the brakes to be a bit engaged.
-The tranny fluid (at rest without running came in very low on the dipstick. Not necessarily the most accurate method of level checking, though I would presume that, if at rest it is low, it may be even lower when it is running and the fluid is getting pushed around. This might have been another contributor to seemingly poor power.
-At cold, and sitting for a few days, it fired right up and the lifters pumped up within a few seconds. A little blue smoke when gunned, though very responsive to throttle. Shooting from the hip, I say it is worth a try to get around town until the rebuild is done.
So a few questions for the gallery (regarding the temporary donor engine):
1. The pilot bearing is rotating in there, and it feels like some (maybe all) the pin bearings are turning in the cage. Can this pilot bearing be run as it is having been behind a torque converter plate not being used for anything. I am concerned about possibility of seized bearings that will cause problems or damage to the transmission shaft. Will this need to be replace before install? If so any tips on getting it out without the specialized tool?
2. The Donor engine, and harness, is a California model: can we use it as a federal set up and just set aside the unneeded connections (ie use a standard svda dist w/ points set up, and coil). We are hoping to avoid having to pull all the electronic ign. stuff out of the donor van. The reason being is Mike wants to send off his harness for rebuilding to rectify a loose injector connection (FYI-the #3 injector connection on Mike's rig has an intermittent connection issue that has been "fixed" by "pushing it down on there real good" and the #3 had the piston scuffing....Hmmmmmm). Any issues with the harness and the ECM? Should we use the AFM from the donor (ie will it be ok set up without the electronic ign?)
This process is kind of jumbled as the desire (ie need) to have a running vehicle while taking the time to do a proper rebuild makes some decisions complex. We are trying to minimize the work needed to achieve these ends.
Oh, and there is an IAC visit in June that we are hoping to have the parts assembled for Colin to contribute to/lead a reassembly.
'Nuff said for now. Pipe in ifn' you want.
So it all started when I wanted to get better gas mileage....
-
SlowLane
- IAC Addict!
- Location: Livermore, CA
- Status: Offline
Re: Kubelwagen's engine meltdown
I had good luck removing the pilot bearing from my engine with a Lisle model 13750 Hydraulic Lifter PullerGypsie wrote:My thought is to take the donor engine as a unit and slip it up into his rig without doing much to it as the engine sounds pretty good and has had some diagnostics that had good results.
1. The pilot bearing is rotating in there, and it feels like some (maybe all) the pin bearings are turning in the cage. Can this pilot bearing be run as it is having been behind a torque converter plate not being used for anything. I am concerned about possibility of seized bearings that will cause problems or damage to the transmission shaft. Will this need to be replace before install? If so any tips on getting it out without the specialized tool?
The electronic ignition harness from the CA van is actually separate from the FI harness, and is easily seperable from it. I would highly recommend using the electronic ignition instead of the points system. It makes for a big improvement in sparking. You'll need to tease the CA FI harness terminal out of the coil connector, and you should find the harnesses separate at that point. You won't need the OXS relay (black cube), and the idle speed control module is optional, as it is easily bypassed by plugging the harness connectors together (this is a part of the tune-up procedure anyways). You should only use the advance side of the distributor vacuum advance can, and tune it to 7.5 deg BTDC @ 850-950 RPM as per the Federal Vanagon spec (or Colin's alternate tuning for max advance at 3000 RPM, whichever you prefer).Gypsie wrote: 2. The Donor engine, and harness, is a California model: can we use it as a federal set up and just set aside the unneeded connections (ie use a standard svda dist w/ points set up, and coil). We are hoping to avoid having to pull all the electronic ign. stuff out of the donor van. The reason being is Mike wants to send off his harness for rebuilding to rectify a loose injector connection (FYI-the #3 injector connection on Mike's rig has an intermittent connection issue that has been "fixed" by "pushing it down on there real good" and the #3 had the piston scuffing....Hmmmmmm). Any issues with the harness and the ECM? Should we use the AFM from the donor (ie will it be ok set up without the electronic ign?)
This is all assuming that the CA-spec distributor is in good shape. Bosch seems to have used lighter springs and weights on the electronic ignition distributors, and from what I've seen (based on a sample of two units), these lighter springs seem more prone to getting stretched out of shape. What i've ended up dong with my own motor is to transfer the weights, springs and vacuum can from my Federal points-and-condenser distributor to a CA-spec electronic Hall-effect distributor. It all fits, and it works amazingly well.
Aside from that, I heartily recommend tearing down, cleaing and re-lubing whichever distributor you're planning to use. You would be amazed at the diference in makes in drivability. It's not necessary (and indeed, quite difficult) to press the drive-dog pin out of the distributor shaft. Just cleaning out and replacing the 30-plus year-old gummy grease in the advance mechanism makes a world of difference.
I'd also recommend transferring the manual-shift Federal FI system (harness, AFM, ECU, double relay, resistor pack, exhaust system) to the donor engine. If you don't care about keeping the automatic FI harness intact, you can scavange parts from it to make the Federal harness better (eg, splice in a good injector connector cut from the automatic harness. Use solder and heat-shrink tubing for best results.) If you do want to keep the automatic harness intact, then maybe you can find another donor harness elswhere. Of course, if you want to do the job "right", you could order the Amp FASTIN-FASTON connectors from Digi-Key that we were yakking about in the Electrical forum a few weeks ago.
The automatic FI system was apparently mapped differently than the manual system. Not sure how drivable it would be. Ratwell has some information on that for the late busses.
If the idea is to eventually sort out the problems with the automatic and restore it to service, then I guess the simplest thing to do would be to transfer the whole engine with FI and ignition harness to avoid breaking something.
On the engine front, I'd hazard a guess from looking at the #1 piston that at some point in the past, the intake valve seat had dropped out and blocked the valve open, causing the piston to smack into the valve (ask me how I know this
'81 Canadian Westfalia (2.0L, manual), now Californiated
"They say a little knowledge is a dangerous thing, but it is not one half so bad as a lot of ignorance."
- Terry Pratchett
"They say a little knowledge is a dangerous thing, but it is not one half so bad as a lot of ignorance."
- Terry Pratchett
-
Gypsie
- rusty aircooled mekanich
- Location: Treadin' Lightly under the Clear Blue!
- Status: Offline
Re: Kubelwagen's engine meltdown
I had good luck removing the pilot bearing from my engine with a [url=http://www.centurytool.net/13750_Lisle_ ... s13750.htm]Lisle model 13750 Hydraulic Lifter Puller
Thanks for the tip. couldn't find a price for that one that one but did find this one (http://www.ebay.com/itm/KD-HYDRAULIC-LI ... %26ps%3D54) I think we may try pulling and replacing this just to make sure something doesn't seize up. Though I wonder, since this is a short term swap (and likely a reinstall in the donor rig to fix it up for resale) can the bearing be refurbished on the bench. The bearing may not have seen any usage as it was behind the torque converter plate just sitting in there gathering dust.
The electronic ignition harness from the CA van is actually separate from the FI harness, and is easily seperable from it. I would highly recommend using the electronic ignition instead of the points system. It makes for a big improvement in sparking.
We disconnected every thing from anything that was mounted to the van itself. The electronic ignition components are still in the donor rig. These should be gathered and installed with the engine? My recollection is that there are four components left in the rig: the Hall unit, idle stabilizer, coil and..?..a larger electronic device box on the drivers side, Would this need to come as well? I think we were hoping to use the federal dist and coil, and connect this to the cali engine (that has the harness already on it) while it is in Mikes rig temporal\rily. Is it possible to usethe cali harness as a federal setup by just not hooking up the connections that are not needed. Perhaps you are saying that when you take all of the cali ignition components off of the harness the harnesses are the same? We could use whichever afm would be best. This is a short term swap while Mike rebuilds his engine (that will eventually be set up federal style. I plan on suggesting a pertronix as I have had good success with mine.
You'll need to tease the CA FI harness terminal out of the coil connector, and you should find the harnesses separate at that point. You won't need the OXS relay (black cube), and the idle speed control module is optional, as it is easily bypassed by plugging the harness connectors together (this is a part of the tune-up procedure anyways). You should only use the advance side of the distributor vacuum advance can, and tune it to 7.5 deg BTDC @ 850-950 RPM as per the Federal Vanagon spec (or Colin's alternate tuning for max advance at 3000 RPM, whichever you prefer).
Will the oxs be harmed by being run and not hooked up? Does it require the hookup for heating as an LM1 does?
This is all assuming that the CA-spec distributor is in good shape.
The engine sounded decent when running though the performance issues the PO was experiencing could be related to a tired dist. We have a local distributor re-builder (http://www.philbingroup.com/) here in town and a rebuilt could be purchased with or without a core.
I agree with having the primo rebuild getting a golden distributor. I think Mike wants to do as little modifying to the donor rig to have a resellable rig after all is said and done. He doesn't want to bring bad VW mojo by sending a clean line rig to the scrapper.
you could order the Amp FASTIN-FASTON connectors from Digi-Key that we were yakking about in the Electrical forum a few weeks ago.
I'll have to check that thread. Would these be a new connector put on the harness (properly) and that will fit into the injector connector? This may be a good alternative to sending the harness out for refurb as the other connections didn't seem to have any probs.
The automatic FI system was apparently mapped differently than the manual system. Not sure how drivable it would be. Ratwell has some information on that for the late busses.
If the idea is to eventually sort out the problems with the automatic and restore it to service, then I guess the simplest thing to do would be to transfer the whole engine with FI and ignition harness to avoid breaking something.
Sounds like this will be the easiest to do. This may be the rub that makes the temp swap require the cali harness and all electonic components to be used during the temp engine swap.
On the to be rebuilt with consideration and properly engine front, I'd hazard a guess from looking at the #1 piston that at some point in the past, the intake valve seat had dropped out and blocked the valve open, causing the piston to smack into the valve (ask me how I know this ). The previous owner then just had the head replaced, without investigating any further (or much caring, since he was just getting the da*n thing running again so he could sell it, having become overwhelmed by air-cooled VW issues). The #3 piston looks like it might have had a similar kiss from its valve. I don't know how deeply you want to get into this rebuild, but at a minimum I'd suggest having the con-rods checked out for straightness, trueness and roundness by a reputable machine shop.
Mikes rig is the one that will get a newly rebuilt engine after all is said and done, that is the one with the pix of it's innards. That PO may have become overwhelmed and sold it quick after new heads. The heads looked rather new and did not look like 'out of the box' heads. they had some attention paid via fin and flashing grinding and some port work. they may even have the higher quality valves and other hardware though it is hard to tell. They really looked nice even though they were AMC's.
I pointed out the rod numbers as my recollection is that the numbers should all be on one side with the 1-2 side pointing west and the 3-4 pointing east (if you get my drift) The numbers were all on the same side with all the rods pointing east. seemed odd to me though I may be trippin'.
regarding the CB performance oil pump. It strikes me as being very "type1" in that the cover will come off without pulling the pump out of the engine. Could this be a better pump than stock or should this be considered a part to seek out.
Thanks for the tip. couldn't find a price for that one that one but did find this one (http://www.ebay.com/itm/KD-HYDRAULIC-LI ... %26ps%3D54) I think we may try pulling and replacing this just to make sure something doesn't seize up. Though I wonder, since this is a short term swap (and likely a reinstall in the donor rig to fix it up for resale) can the bearing be refurbished on the bench. The bearing may not have seen any usage as it was behind the torque converter plate just sitting in there gathering dust.
The electronic ignition harness from the CA van is actually separate from the FI harness, and is easily seperable from it. I would highly recommend using the electronic ignition instead of the points system. It makes for a big improvement in sparking.
We disconnected every thing from anything that was mounted to the van itself. The electronic ignition components are still in the donor rig. These should be gathered and installed with the engine? My recollection is that there are four components left in the rig: the Hall unit, idle stabilizer, coil and..?..a larger electronic device box on the drivers side, Would this need to come as well? I think we were hoping to use the federal dist and coil, and connect this to the cali engine (that has the harness already on it) while it is in Mikes rig temporal\rily. Is it possible to usethe cali harness as a federal setup by just not hooking up the connections that are not needed. Perhaps you are saying that when you take all of the cali ignition components off of the harness the harnesses are the same? We could use whichever afm would be best. This is a short term swap while Mike rebuilds his engine (that will eventually be set up federal style. I plan on suggesting a pertronix as I have had good success with mine.
You'll need to tease the CA FI harness terminal out of the coil connector, and you should find the harnesses separate at that point. You won't need the OXS relay (black cube), and the idle speed control module is optional, as it is easily bypassed by plugging the harness connectors together (this is a part of the tune-up procedure anyways). You should only use the advance side of the distributor vacuum advance can, and tune it to 7.5 deg BTDC @ 850-950 RPM as per the Federal Vanagon spec (or Colin's alternate tuning for max advance at 3000 RPM, whichever you prefer).
Will the oxs be harmed by being run and not hooked up? Does it require the hookup for heating as an LM1 does?
This is all assuming that the CA-spec distributor is in good shape.
The engine sounded decent when running though the performance issues the PO was experiencing could be related to a tired dist. We have a local distributor re-builder (http://www.philbingroup.com/) here in town and a rebuilt could be purchased with or without a core.
I agree with having the primo rebuild getting a golden distributor. I think Mike wants to do as little modifying to the donor rig to have a resellable rig after all is said and done. He doesn't want to bring bad VW mojo by sending a clean line rig to the scrapper.
you could order the Amp FASTIN-FASTON connectors from Digi-Key that we were yakking about in the Electrical forum a few weeks ago.
I'll have to check that thread. Would these be a new connector put on the harness (properly) and that will fit into the injector connector? This may be a good alternative to sending the harness out for refurb as the other connections didn't seem to have any probs.
The automatic FI system was apparently mapped differently than the manual system. Not sure how drivable it would be. Ratwell has some information on that for the late busses.
If the idea is to eventually sort out the problems with the automatic and restore it to service, then I guess the simplest thing to do would be to transfer the whole engine with FI and ignition harness to avoid breaking something.
Sounds like this will be the easiest to do. This may be the rub that makes the temp swap require the cali harness and all electonic components to be used during the temp engine swap.
On the to be rebuilt with consideration and properly engine front, I'd hazard a guess from looking at the #1 piston that at some point in the past, the intake valve seat had dropped out and blocked the valve open, causing the piston to smack into the valve (ask me how I know this
Mikes rig is the one that will get a newly rebuilt engine after all is said and done, that is the one with the pix of it's innards. That PO may have become overwhelmed and sold it quick after new heads. The heads looked rather new and did not look like 'out of the box' heads. they had some attention paid via fin and flashing grinding and some port work. they may even have the higher quality valves and other hardware though it is hard to tell. They really looked nice even though they were AMC's.
I pointed out the rod numbers as my recollection is that the numbers should all be on one side with the 1-2 side pointing west and the 3-4 pointing east (if you get my drift) The numbers were all on the same side with all the rods pointing east. seemed odd to me though I may be trippin'.
regarding the CB performance oil pump. It strikes me as being very "type1" in that the cover will come off without pulling the pump out of the engine. Could this be a better pump than stock or should this be considered a part to seek out.
So it all started when I wanted to get better gas mileage....
-
tristessa
- Trusted Air-Cooled Maniac
- Location: Uwish Uknew, Oregon
- Status: Offline
Re: Kubelwagen's engine meltdown
Yeah, that's a type 1 oil pump. Those can be modified to work in a T4, which is good because the proper T4 oil.pump is made of unobtanium these days.
I don't think CB actually makes their own oil pumps, probably just throw their cover in a box with a run-of-the-mill part from.somewhere else.
I don't think CB actually makes their own oil pumps, probably just throw their cover in a box with a run-of-the-mill part from.somewhere else.
Remember, only YOU can prevent narcissism!
-
SlowLane
- IAC Addict!
- Location: Livermore, CA
- Status: Offline
Re: Kubelwagen's engine meltdown
Sears had a link for the Lisle tool for $31. It's quite possible that the bearing in there is a pristine OE one, as you surmise, but the dust and grime which has accumulated over 30 years may render it unusable, unless you can get it sparkly-clean.Gypsie wrote:I had good luck removing the pilot bearing from my engine with a [url=http://www.centurytool.net/13750_Lisle_ ... s13750.htm]Lisle model 13750 Hydraulic Lifter Puller
Thanks for the tip. couldn't find a price for that one that one but did find this one (http://www.ebay.com/itm/KD-HYDRAULIC-LI ... %26ps%3D54) I think we may try pulling and replacing this just to make sure something doesn't seize up. Though I wonder, since this is a short term swap (and likely a reinstall in the donor rig to fix it up for resale) can the bearing be refurbished on the bench. The bearing may not have seen any usage as it was behind the torque converter plate just sitting in there gathering dust.
The electronic ignition harness from the CA van is actually separate from the FI harness, and is easily seperable from it. I would highly recommend using the electronic ignition instead of the points system. It makes for a big improvement in sparking.
We disconnected every thing from anything that was mounted to the van itself. The electronic ignition components are still in the donor rig. These should be gathered and installed with the engine? My recollection is that there are four components left in the rig: the Hall unit, idle stabilizer, coil and..?..a larger electronic device box on the drivers side, Would this need to come as well?
Yup, four components (well, five if you count the distributor itself): Ignition module, idle stabilizer, coil and the final electronic device box is the "OXS relay". Took me some head-scratching and research to figure out what the heck it did and why. It's there to protect the catalytic converter from getting too much raw fuel. It does this by sitting in series with the WOT switch that sits on top of the throttle body. When you floor the accelerator pedal, the WOT switch closes and the ECU responds with full enrichment (my AFR drops to about 10:1 when I mash the pedal). The OXS relay monitors the engine RPM and only closes its contact above 3000 RPM. Since it is wired in series with the WOT switch, the ECU will only get that full-enrichment signal when you mash the pedal AND the engine is spinning at more than 3000 RPM. Do you need it? Maybe. If you're installing the entire CA exhaust system with the donor engine, complete with a working catalytic converter, it's probably a good idea to include it in the swap, if only to save the cat.
For my money I'd install the CA ignition along with the CA injection (but i'm not a big fan of Pertronix). The CA harness has to be used with the CA ECU, because the resistors for the injectors are internal to the CA ECU, whereas the resistors on the Federal models are external. The harness wiring reflects that difference.I think we were hoping to use the federal dist and coil, and connect this to the cali engine (that has the harness already on it) while it is in Mikes rig temporal\rily. Is it possible to usethe cali harness as a federal setup by just not hooking up the connections that are not needed. Perhaps you are saying that when you take all of the cali ignition components off of the harness the harnesses are the same? We could use whichever afm would be best. This is a short term swap while Mike rebuilds his engine (that will eventually be set up federal style. I plan on suggesting a pertronix as I have had good success with mine.
The early Vanagon O2 sensors were single-wire. No heating element involved. If you want to get fancy, you can use a wide-band O2 sensor with an LC-1. The LC-1 has two output channels: one is for a gauge, and the other is set by factory default to simuiate a narrow-band O2 sensor, so you can use it to drive your CA-spec ECU. Again, this is all assuming you have a good catalytic converter that you want to keep healthy. If not, then an O2 sensor will simply complicate your tuning efforts.Will the oxs be harmed by being run and not hooked up? Does it require the hookup for heating as an LM1 does?
Wish I had Philbin in my backyard. I will attest again to the dramatic improvement in drivability that a properly-functioning distributor can deliver.This is all assuming that the CA-spec distributor is in good shape.
The engine sounded decent when running though the performance issues the PO was experiencing could be related to a tired dist. We have a local distributor re-builder (http://www.philbingroup.com/) here in town and a rebuilt could be purchased with or without a core.
I agree with having the primo rebuild getting a golden distributor. I think Mike wants to do as little modifying to the donor rig to have a resellable rig after all is said and done. He doesn't want to bring bad VW mojo by sending a clean line rig to the scrapper.
I misspoke myself there. The FASTIN/FASTON connectors are the brass connectors used in pretty much everywhere else on the vehicle, but the injection harness uses "Junior Timer" connectors. Bus Boys sell some (http://www.bus-boys.com/bb13380.htm#fi) harness repair parts, but you know what? Those connectors have been used on all manner of Bosch FI-equipped vehicled from the late 70's to at least the mid-90's (my 97 Volvo wagon uses the same connectors for its injectors). I suggest ye get thyselves down to ye olde local wrecking yard with thy wire-cutters and harvest thyselves some Junior-Timer pig-tails. You ought to be able to find them on Audis, BMWs, VWs and Volvos. Maybe even Porsches and Benzes.
you could order the Amp FASTIN-FASTON connectors from Digi-Key that we were yakking about in the Electrical forum a few weeks ago.
I'll have to check that thread. Would these be a new connector put on the harness (properly) and that will fit into the injector connector? This may be a good alternative to sending the harness out for refurb as the other connections didn't seem to have any probs.
Mikes rig is the one that will get a newly rebuilt engine after all is said and done, that is the one with the pix of it's innards. That PO may have become overwhelmed and sold it quick after new heads. The heads looked rather new and did not look like 'out of the box' heads. they had some attention paid via fin and flashing grinding and some port work. they may even have the higher quality valves and other hardware though it is hard to tell. They really looked nice even though they were AMC's.
I pointed out the rod numbers as my recollection is that the numbers should all be on one side with the 1-2 side pointing west and the 3-4 pointing east (if you get my drift) The numbers were all on the same side with all the rods pointing east. seemed odd to me though I may be trippin'.
I remember scratching my head over the rods when I did my rebuild. I think mine were the same way as Mike's (and I put it back together the same way). Bentley doesn't make an issue out of it: they just say to make sure the numbers match and are on the same side for the rod and cap.
I think my own confusion was from a recollection of rebuilding a type 1 and having to make sure that the forging "bumps" on the con rods were all facing up. Guess I automatically assumed there was a similar thing with the type IV.
If the CB oil pump was providing adequate pressure under all conditions, then there's no reason not to use it. BUT: aftermarket pumps were generally not very well built, with sloppy case-to-pump body clearances and poorly fitting gears. If you can source a correct type IV pump in decent shape, then I'd recommend going with that. One thing to definitely look out for during one of your (many) test assemblies is to check the oil-pump-to-cam-gear clearance, especially if using a bolted-on cam gear. Lay the cam in one half of the case with bearing shells, then slide the oil pump into position and snug two nuts down finger-tight. Gently turn the cam in its bearings and look for interference between the pump and cam gear bolt heads.regarding the CB performance oil pump. It strikes me as being very "type1" in that the cover will come off without pulling the pump out of the engine. Could this be a better pump than stock or should this be considered a part to seek out.
Have fun, eh?
'81 Canadian Westfalia (2.0L, manual), now Californiated
"They say a little knowledge is a dangerous thing, but it is not one half so bad as a lot of ignorance."
- Terry Pratchett
"They say a little knowledge is a dangerous thing, but it is not one half so bad as a lot of ignorance."
- Terry Pratchett
-
Gypsie
- rusty aircooled mekanich
- Location: Treadin' Lightly under the Clear Blue!
- Status: Offline
Re: Kubelwagen's engine meltdown
Slowlane, you have provided a plethora of valuable information that will assuredly assist us in going forward with the rebuild and temporary swap. Thank you very much.
Mike has already taken the case, crank, rods, cam, and heads in for service and testing.
This is exciting...
And just cause I can't keep myself from saying it at least once in an engine build thread, I will say it here to get it out of the way..
Wait for it....
wait for it....
Lube.
Mike has already taken the case, crank, rods, cam, and heads in for service and testing.
This is exciting...
And just cause I can't keep myself from saying it at least once in an engine build thread, I will say it here to get it out of the way..
Wait for it....
wait for it....
Lube.
So it all started when I wanted to get better gas mileage....
-
mamasunshine
- I'm New!
- Location: Portland, OR
- Status: Offline
Re: Kubelwagen's engine meltdown
Interesting reading. Good pics. Glad to see the van is in good hands. Keep us posted! Hope everyone has a great memorial day weekend!
"Never part with your dreams or aspirations. For though you may still exist, you have ceased to live." -HDT
'81 air-cooled autotran Cali tintop transporter Vanagon
'81 air-cooled autotran Cali tintop transporter Vanagon
-
Amskeptic

- IAC "Help Desk"

- Status: Offline
Re: Kubelwagen's engine meltdown
The rods are symmetrical on Type 4s. There is no "orientation" but that the numbers match and are adjacent.SlowLane wrote:Bentley doesn't make an issue out of it: they just say to make sure the numbers match and are on the same side for the rod and cap.
The Type 1 engines have offset wristpins to avoid piston slap, they must be installed with the marks facing up. With a crank on the bench, you need to know where the rods go . . . on the correct side of the center line! i.e. furthest forward journal is 3! then 1 on right! then 4 on the left! furthest rearward journal is 2 on right!
Colin
BobD - 78 Bus . . . 112,730 miles
Chloe - 70 bus . . . 217,593 miles
Naranja - 77 Westy . . . 142,970 miles
Pluck - 1973 Squareback . . . . . . 55,600 miles
Alexus - 91 Lexus LS400 . . . 96,675 miles
Chloe - 70 bus . . . 217,593 miles
Naranja - 77 Westy . . . 142,970 miles
Pluck - 1973 Squareback . . . . . . 55,600 miles
Alexus - 91 Lexus LS400 . . . 96,675 miles