The Yuma Touch (Up)
Posted: Sat Dec 18, 2010 9:21 pm
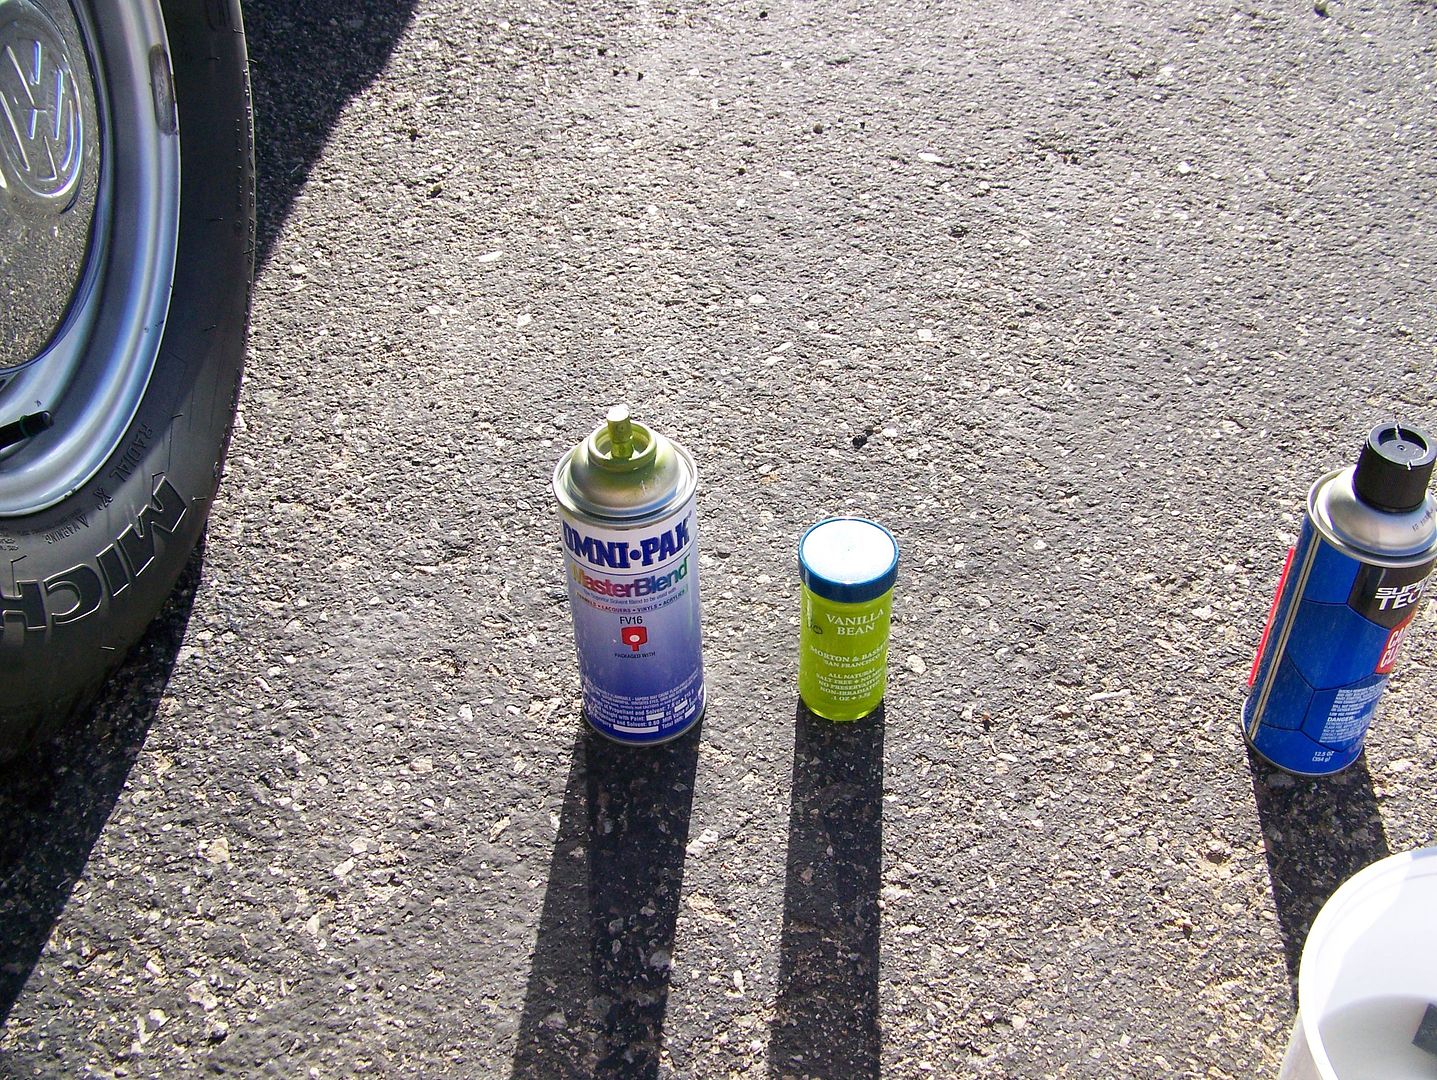
I had searched for Taigagrun 63H and found a willing paint store victim in El Centro CA to make me up three custom aerosol cans (see Irvine Advent Pt III)
The three new cans had a lousy match too.
Here's the thing, you have seen photographs of the BobD where it changes color in the sun. It does. It goes wild yellow. Then, in the shade, it is a stately dark green with greys and a touch of red. It is a complex color!
So Pedro had matched the paint almost decently in the shade, but it kept drying too dark! As have all other attempts ever, to touch up this car. I think it was because the yellow component is just too wild when wet.
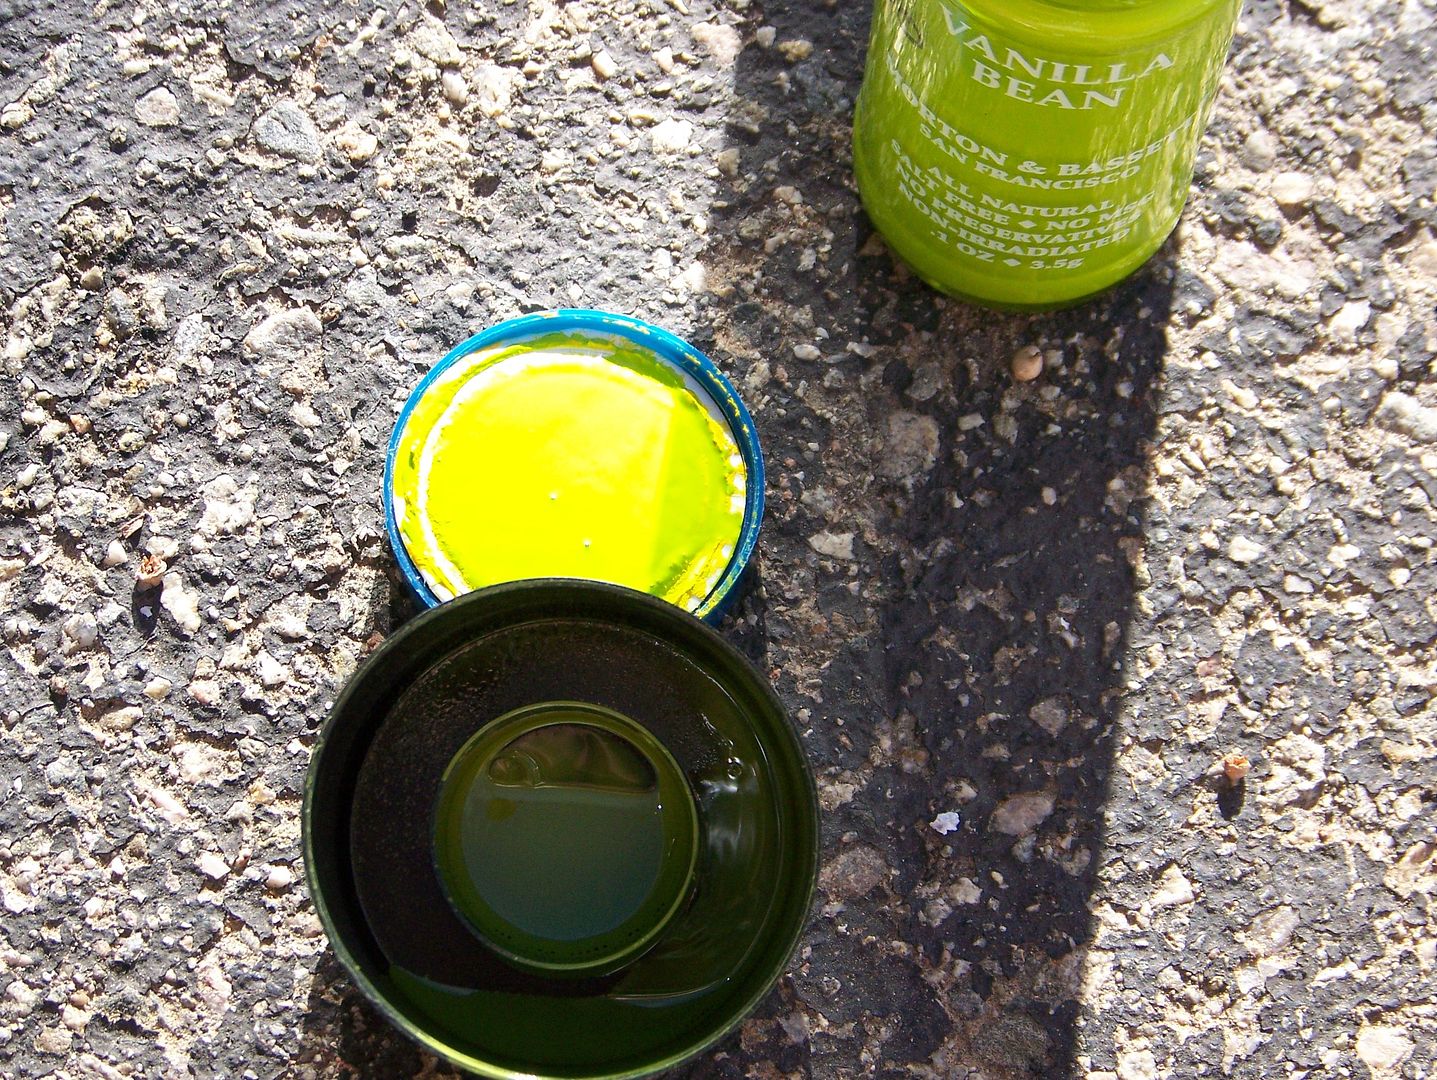
I came up with a plan. I got the formula, and asked to purchase a small quantity of the lacking primary colors in the formula. Chrome yellow DM 530, and yellow green DM504. And I mixed that paint myself in the cap of the errant spray can results.
Nailed it! In all lighting conditions! Touched up the left side of the car before the paint dried out in the cap.
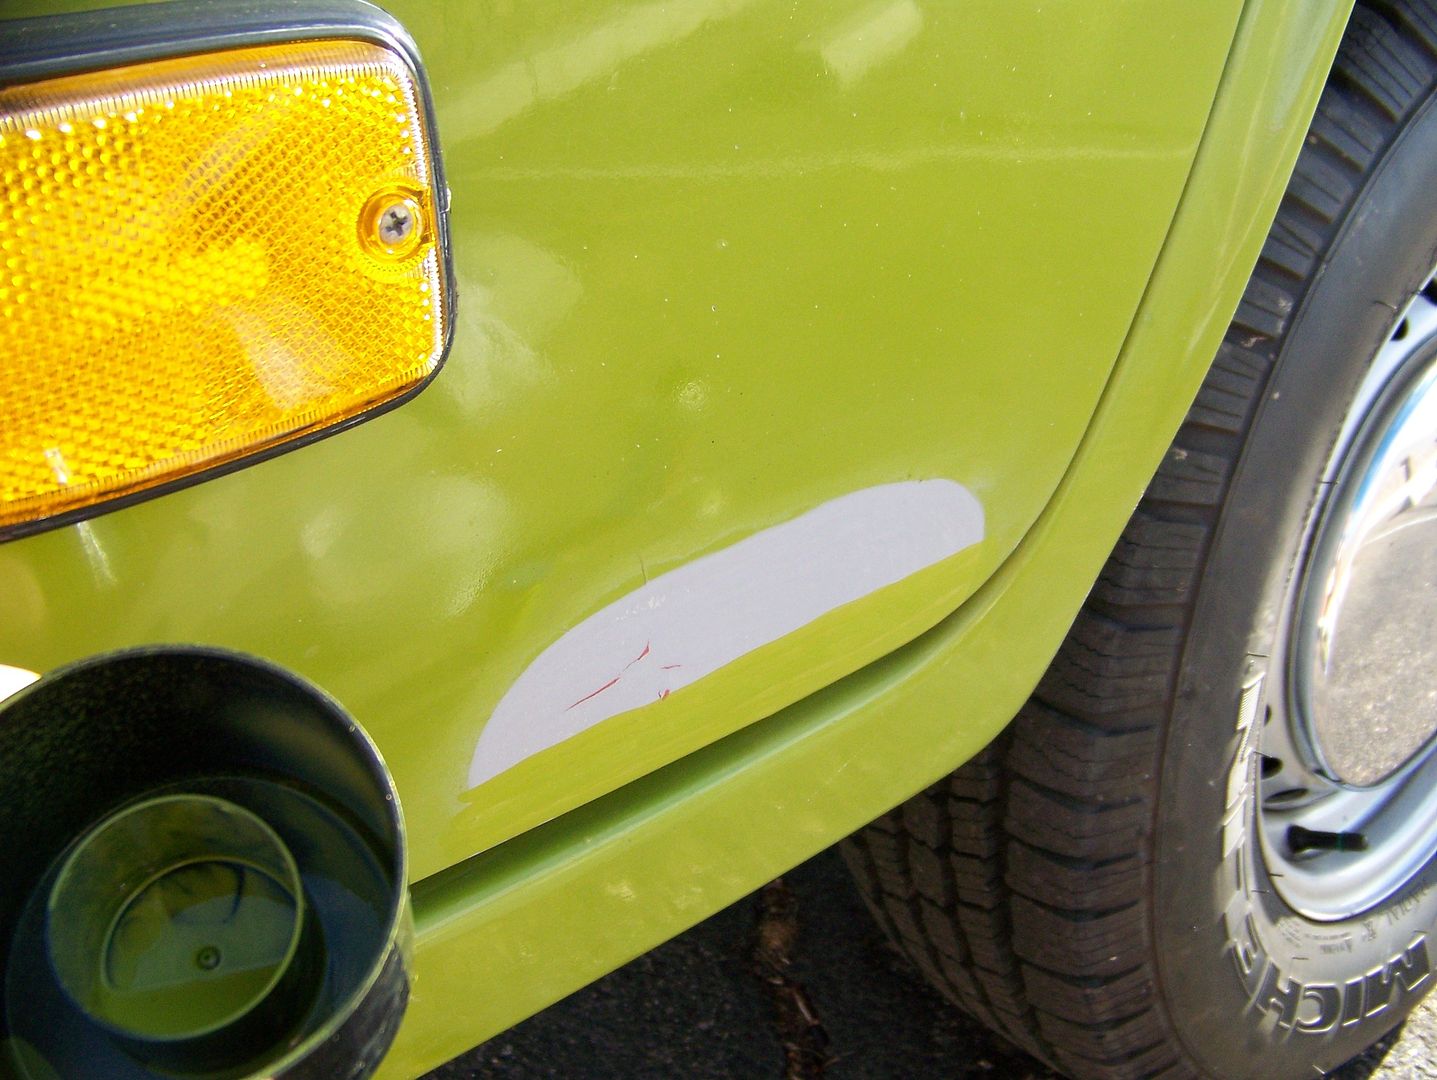
Got so excited, I tore into the driver's door dent + hole where some wingnut "body man" had drilled huge pull out holes under the reflector. Here is the picture I sent to Willy one month after buying the BobD. Just add a hole in there, and that is what it looked like this morning:

One of the holes had lost its bondo plug, and that! we shall up with which not put.
Sorry I did not make a procedure of it, but it was mostly sanding and spot putty build-up and more sanding and and brush-on primer with more sanding:
Here, I am halfway up brushing the paint on quickly and lightly with a prang watercolor paint brush (way too stupid small for this project)
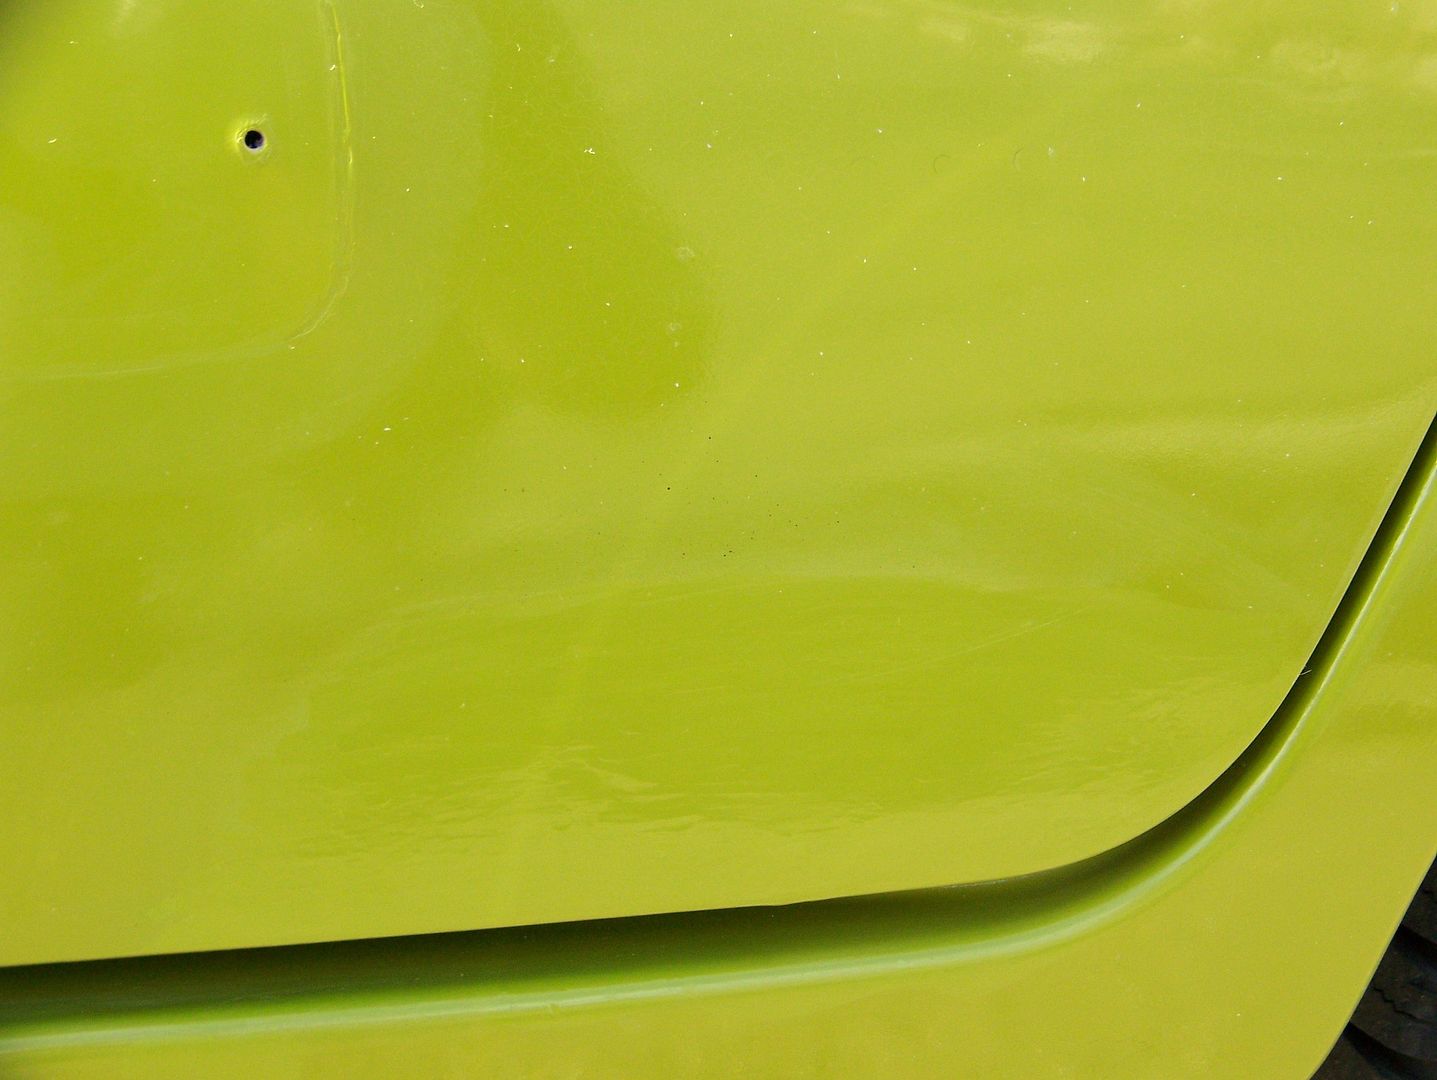
Here it is fully painted with two brush coats + under where the reflector had eaten into the paint because the aforementioned prior wingnut forgot to use the rubber reflector base-to-body seal so the housing came in too close and ate the paint:
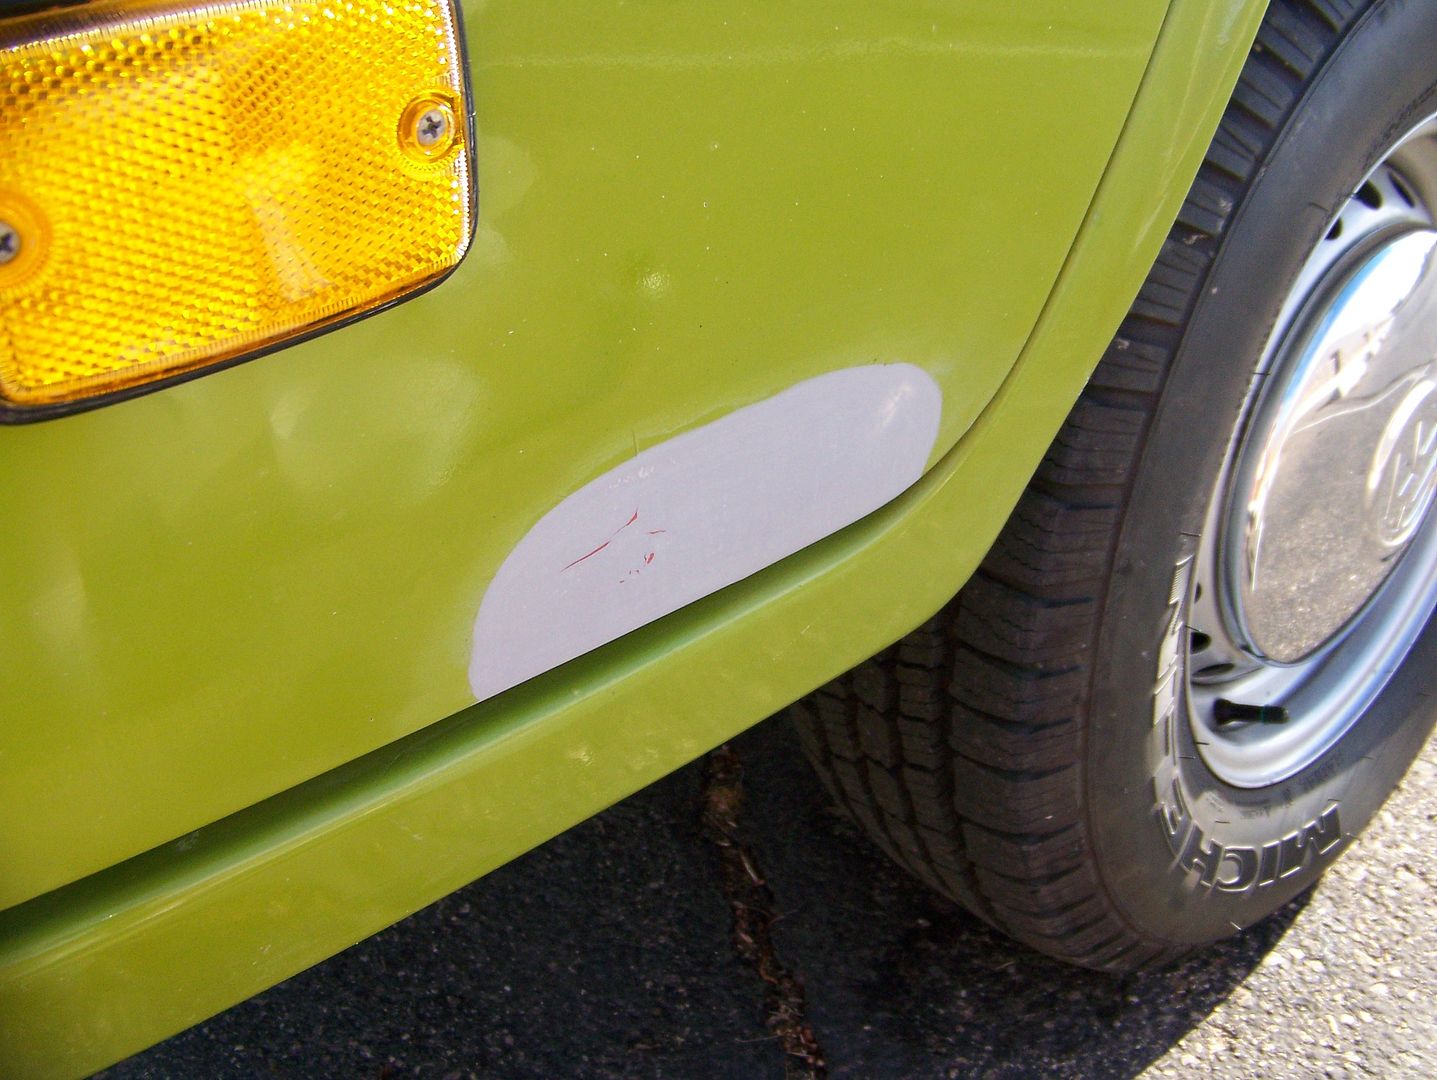
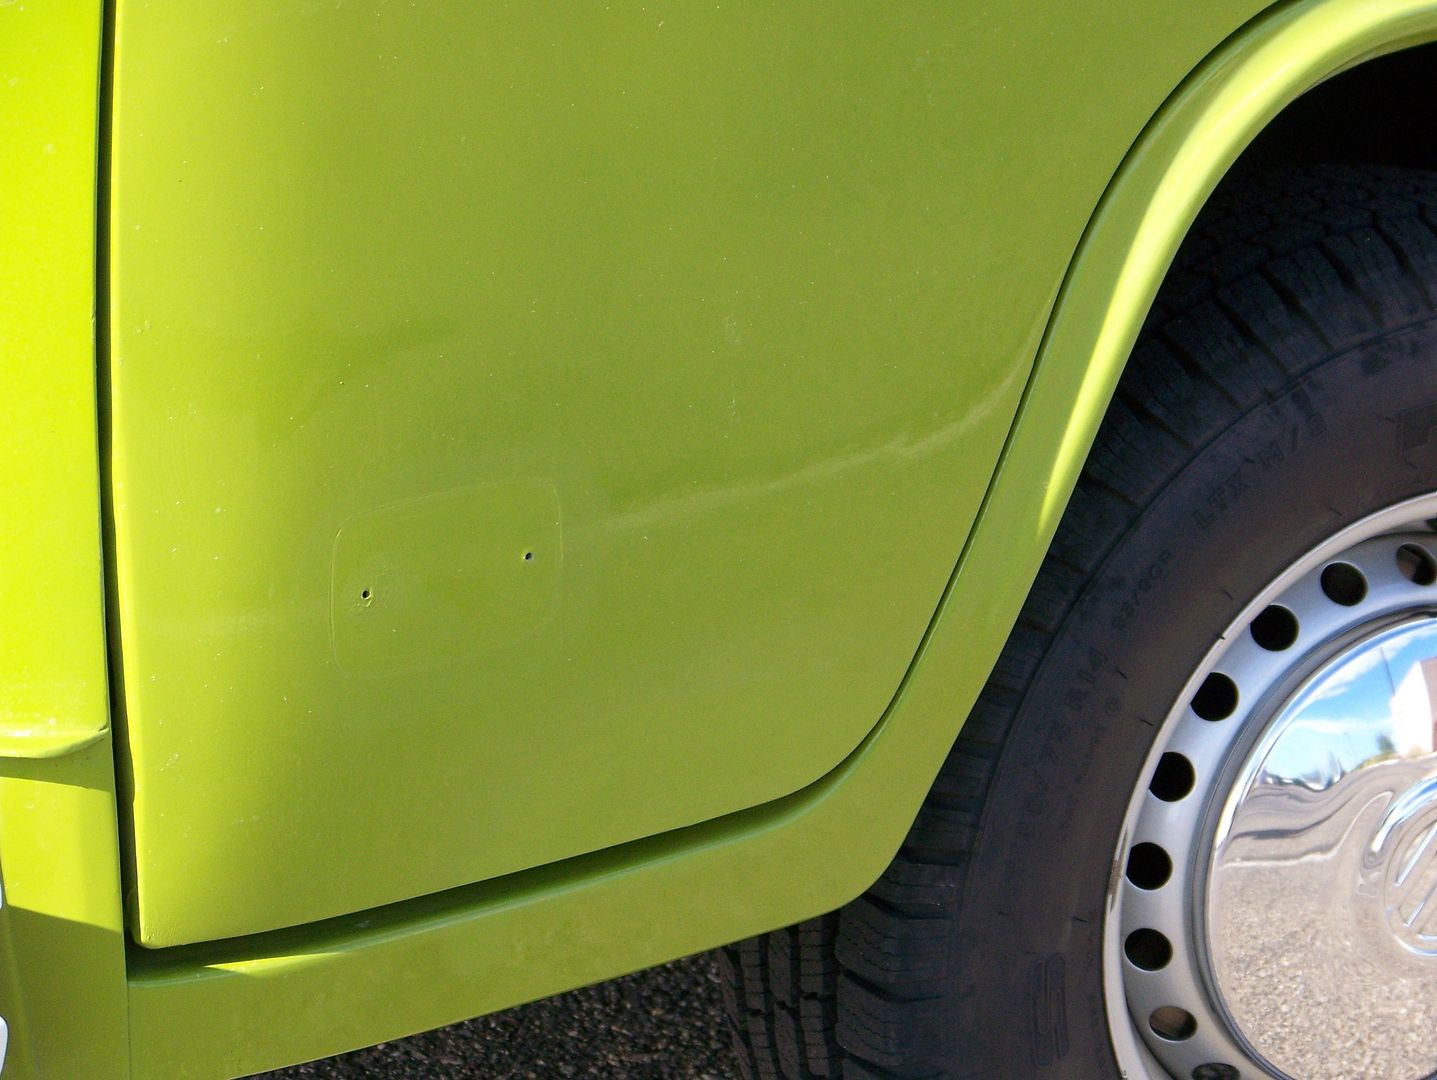
Look how the color changes to a harsher yellow in the light. With the sun and clouds weather, it was easy to check shade vs sunlight matching while I still had time to perform small color adjustments:
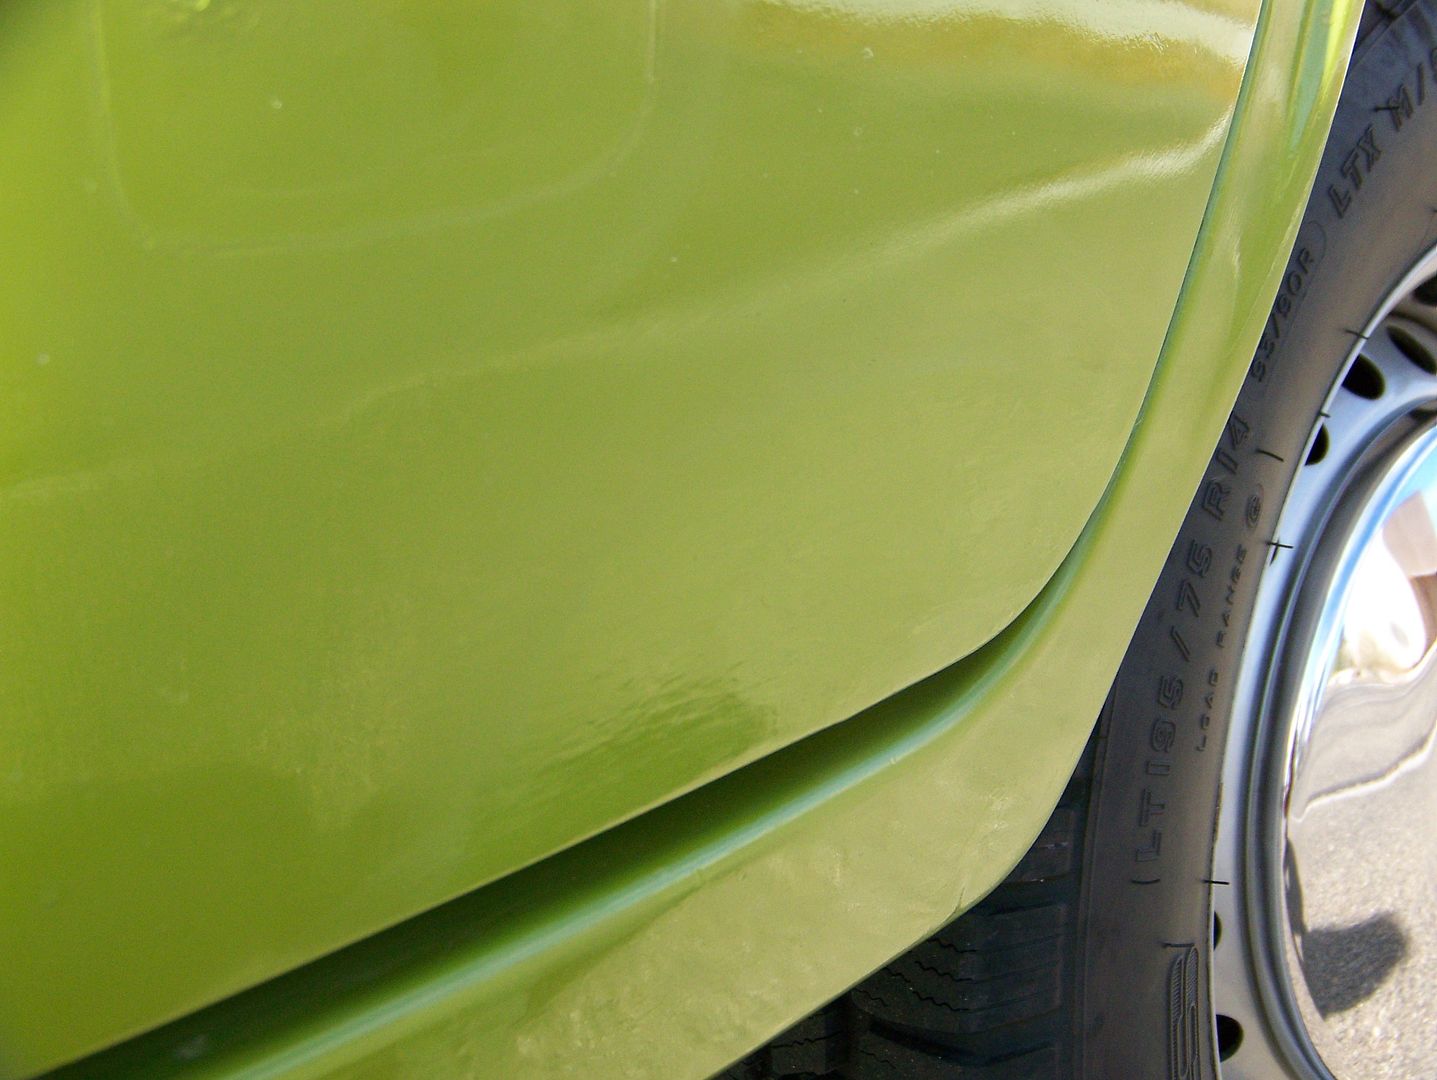
Color changes again in the later afternoon, if you stare intently at the bottom part, you can see the brush strokes that I will color sand down a week or so:
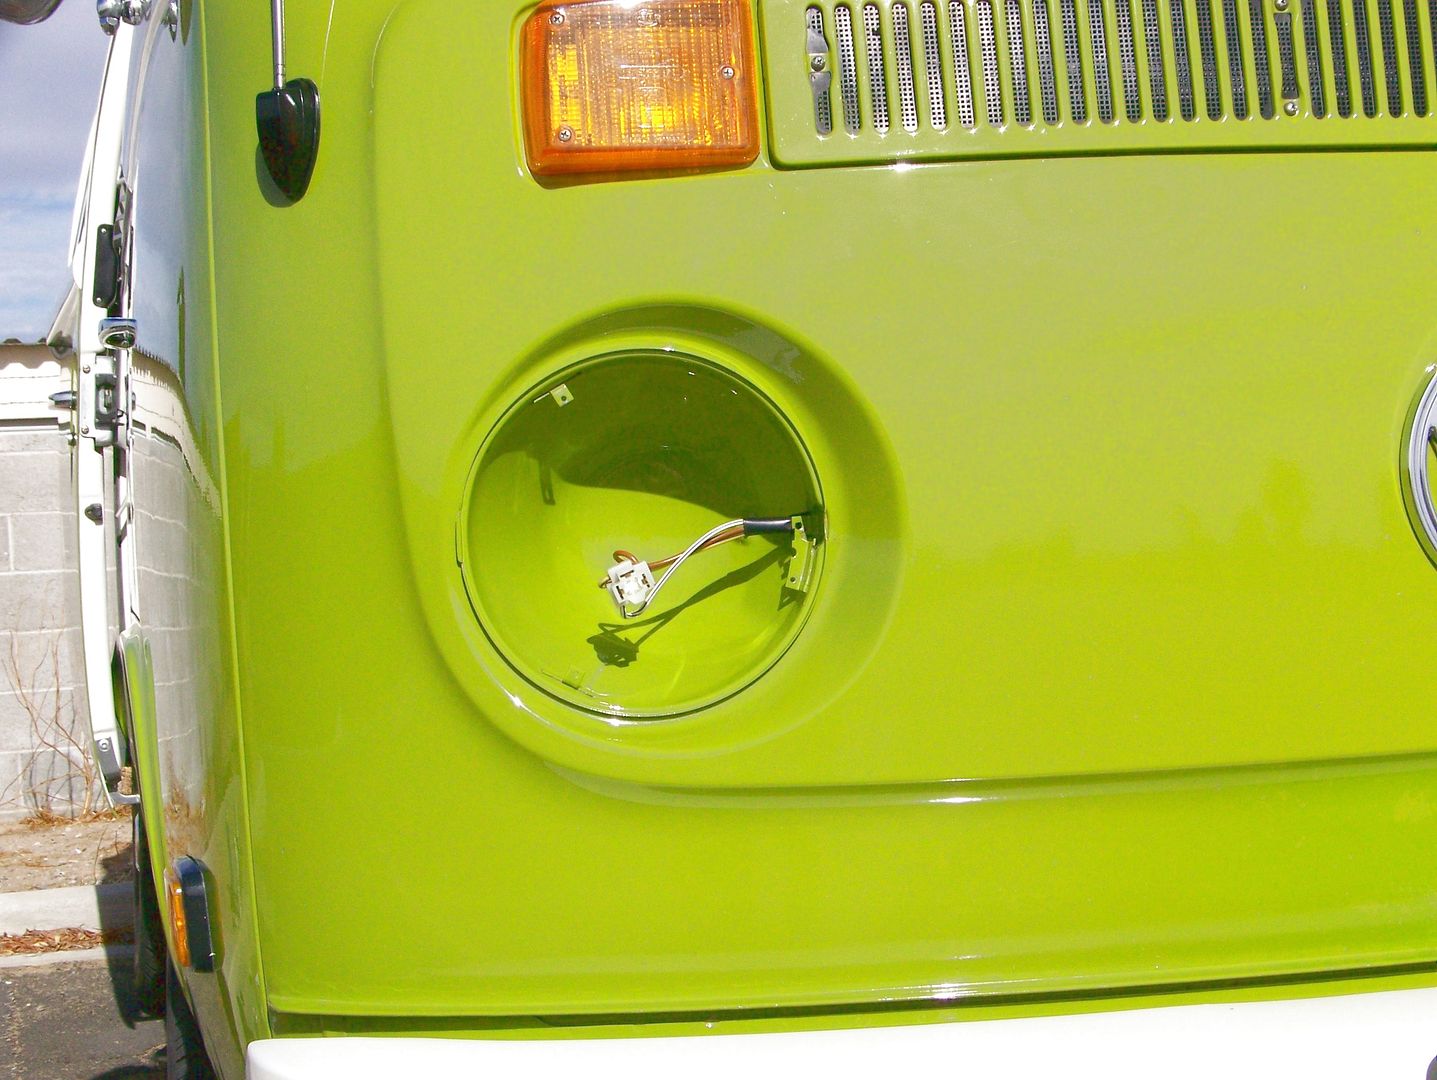
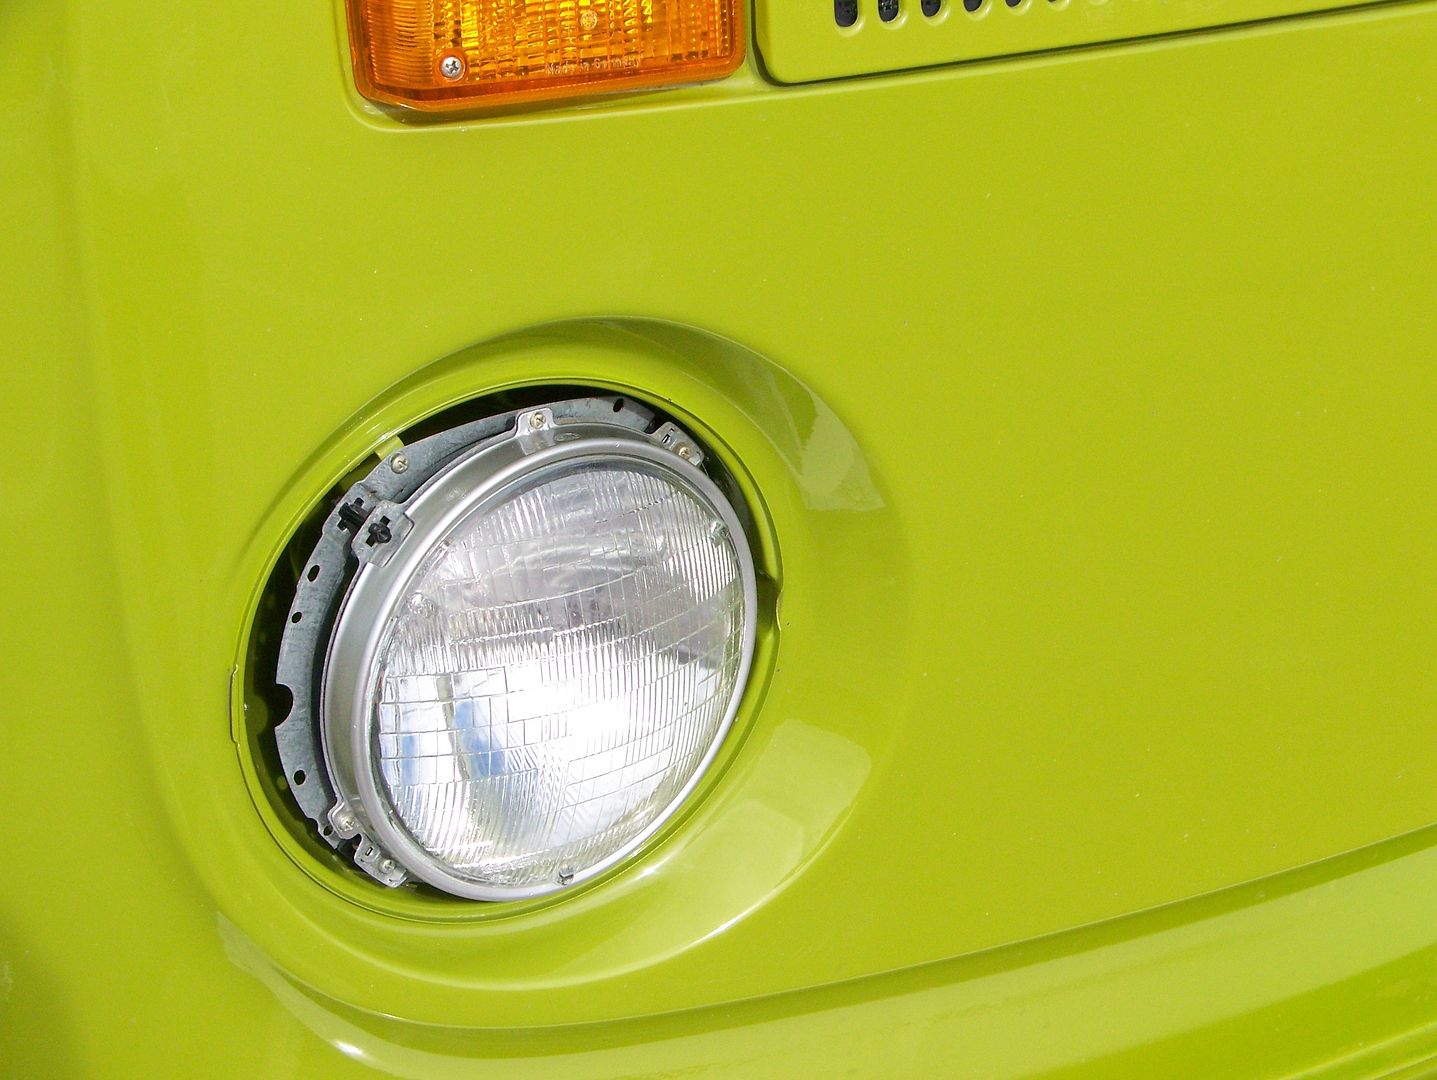
While waiting for spot putty and various paint stages to dry, I disassembled the headlamps for no better reason than to wax the insides of the headlamp buckets and . . .
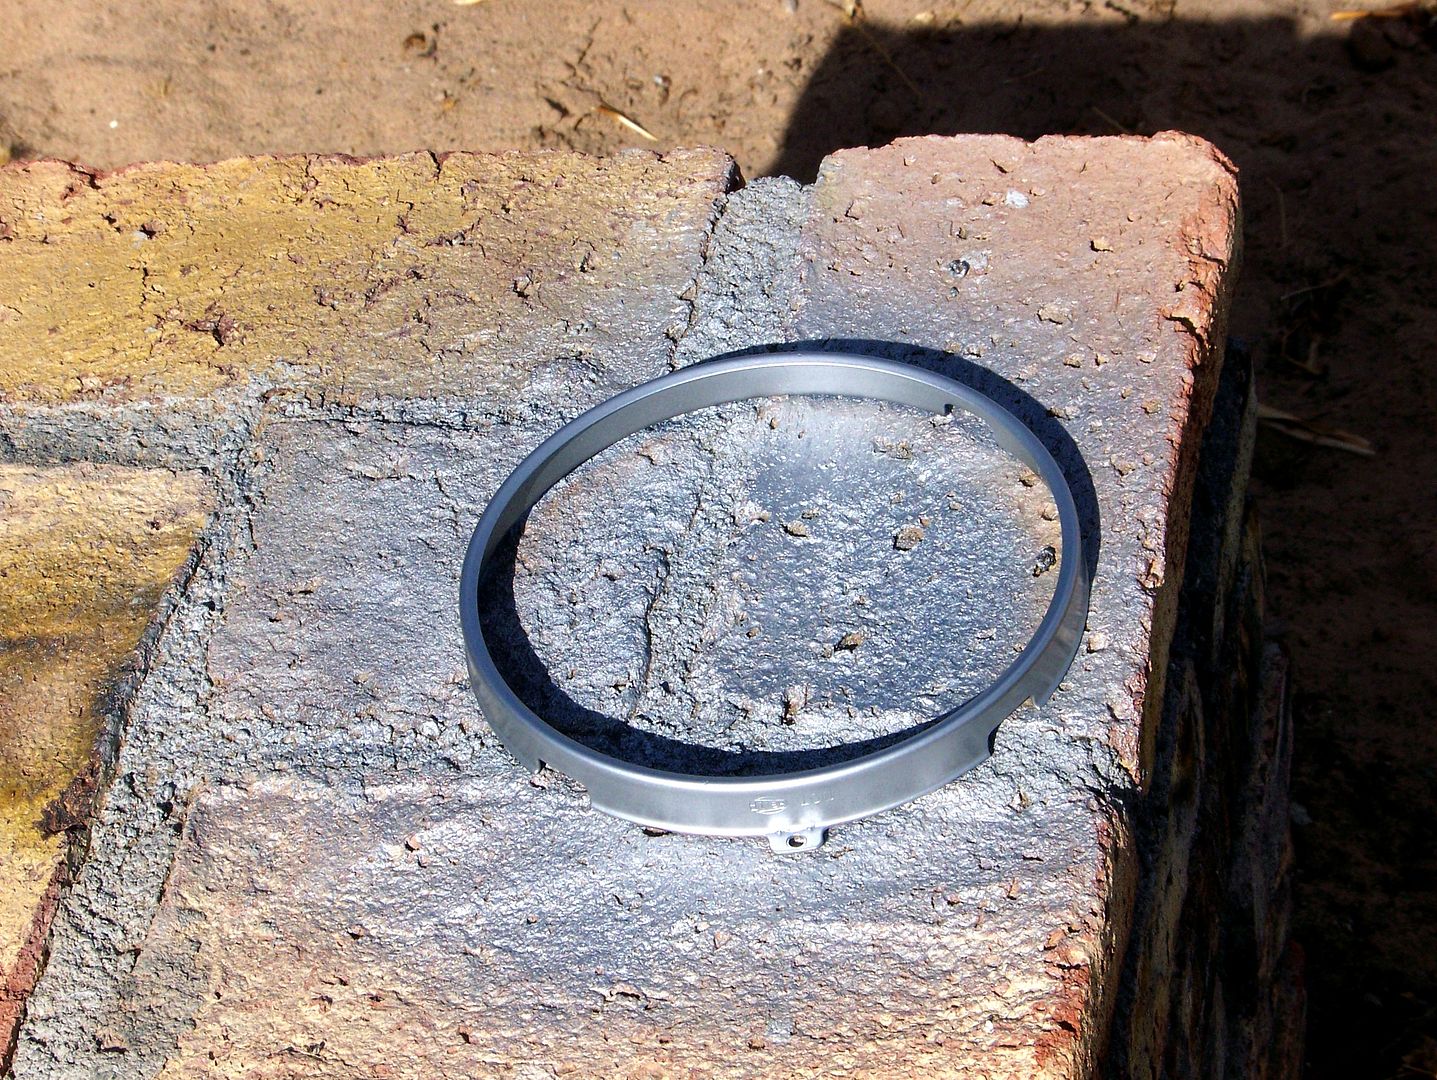
. . . primarily I wanted to repaint the headlamp retaining rings which, on my better-crafted Road Warrior, were polished stainless steel:
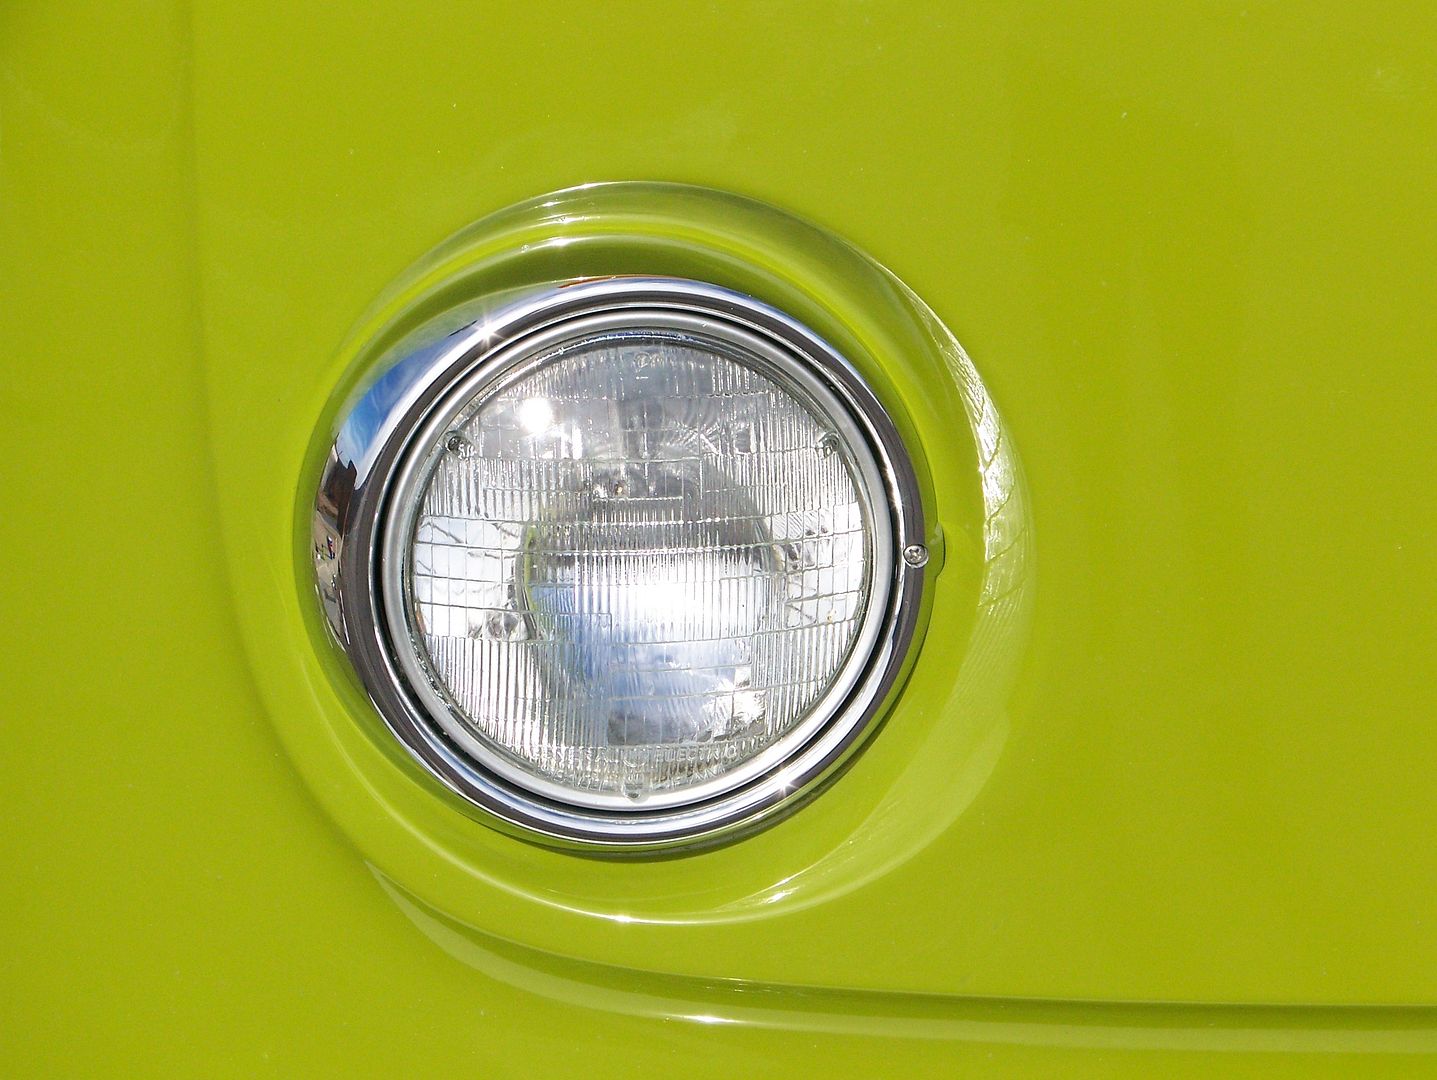
A subtle, but important, appearance upgrade:
Here's the completed result:
And if you have paint in hand, you must freshen the footwells. I clean all the old glue off, and touch up the inevitable rust along the seam that runs under the middle of the step pad with rust-catalyzing primer. I install those pads with no glue no way. Let the water drain and dry as quickly as possible I say:
I have a pile-up of photographs and articles to post, but I can barely handle the incessant Starbucks noise.
Colin
The three new cans had a lousy match too.
Here's the thing, you have seen photographs of the BobD where it changes color in the sun. It does. It goes wild yellow. Then, in the shade, it is a stately dark green with greys and a touch of red. It is a complex color!
So Pedro had matched the paint almost decently in the shade, but it kept drying too dark! As have all other attempts ever, to touch up this car. I think it was because the yellow component is just too wild when wet.
I came up with a plan. I got the formula, and asked to purchase a small quantity of the lacking primary colors in the formula. Chrome yellow DM 530, and yellow green DM504. And I mixed that paint myself in the cap of the errant spray can results.
Nailed it! In all lighting conditions! Touched up the left side of the car before the paint dried out in the cap.
Got so excited, I tore into the driver's door dent + hole where some wingnut "body man" had drilled huge pull out holes under the reflector. Here is the picture I sent to Willy one month after buying the BobD. Just add a hole in there, and that is what it looked like this morning:
One of the holes had lost its bondo plug, and that! we shall up with which not put.
Sorry I did not make a procedure of it, but it was mostly sanding and spot putty build-up and more sanding and and brush-on primer with more sanding:
Here, I am halfway up brushing the paint on quickly and lightly with a prang watercolor paint brush (way too stupid small for this project)
Here it is fully painted with two brush coats + under where the reflector had eaten into the paint because the aforementioned prior wingnut forgot to use the rubber reflector base-to-body seal so the housing came in too close and ate the paint:
Look how the color changes to a harsher yellow in the light. With the sun and clouds weather, it was easy to check shade vs sunlight matching while I still had time to perform small color adjustments:
Color changes again in the later afternoon, if you stare intently at the bottom part, you can see the brush strokes that I will color sand down a week or so:
While waiting for spot putty and various paint stages to dry, I disassembled the headlamps for no better reason than to wax the insides of the headlamp buckets and . . .
. . . primarily I wanted to repaint the headlamp retaining rings which, on my better-crafted Road Warrior, were polished stainless steel:
A subtle, but important, appearance upgrade:
Here's the completed result:
And if you have paint in hand, you must freshen the footwells. I clean all the old glue off, and touch up the inevitable rust along the seam that runs under the middle of the step pad with rust-catalyzing primer. I install those pads with no glue no way. Let the water drain and dry as quickly as possible I say:
I have a pile-up of photographs and articles to post, but I can barely handle the incessant Starbucks noise.
Colin