Center Pin Bushings II
Posted: Thu Nov 15, 2007 2:49 pm
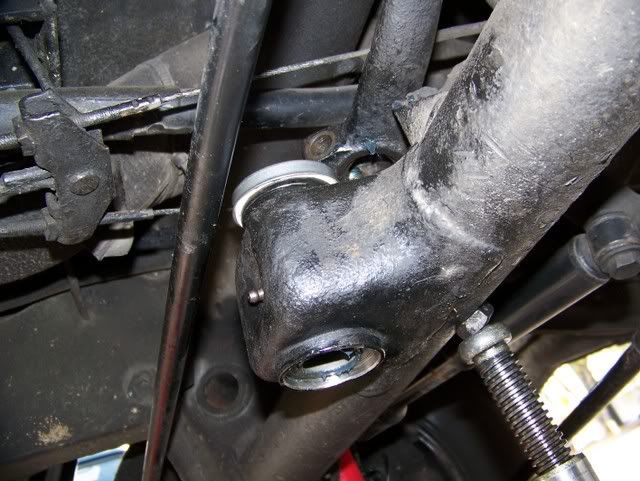
We're at maximum disassembly which is just another word for "start cleaning." Clean the center pin bore in the front beam with particular attention to the grease fitting hole. Look up the bore to see if your driver nicked the bore. You can dress any gouges with a light pass with a small round file. Clean again. And again. Clean the relay lever hole where the thin metal and little plastic washer go. There is a slot in the relay lever. This slot allows it to clamp the center pin as you tighten the 19mm bolt. Clean the slot.
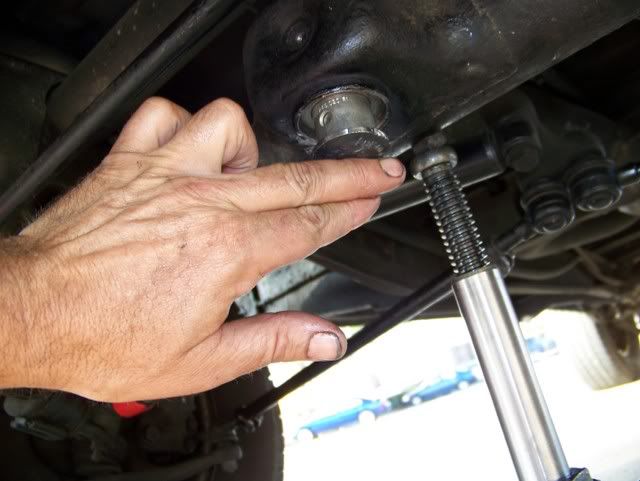
Have your grease gun ready and a tub of your favorite Valvoline DuraBlend semi-synthetic molybdenum disulfide grease and some paper towels. Lay out the parts in your new bushing kit. Grab a new bushing out the kit and slip it over your freshly cleaned old center pin/driver. Won't go on easily? Did the upper end get mushroomed by all of your hammering? The chamfer I recommended prevents this. . . . go chamfer it so it has a 1/4" 45* bevel around the top edge and the new bushing cleanly slips on. Install the pin as it would normally go, with the new bushing sitting on the small shoulder down at the bottom end. Orient the oil hole facing forward:
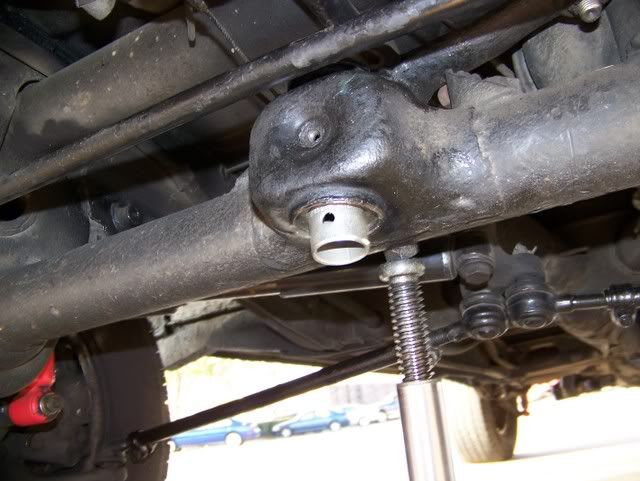
Tap the pin/driver up until the bushing starts squarely in the hole:
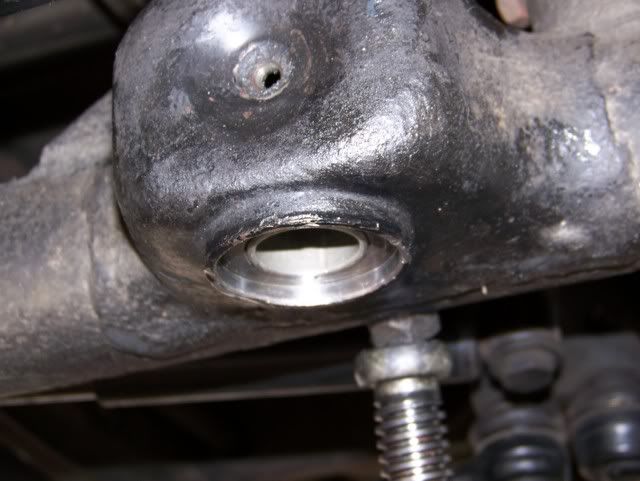
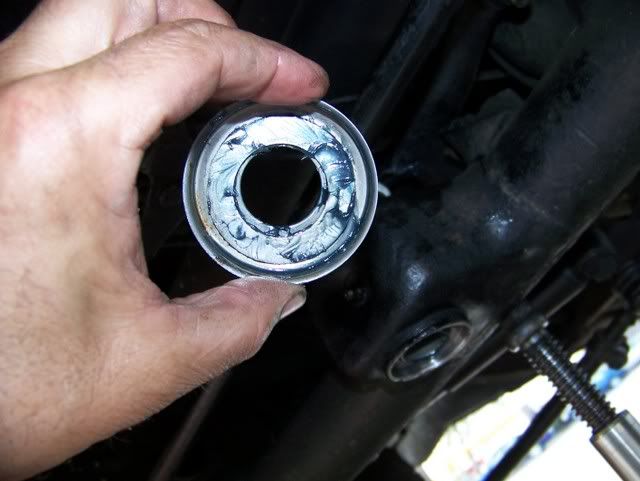
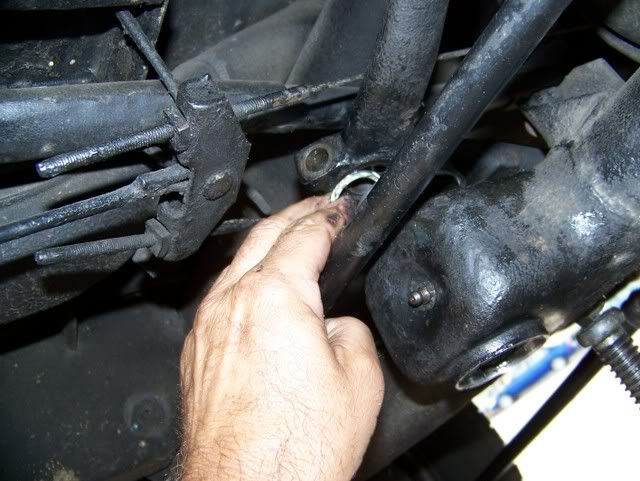
Once the bushing is started and well into the hole, slip the old pin out and turn it over so you can drive the bushing up to the top of the bore. You have to place a finger up there to monitor the action. Pretend that this photograph is actually the top of the bore. You need the bushing to stick out the top 1mm. No more. . . . no less [this protrusion centers the plastic (Meyle) or metal (Febi) broad thrust washer]. Now we have to get the lower bushing started into the hole. Slip the new bushing onto the pin/driver and insert it up the bore until the bushing is ready to be started squarely. Just a couple of taps to get it going. You don't want to get the pin/driver stuck in the hole. Drive this bushing up until it is flush with the bottom of the bore:
Now clean everything again (driving bushings can leave metal particles)
Install the big plastic seal on the top of the bore. Meyles are easy and flexible, Febis use a PIA harder plastic. The "groove" faces down. Now get the broad thrust washer and grease it and stick it inside the metal cap:
The metal cap-with-thrust-washer now goes over your just-installed sealing ring atop the bore. The Meyle sealing rings sort of try to ooze the metal cap off because of flexible material, the Febis click right on:
Insert the thin metal ring inside the relay lever hole, use grease to make it stay if it wants to fall out, follow with the little plastic ring:
Now turn the steering coupler towards a right turn and you will see the relay lever magically glide back over the bore. Then the plastic ring falls out of the relay lever. Maybe not, but if it does, stick it back into the relay lever temporarily and let the center pin guide it back into its hole during final assembly. You first must grease the hole with the new bushings and fill the void between the bushings. Grease the new even more serious wavy washer and new center pin. Note that the center pin has a cut-out for the 19mm bolt. You have got to align this cut-out with the relay lever bolt hole before you drive the new center pin up. Drive the new center pin up until it just starts to bang the new metal cap at the top of the bore right off the plastic sealing ring. Hold the metal cap down and tap the center pin up just enough to get through the metal cap at the top. If your little plastic ring keeps falling out of the relay lever, just stick on the newly protruding center pin throught the metal cap. Now you will have to futz a bit with the steering coupler/front wheel position/relay lever position as you get the new center pin through the relay lever. Re-c-clamp the relay lever and the bottom of the new center pin. You will see the wavy washer get flattened as the c-clamp drives the center pin up against the bottom of the hole:
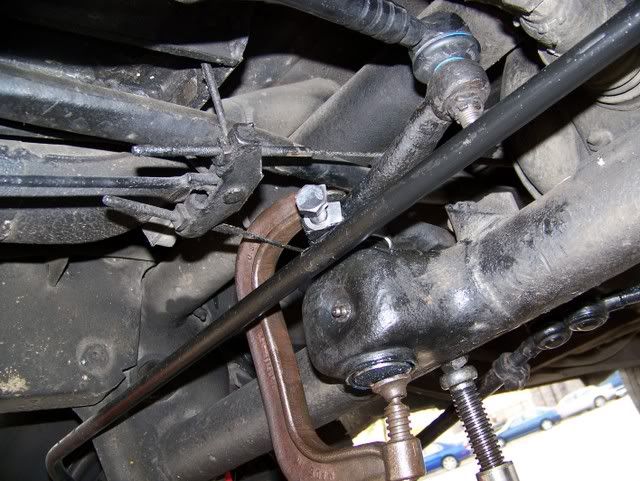
The nicely cleaned slot in the relay lever will help you visualize and align the cut out in the center pin so that the 19mm bolt-with-new-tab-washer can make it through the relay lever without stripping. It should go in easily and start threading with no drama. You may have to adjust the c-clamp and you may have to adjust the relay lever in relation to the center pin. A pair of visegrips on the head of the pin and your hand on the steering coupler to turn this way or that will help you get the alignment. Use a flashlight to see into the slot if necessary:
Tighten the 19mm bolt as you hold the tabbed washer with the small tab against the relay lever and the longer tab sticking straight up. It will lock into position as you tighten the 19mm bolt. The c-clamp can be released once the bolt is tight, you should not see the head of the center pin drop down as you release the c-clamp. If it does, re-c-clamp, loosen the 19mm bolt, make sure the c-clamp is on the relay lever only at the top, squish the wavy washer as you tighten the c-clamp, get the 19mm bolt secure, then un clamp. See, people think the cut-out in the center pin "holds" the relay lever on the center pin, but they'd be wrong. It is only a safety back-up. The relay lever grips the center pin where you say it should. I say, make sure the 19mm bolt is unfettered by contact with the cut-out in the center pin. Tap the tab down over the bolt flat. Bang a little lock action by tapping the tab over the front of the bolt. Install the grease fitting. Lubricate the new center pin whilst moving the wheels left-to-right. Grease will squirt down around the wavy washer/head of the center pin. So put the new grease cap on now. Tap it on so delicately that no dents occur. A couple of more pumps with the grease gun to fill the cap and squirt out the weep hole with no air bubbles, and the greasy part is over:
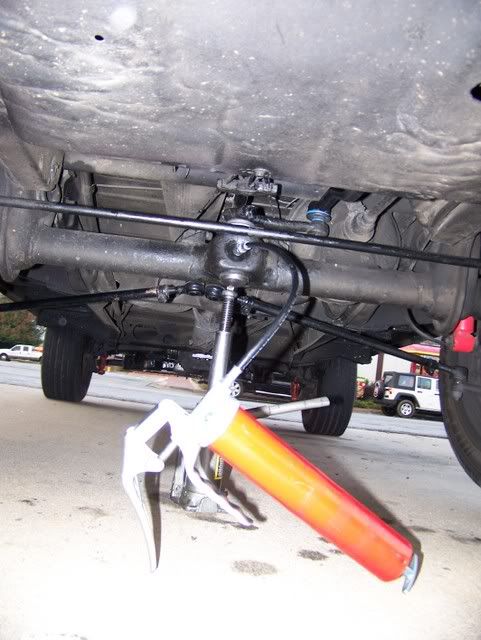
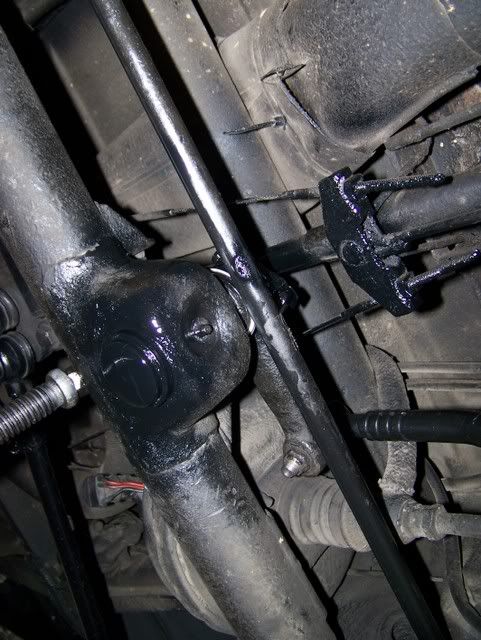
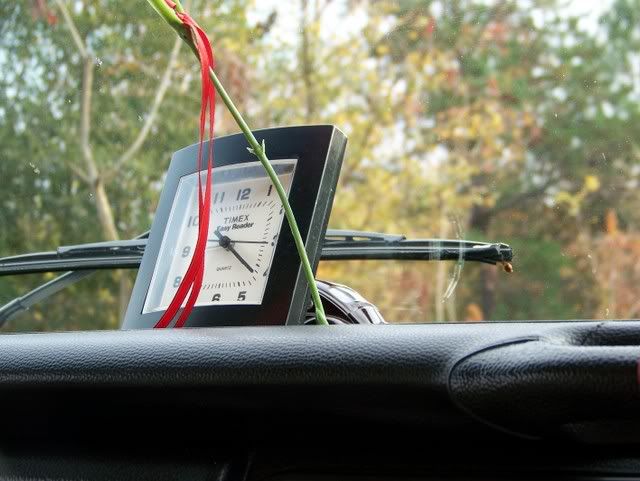
If this is an Itinerant Air-Cooled sort of restorative job, wax the Konis and paint the cap and relay lever bolt/tab washer and catch the fronts of the tie rods. Lower the car and check the clock:
57 minutes (only because I had been down here so recently):
Have your grease gun ready and a tub of your favorite Valvoline DuraBlend semi-synthetic molybdenum disulfide grease and some paper towels. Lay out the parts in your new bushing kit. Grab a new bushing out the kit and slip it over your freshly cleaned old center pin/driver. Won't go on easily? Did the upper end get mushroomed by all of your hammering? The chamfer I recommended prevents this. . . . go chamfer it so it has a 1/4" 45* bevel around the top edge and the new bushing cleanly slips on. Install the pin as it would normally go, with the new bushing sitting on the small shoulder down at the bottom end. Orient the oil hole facing forward:
Tap the pin/driver up until the bushing starts squarely in the hole:
Once the bushing is started and well into the hole, slip the old pin out and turn it over so you can drive the bushing up to the top of the bore. You have to place a finger up there to monitor the action. Pretend that this photograph is actually the top of the bore. You need the bushing to stick out the top 1mm. No more. . . . no less [this protrusion centers the plastic (Meyle) or metal (Febi) broad thrust washer]. Now we have to get the lower bushing started into the hole. Slip the new bushing onto the pin/driver and insert it up the bore until the bushing is ready to be started squarely. Just a couple of taps to get it going. You don't want to get the pin/driver stuck in the hole. Drive this bushing up until it is flush with the bottom of the bore:
Now clean everything again (driving bushings can leave metal particles)
Install the big plastic seal on the top of the bore. Meyles are easy and flexible, Febis use a PIA harder plastic. The "groove" faces down. Now get the broad thrust washer and grease it and stick it inside the metal cap:
The metal cap-with-thrust-washer now goes over your just-installed sealing ring atop the bore. The Meyle sealing rings sort of try to ooze the metal cap off because of flexible material, the Febis click right on:
Insert the thin metal ring inside the relay lever hole, use grease to make it stay if it wants to fall out, follow with the little plastic ring:
Now turn the steering coupler towards a right turn and you will see the relay lever magically glide back over the bore. Then the plastic ring falls out of the relay lever. Maybe not, but if it does, stick it back into the relay lever temporarily and let the center pin guide it back into its hole during final assembly. You first must grease the hole with the new bushings and fill the void between the bushings. Grease the new even more serious wavy washer and new center pin. Note that the center pin has a cut-out for the 19mm bolt. You have got to align this cut-out with the relay lever bolt hole before you drive the new center pin up. Drive the new center pin up until it just starts to bang the new metal cap at the top of the bore right off the plastic sealing ring. Hold the metal cap down and tap the center pin up just enough to get through the metal cap at the top. If your little plastic ring keeps falling out of the relay lever, just stick on the newly protruding center pin throught the metal cap. Now you will have to futz a bit with the steering coupler/front wheel position/relay lever position as you get the new center pin through the relay lever. Re-c-clamp the relay lever and the bottom of the new center pin. You will see the wavy washer get flattened as the c-clamp drives the center pin up against the bottom of the hole:
The nicely cleaned slot in the relay lever will help you visualize and align the cut out in the center pin so that the 19mm bolt-with-new-tab-washer can make it through the relay lever without stripping. It should go in easily and start threading with no drama. You may have to adjust the c-clamp and you may have to adjust the relay lever in relation to the center pin. A pair of visegrips on the head of the pin and your hand on the steering coupler to turn this way or that will help you get the alignment. Use a flashlight to see into the slot if necessary:
Tighten the 19mm bolt as you hold the tabbed washer with the small tab against the relay lever and the longer tab sticking straight up. It will lock into position as you tighten the 19mm bolt. The c-clamp can be released once the bolt is tight, you should not see the head of the center pin drop down as you release the c-clamp. If it does, re-c-clamp, loosen the 19mm bolt, make sure the c-clamp is on the relay lever only at the top, squish the wavy washer as you tighten the c-clamp, get the 19mm bolt secure, then un clamp. See, people think the cut-out in the center pin "holds" the relay lever on the center pin, but they'd be wrong. It is only a safety back-up. The relay lever grips the center pin where you say it should. I say, make sure the 19mm bolt is unfettered by contact with the cut-out in the center pin. Tap the tab down over the bolt flat. Bang a little lock action by tapping the tab over the front of the bolt. Install the grease fitting. Lubricate the new center pin whilst moving the wheels left-to-right. Grease will squirt down around the wavy washer/head of the center pin. So put the new grease cap on now. Tap it on so delicately that no dents occur. A couple of more pumps with the grease gun to fill the cap and squirt out the weep hole with no air bubbles, and the greasy part is over:
If this is an Itinerant Air-Cooled sort of restorative job, wax the Konis and paint the cap and relay lever bolt/tab washer and catch the fronts of the tie rods. Lower the car and check the clock:
57 minutes (only because I had been down here so recently):