Center Pin Bushings I
Posted: Thu Nov 15, 2007 1:16 pm
First, drive down the road on a windy day and get annoyed with the vague steering. Curse the sloppy new Meyle bushing kit with barely seven months on it. Find a McDonalds parking lot next to where the trucks keeping blowing by to the Flying J truck stop. Notice that the wind is picking up and the temperatures are dropping. Perfect. Let's do our bushings!
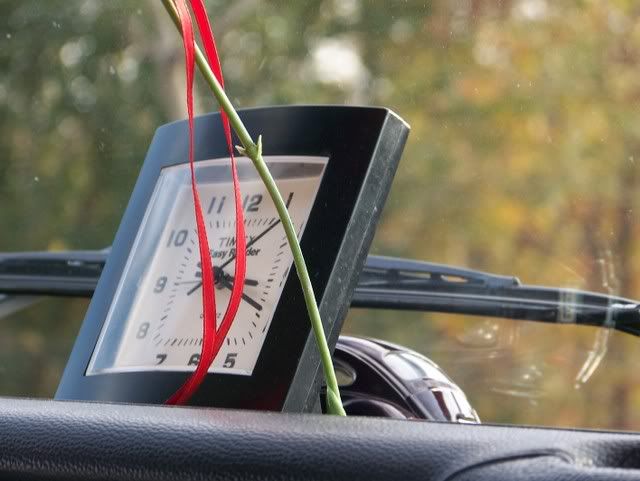
It is 3:20 PM in Toccoa, Georgia:
Set e brake if yours works well, set ebrake and chock rear tire if your ebrake is questionable.
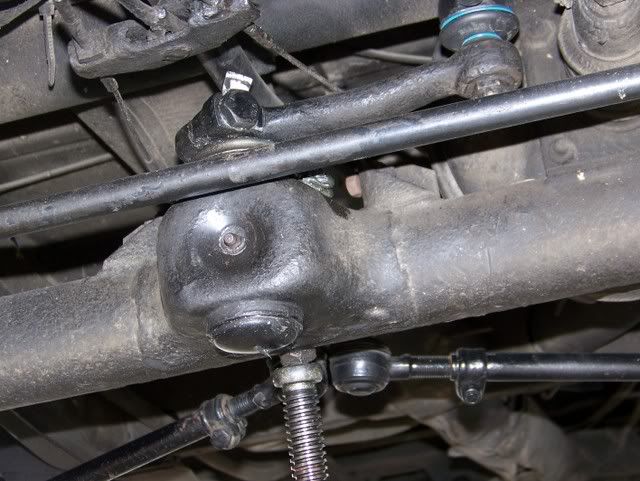
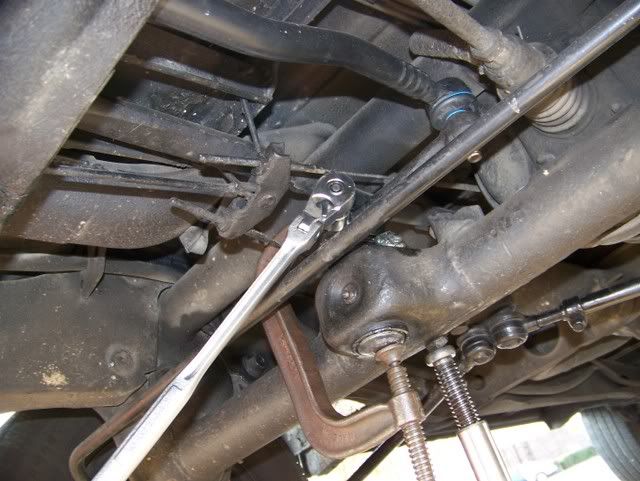
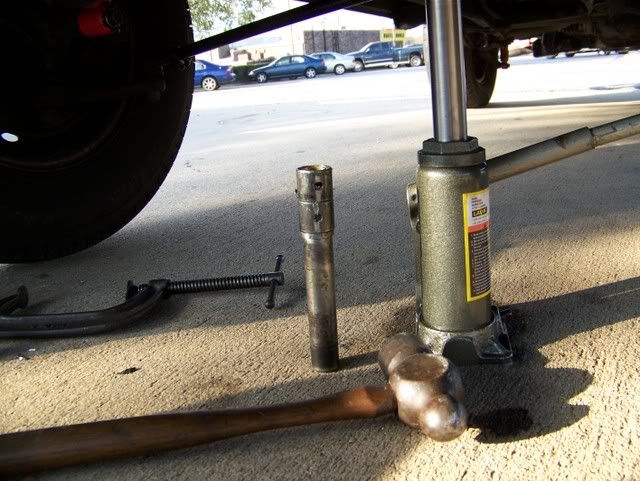
Jack up the entire front of the car at the center of the front beam (I use the torsion leaves locknut and a bottle jack on full extension) as far as you can, so you can get a decent swing with the hammer. Please note that your front wheels are still on and there is plenty of room under the car, so don't get too excited about getting squished. Atop the center of the upper beam is the relay lever. There is a 19mm bolt locked with a tabbed washer. Pry the tab away from the flats of the bolt. :
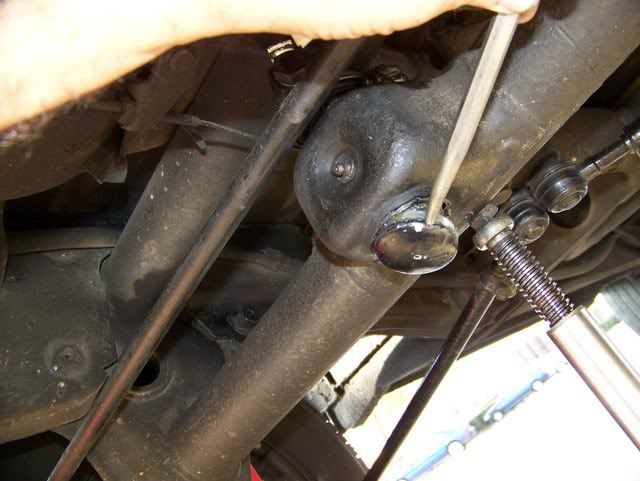
Pop the center pin cap off. I use a pointed chisel and a hammer:
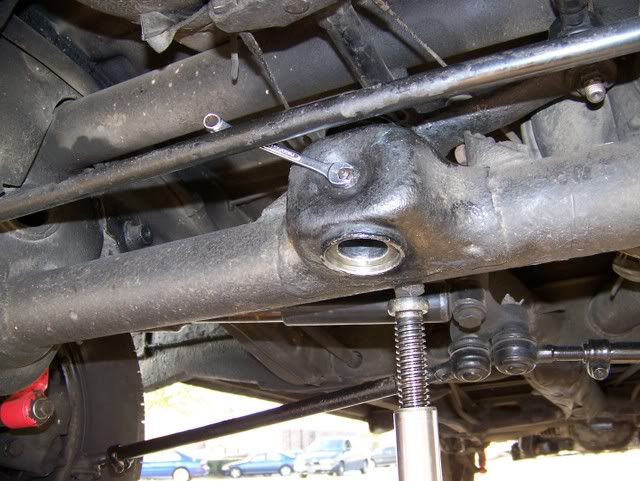
Get your 7mm wrench and remove the grease fitting:
Install a large c-clamp from the right side of the vehicle over the ebrake cable and position it so the lower part of the c-clamp is offset to the left of the center of the center pin and the upper part is grabbing only the relay lever edge. You do not want to crank down on the top of the center pin itself, because that is a waste of your effort. We just need to compress the wavy washer under the center pin so that our 19mm bolt is relieved of any pull.

Loosen the 19mm bolt. It should be a fairly easy loosen. If it is sticky, renegotiate the c-clamp a bit and tighten more or less to get the bolt rotating as freely as possible. Remove bolt and locking tab.
Give the steering coupler (the square rubber deal with the flanges bolted to it) on top of the steering box a wiggle back and forth while you bang up on the rear of the drag link that connects the steering box to the relay lever. It will tilt and slide up a bit. Bang up on the two center tie rods as well if it is being recalcitrant. It will lift off the center pin. If yours is as loose as my nice new Meyle one was, it will unceremoniously drop upon your nose:

Now turn the steering coupler as though you were making a left turn. That makes the drag link move rearward. Pull the left front tire as though you are making a right turn. The relay lever will quite magically glide back and away from the front beam.
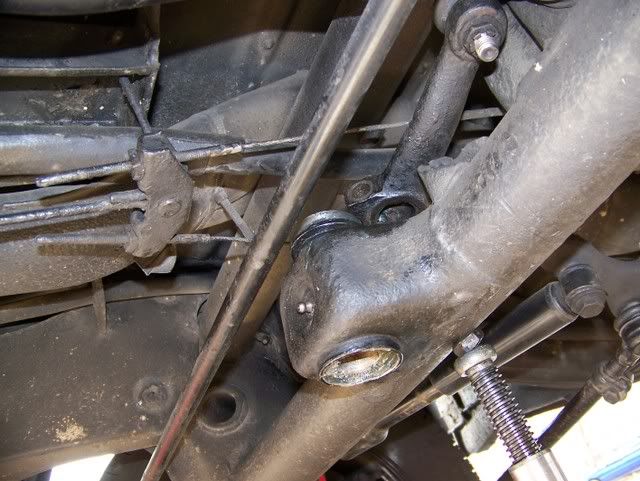
Look up! There is a plastic washer and a thin little metal washer crammed up in the relay lever hole. The plastic washer may have sprung loose, the thin metal washer, you usually have to pry out of the relay lever.
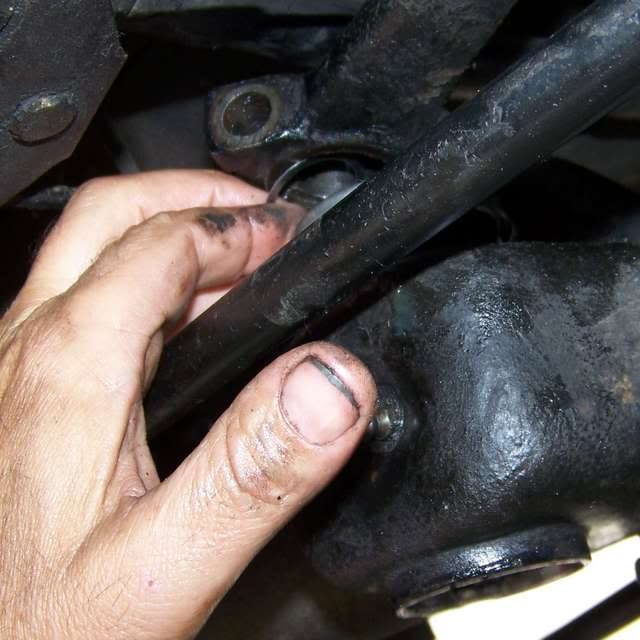
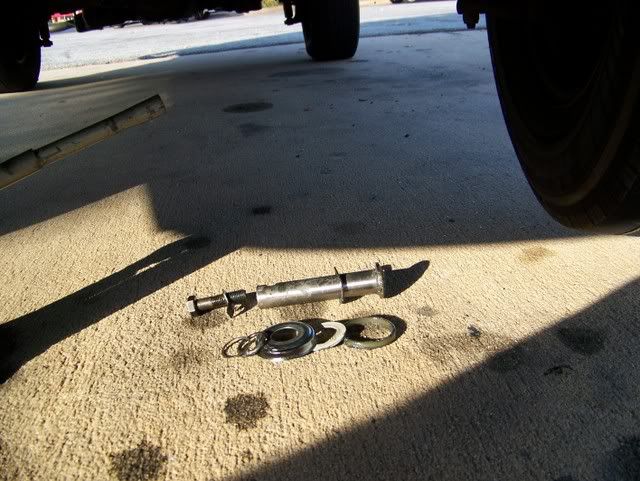
On the top of the beam is a larger metal cap which you need to pry off. Under the metal cap is a plastic sealing ring fitted to the beam itself. Also under the metal cap is a broad thrust washer, plastic in the Meyle kit, metal in the Febi kit. Here are the parts laid out at the maximum disassembly point. In the back are the 19mm bolt with the tabbed washer and the center pin with the very serious wavy washer. In the front, aligned left-to-right from top-to-bottom:
a) thin washer inside relay lever
b) plastic washer inside relay lever
c) metal cap on top of front beam hole
d) plastic broad thrust washer
e) plastic sealing ring that goes on front beam hole
A very fine driver to bash the bushings out is your old center pin ground down to precisely the same diameter as your bushings. First, make it flat across the bottom but don't grind down past the edge shoulder, just get rid of the convex. Once flat, stick a new bushing on the newly flat bottom of the old center pin. Make it equidistant all around the perimeter. Get a sharpie marker and color in the excess pin sticking out past the outside of the new bushing. Go grind it off carefully. Make it round and pretty. Also, grind a chamfer at the what used to be the top of the pin, where the relay lever fit on it. Now get under the bus and put the old center pin in, oriented as it was originally installed. Whack it hard straight up. Once. Check to see if the pin sticks in the hole. If your old center pin's periphery was not ground sufficiently, it will stick in the hole. Pop it out by tapping down from the top. Grind it down a little more where contact mark occurred. A couple of whacks should make the lower bushing in the hole jump upwards a millimeter or so. This is to give us a little bit of pilot centering for our new "driver." If all is well, the pin/driver will fall right back out after you have tapped the lower bushing upwards a millimeter or two. Now turn the center pin over so you are butting the bushing with what used to be the bottom of the pin and the body of the pin is now facing down in harm's way of the hammer. The pin should be piloted by the little bit of space we created with that first hit. The bushing will move up a little bit with each hit, enough to convince you that this is an easy enough job, what were those whinebabies mewling about? When the lower bushing hits the upper bushing, that's when you better have had your Wheaties. Keep hitting until you hear the upper bushing clatter out. Now it gets easier again so be alert and get the lower bushing out. This photograph shows my old old center pin/driver with the bushings stacked up on top of it:
End O Part I
It is 3:20 PM in Toccoa, Georgia:
Set e brake if yours works well, set ebrake and chock rear tire if your ebrake is questionable.
Jack up the entire front of the car at the center of the front beam (I use the torsion leaves locknut and a bottle jack on full extension) as far as you can, so you can get a decent swing with the hammer. Please note that your front wheels are still on and there is plenty of room under the car, so don't get too excited about getting squished. Atop the center of the upper beam is the relay lever. There is a 19mm bolt locked with a tabbed washer. Pry the tab away from the flats of the bolt. :
Pop the center pin cap off. I use a pointed chisel and a hammer:
Get your 7mm wrench and remove the grease fitting:
Install a large c-clamp from the right side of the vehicle over the ebrake cable and position it so the lower part of the c-clamp is offset to the left of the center of the center pin and the upper part is grabbing only the relay lever edge. You do not want to crank down on the top of the center pin itself, because that is a waste of your effort. We just need to compress the wavy washer under the center pin so that our 19mm bolt is relieved of any pull.
Loosen the 19mm bolt. It should be a fairly easy loosen. If it is sticky, renegotiate the c-clamp a bit and tighten more or less to get the bolt rotating as freely as possible. Remove bolt and locking tab.
Give the steering coupler (the square rubber deal with the flanges bolted to it) on top of the steering box a wiggle back and forth while you bang up on the rear of the drag link that connects the steering box to the relay lever. It will tilt and slide up a bit. Bang up on the two center tie rods as well if it is being recalcitrant. It will lift off the center pin. If yours is as loose as my nice new Meyle one was, it will unceremoniously drop upon your nose:
Now turn the steering coupler as though you were making a left turn. That makes the drag link move rearward. Pull the left front tire as though you are making a right turn. The relay lever will quite magically glide back and away from the front beam.
Look up! There is a plastic washer and a thin little metal washer crammed up in the relay lever hole. The plastic washer may have sprung loose, the thin metal washer, you usually have to pry out of the relay lever.
On the top of the beam is a larger metal cap which you need to pry off. Under the metal cap is a plastic sealing ring fitted to the beam itself. Also under the metal cap is a broad thrust washer, plastic in the Meyle kit, metal in the Febi kit. Here are the parts laid out at the maximum disassembly point. In the back are the 19mm bolt with the tabbed washer and the center pin with the very serious wavy washer. In the front, aligned left-to-right from top-to-bottom:
a) thin washer inside relay lever
b) plastic washer inside relay lever
c) metal cap on top of front beam hole
d) plastic broad thrust washer
e) plastic sealing ring that goes on front beam hole
A very fine driver to bash the bushings out is your old center pin ground down to precisely the same diameter as your bushings. First, make it flat across the bottom but don't grind down past the edge shoulder, just get rid of the convex. Once flat, stick a new bushing on the newly flat bottom of the old center pin. Make it equidistant all around the perimeter. Get a sharpie marker and color in the excess pin sticking out past the outside of the new bushing. Go grind it off carefully. Make it round and pretty. Also, grind a chamfer at the what used to be the top of the pin, where the relay lever fit on it. Now get under the bus and put the old center pin in, oriented as it was originally installed. Whack it hard straight up. Once. Check to see if the pin sticks in the hole. If your old center pin's periphery was not ground sufficiently, it will stick in the hole. Pop it out by tapping down from the top. Grind it down a little more where contact mark occurred. A couple of whacks should make the lower bushing in the hole jump upwards a millimeter or so. This is to give us a little bit of pilot centering for our new "driver." If all is well, the pin/driver will fall right back out after you have tapped the lower bushing upwards a millimeter or two. Now turn the center pin over so you are butting the bushing with what used to be the bottom of the pin and the body of the pin is now facing down in harm's way of the hammer. The pin should be piloted by the little bit of space we created with that first hit. The bushing will move up a little bit with each hit, enough to convince you that this is an easy enough job, what were those whinebabies mewling about? When the lower bushing hits the upper bushing, that's when you better have had your Wheaties. Keep hitting until you hear the upper bushing clatter out. Now it gets easier again so be alert and get the lower bushing out. This photograph shows my old old center pin/driver with the bushings stacked up on top of it:
End O Part I