'79 Westy Rebuild

Bus, Microbus, Transporter, Station Wagon, Vanagon, Camper, Pick-Up.

Moderators: Sluggo, Amskeptic

Post Reply
User avatar
Vdubtech
IAC Addict!
Location: East Syracuse, NY
Status: Offline

Post by Vdubtech » Fri Jul 03, 2009 7:10 pm

Image
Image
Image
Image
Image
Image

User avatar
Vdubtech
IAC Addict!
Location: East Syracuse, NY
Status: Offline

Post by Vdubtech » Fri Jul 03, 2009 7:10 pm

Image

These are most oif the staples I removed from the tack strips.

Image

User avatar
gmag69
IAC Addict!
Location: Up in smoke man.
Status: Offline

Post by gmag69 » Fri Jul 03, 2009 8:27 pm

Lookin good man. Are your seals new or are you using old ones? What does your front one that seals the top to the luggage rack look like? Mine is nothing like the original and I couldn't get it bent around the top so I just put the old crappy one back on. I'll have to take some pics of it.
Check out my Westy Resto thread. viewtopic.php?t=2063
bretski wrote:...oh, and we just bombed the moon.

User avatar
chitwnvw
Resident Troublemaker
Location: Chicago.
Status: Offline

Post by chitwnvw » Fri Jul 03, 2009 9:26 pm

Is that bus as pristine as it looks? Where'd you get it?...whoa back to page 1 and all my questions answered. Looks porn.

User avatar
Vdubtech
IAC Addict!
Location: East Syracuse, NY
Status: Offline

Post by Vdubtech » Sat Jul 04, 2009 1:58 pm

gmag69 wrote:Lookin good man. Are your seals new or are you using old ones? What does your front one that seals the top to the luggage rack look like? Mine is nothing like the original and I couldn't get it bent around the top so I just put the old crappy one back on. I'll have to take some pics of it.
I actually pulled the seals from the top I took off, they were like new. The pop top to luugage rack seal looks to have been replaced fairly recently, and it was glued in unlike the original. I didn't glue it to the new top yet, I still have to sand and repaint it after I dragged it out of the basement by myself. I'll be getting the canvas buttoned up over the next couple of days and post some pics of the seals.

User avatar
Vdubtech
IAC Addict!
Location: East Syracuse, NY
Status: Offline

Post by Vdubtech » Sun Jul 05, 2009 10:48 pm

Balls. I was bored tonight after sleeping off a hangover all day so I decided to start securing the new canvas to the top. I put the front and back pieces on first and checked putting the top up. The front was ultra tight, but I was able to adjust the height a little bit at the base to give it some extra room. I then started around the corner and down the passenger side. I got the corners notched and the canvas installed to the rear portion of the top bunk and decided to pop the top all the way again and check the fit. It's too tight in an area about a foot long down the passenger side of the top. It started to pull some of the staples out. I'm gonna have to remove the rails I have done do far, roll the top up, and adjust the height of the canvas up there. I probably could get away with leaving it, but I know the first time I'm out with it, proudly displaying my new canvas for all of the campground to admire, and one side completely bursting from the top in a shower of very expensive staples. I'll try to get to it tomorrow, moving and adjusting the length of the area that needs a little more room. Pics to come.

User avatar
Manfred
Old School!
Location: Chicago
Status: Offline

Post by Manfred » Mon Jul 06, 2009 8:14 am

Vdubtech wrote:Balls. I was bored tonight after sleeping off a hangover all day so I decided to start securing the new canvas to the top. I put the front and back pieces on first and checked putting the top up. The front was ultra tight, but I was able to adjust the height a little bit at the base to give it some extra room. I then started around the corner and down the passenger side. I got the corners notched and the canvas installed to the rear portion of the top bunk and decided to pop the top all the way again and check the fit. It's too tight in an area about a foot long down the passenger side of the top. It started to pull some of the staples out. I'm gonna have to remove the rails I have done do far, roll the top up, and adjust the height of the canvas up there. I probably could get away with leaving it, but I know the first time I'm out with it, proudly displaying my new canvas for all of the campground to admire, and one side completely bursting from the top in a shower of very expensive staples. I'll try to get to it tomorrow, moving and adjusting the length of the area that needs a little more room. Pics to come.
That sucks. I need to do the same thing to mine. I was embarrassed at my nasty canvas this weekend. So what do did you paint your backing plates, drums, and spindles with?

User avatar
hambone
Post-Industrial Non-Secular Mennonite
Location: Portland, Ore.
Status: Offline

Post by hambone » Mon Jul 06, 2009 8:42 am

That bus has come a long way in a short time.
http://greencascadia.blogspot.com
http://pdxvolksfolks.blogspot.com
it balances on your head just like a mattress balances on a bottle of wine
your brand new leopard skin pillbox hat

User avatar
Vdubtech
IAC Addict!
Location: East Syracuse, NY
Status: Offline

Post by Vdubtech » Tue Sep 01, 2009 6:37 am

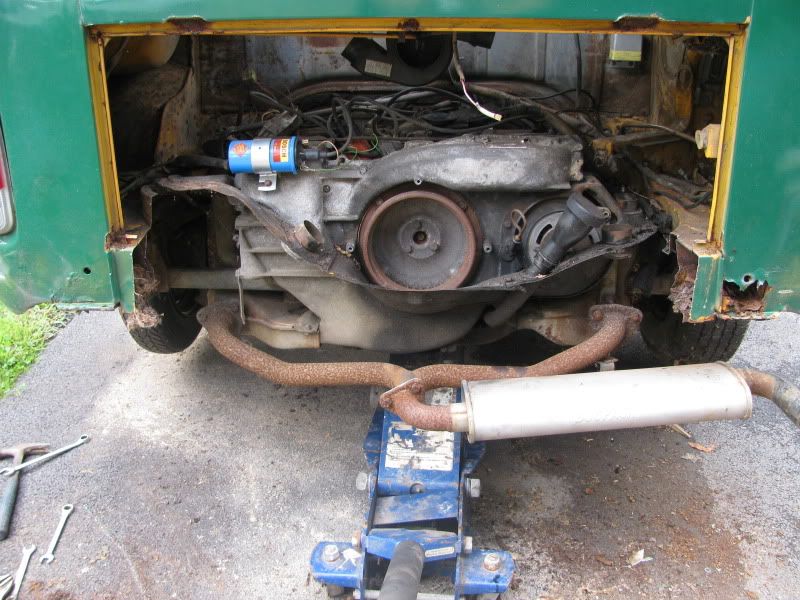
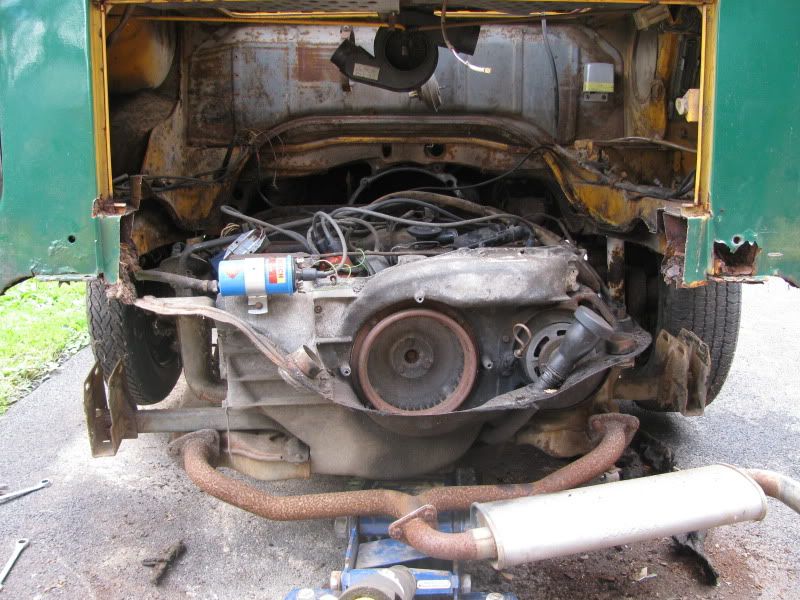
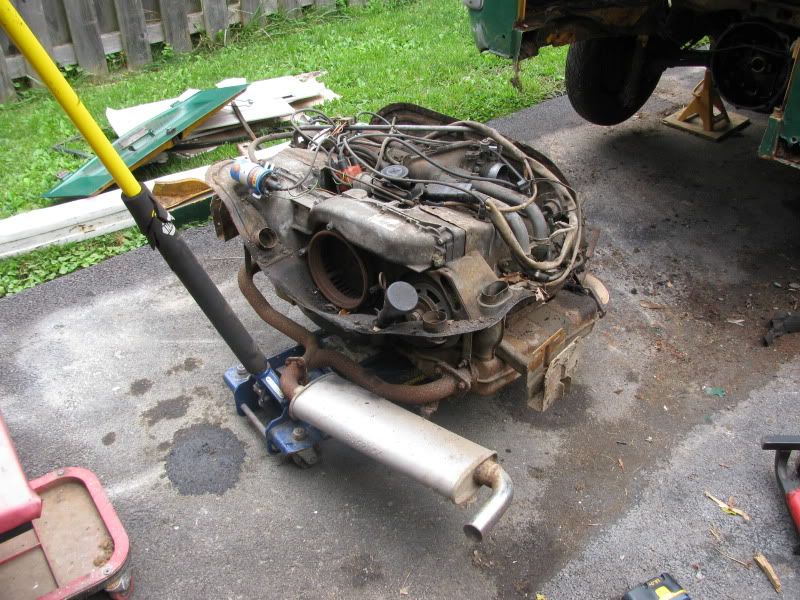
Actually made a little progress yesterday, though not directly on the '79. I pulled the drivetrain out of the '76 parts Bus I bought earlier in the year to prepare it for transplant into the '79. The engine was last run in 2007. It looks fairly clean, and I found one of those inserts rebuilders use to check for overheating on the case, so evidently it was rebuilt at some point. I tried to start it in the Bus as it sat, but between the fuel leaks, hacked wiring, and missing/unconnected vacuum hoses it didn't have a chance. I'm gonna pull all of the FI off of it and the tin, clean the longblock all up, paint the tin, replace all of the FI seals and put it back together. New TSII, fresh tuneup and valve adjustment and I'll put it in the Camper after the shift rod bushings are replace and the fuel tank and straps installed. Still have to paint the engine compartment and trim and install the donor metal from where the A/C compressor originally was so I can seal everything up properly.
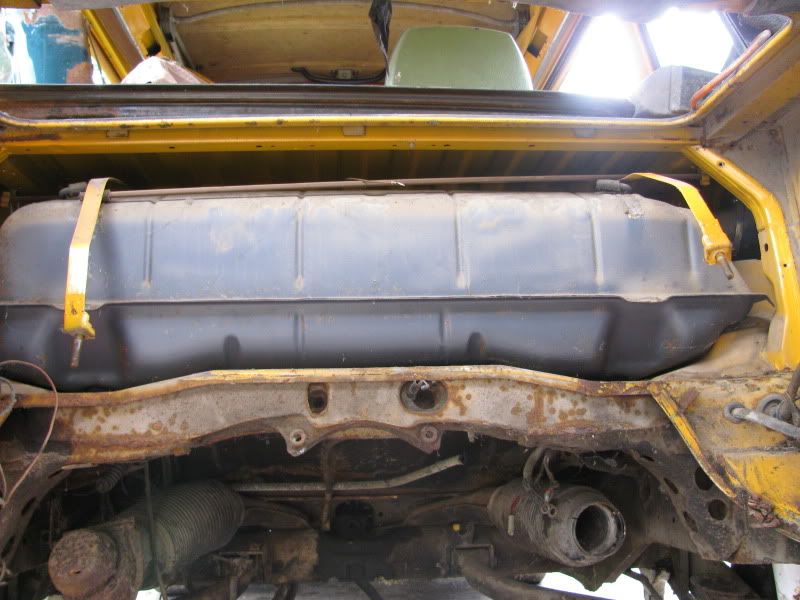
I was pleasantly surprised to find the fuel tank I pulled out of the '76 is absolutely perfect. No rust whatsoever inside, and the outlets on the bottom are strong and rust free. I can't tell you how many tanks I have seen in the northeast that the outlets on the tank turn to dust in yoru hand as soon as you touch them. I've had my fingers crossed since I brought this thing home that it would have a tank that was at least useable, but this is way beyond my expectations. I'll give it a quick coat of paint and a new sender before it gets put back into the Bus.
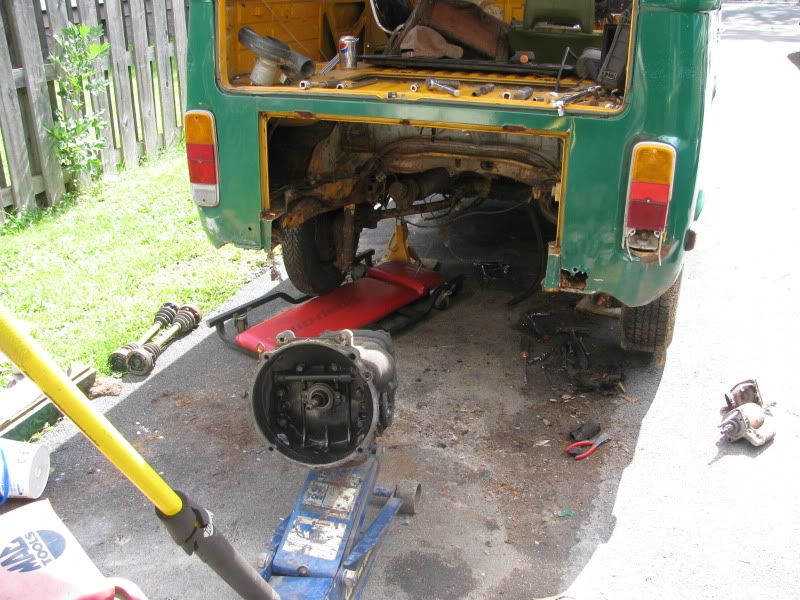
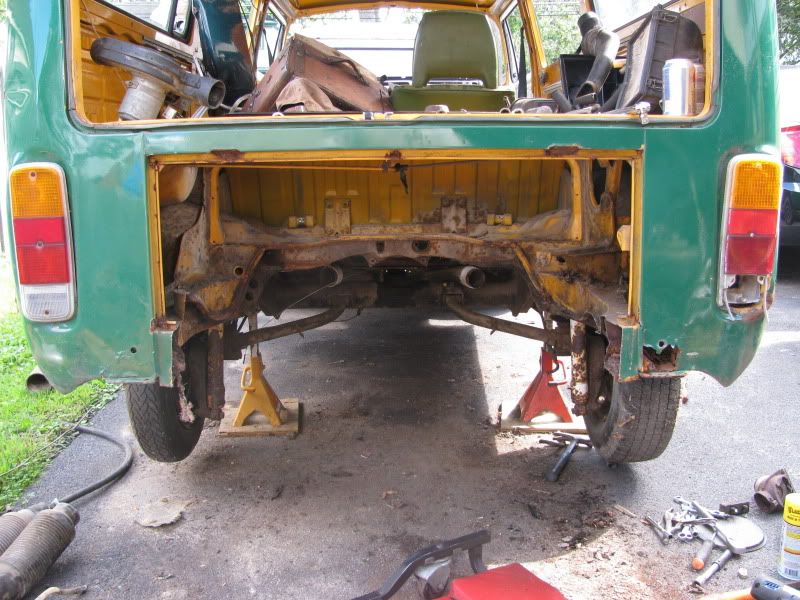
I stripped everything I could use out of the rearend, right down to the wiring. I'll be finishing up scavenging parts off of this Bus and it will get cut up and scrapped, hopefully this week.
Image
Image
Image
Image
Image
Image

User avatar
LiveonJG
IAC Jester!
Location: Standing on the side of the road, rain falling on my shoes.
Status: Offline

Post by LiveonJG » Tue Sep 01, 2009 7:54 am

I could use that green headrest, got another one too?

-John
Keep it acoustic.

User avatar
Ritter
IAC Addict!
Location: Sonoma County, CA
Status: Offline

Post by Ritter » Tue Sep 01, 2009 8:28 am

Dude. You pulled the engine separate from the trans! First time?! :cyclopsani:
1978 Westfalia 2.0 FI

User avatar
Vdubtech
IAC Addict!
Location: East Syracuse, NY
Status: Offline

Post by Vdubtech » Tue Sep 01, 2009 12:23 pm

Ritter wrote:Dude. You pulled the engine separate from the trans! First time?! :cyclopsani:
Yeah, I know. It isn't the first time I've done it, but I prefer to take them both out as a unit when I don't have the option of cutting off the back of the Bus. I didn't have the jackstands very high and with the header and muffler hanging so low off this engine there really wasn't a whole lot of room for my big ass to be shimmying around under there, so I pulled them individually, and made it easier by cutting off the"apron" in the rear.

User avatar
hambone
Post-Industrial Non-Secular Mennonite
Location: Portland, Ore.
Status: Offline

Post by hambone » Tue Sep 01, 2009 1:18 pm

Do you use any wood on top of the circle-part of the floor jack? I never have, seems like it fits around the oil drain plate OK but don't want to screw anything up.
http://greencascadia.blogspot.com
http://pdxvolksfolks.blogspot.com
it balances on your head just like a mattress balances on a bottle of wine
your brand new leopard skin pillbox hat

User avatar
Vdubtech
IAC Addict!
Location: East Syracuse, NY
Status: Offline

Post by Vdubtech » Tue Sep 01, 2009 1:52 pm

hambone wrote:Do you use any wood on top of the circle-part of the floor jack? I never have, seems like it fits around the oil drain plate OK but don't want to screw anything up.
Yes I did have a small piece of wood on the saddle of the jack. I'm sure just using the jack wouldn't hurt it but I figure spreading out the load a little is even better.

User avatar
Vdubtech
IAC Addict!
Location: East Syracuse, NY
Status: Offline

Post by Vdubtech » Tue Sep 01, 2009 1:52 pm

LiveonJG wrote:I could use that green headrest, got another one too?

-John
I only have that one seat, but I may have another green headrest, lemme check for ya.

Post Reply