'79 Westy Rebuild
-
gmag69

- IAC Addict!
- Location: Up in smoke man.
- Status: Offline
Thanks for saying about the curtain rod. I have my cabinets half way in and it would have been a PITA to pull them back out. Interior looks like Pimp My Ride. Did X show up??  Keep up the good luck man. At least you hav a level area to work on yours.
Check out my Westy Resto thread. viewtopic.php?t=2063
bretski wrote:...oh, and we just bombed the moon.
-
Vdubtech

- IAC Addict!
- Location: East Syracuse, NY
- Status: Offline
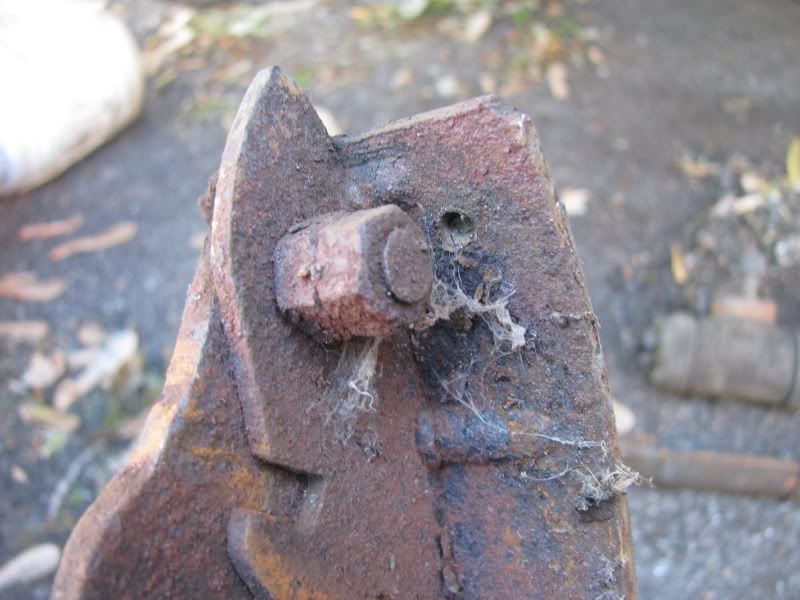
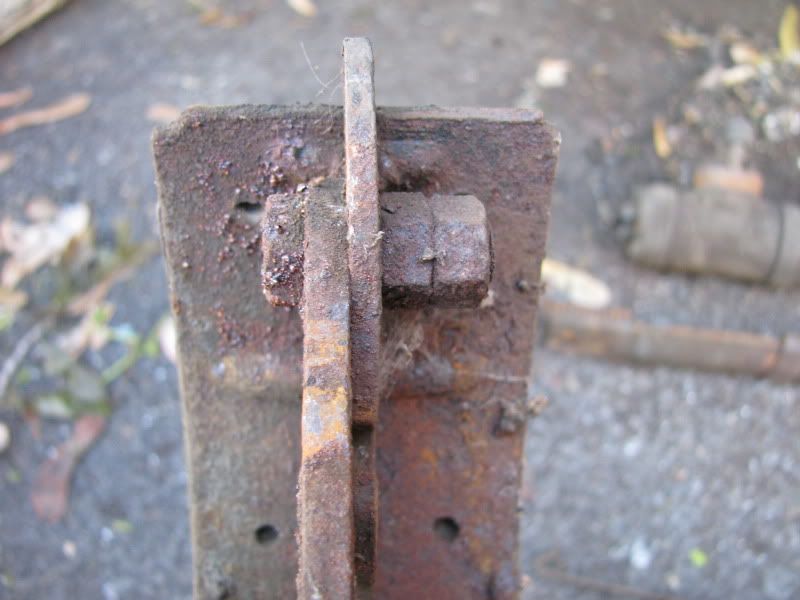
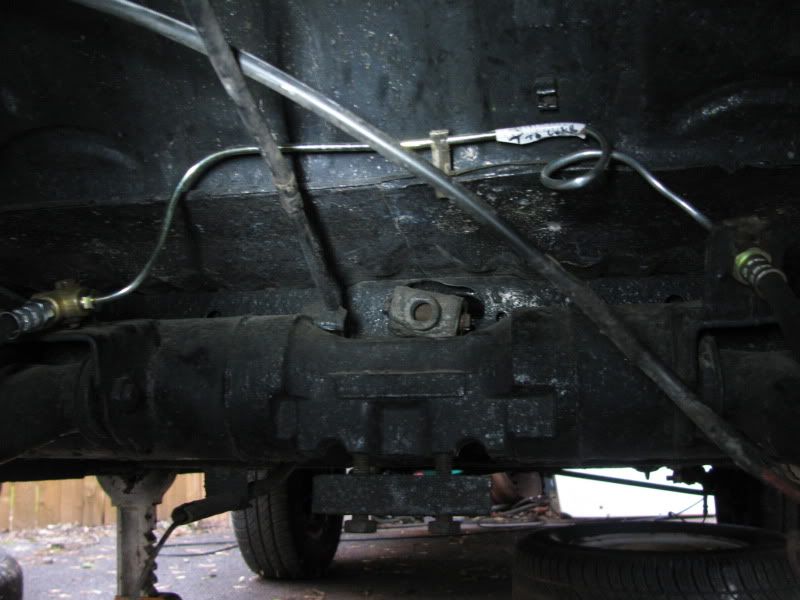
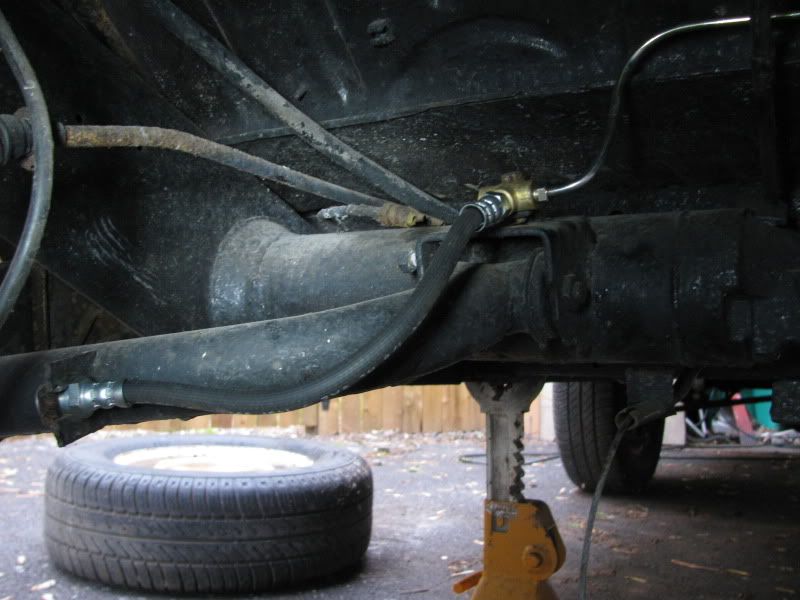
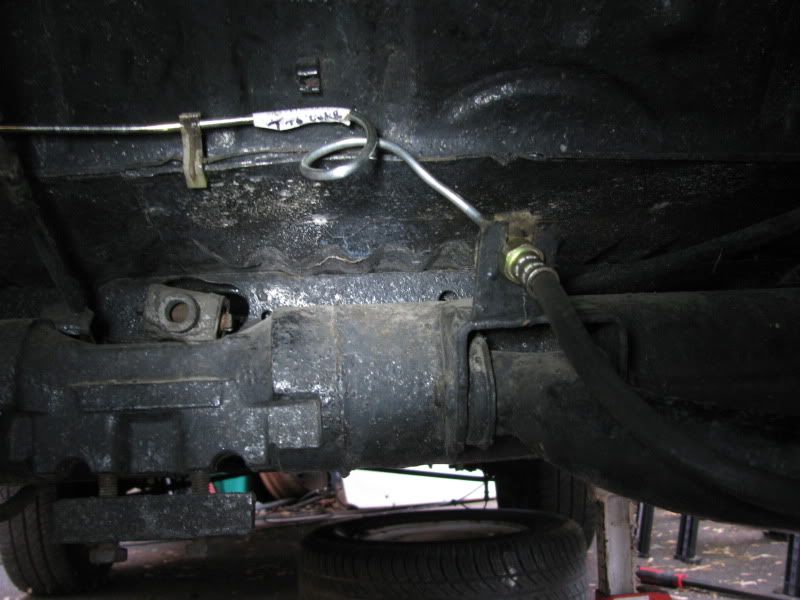
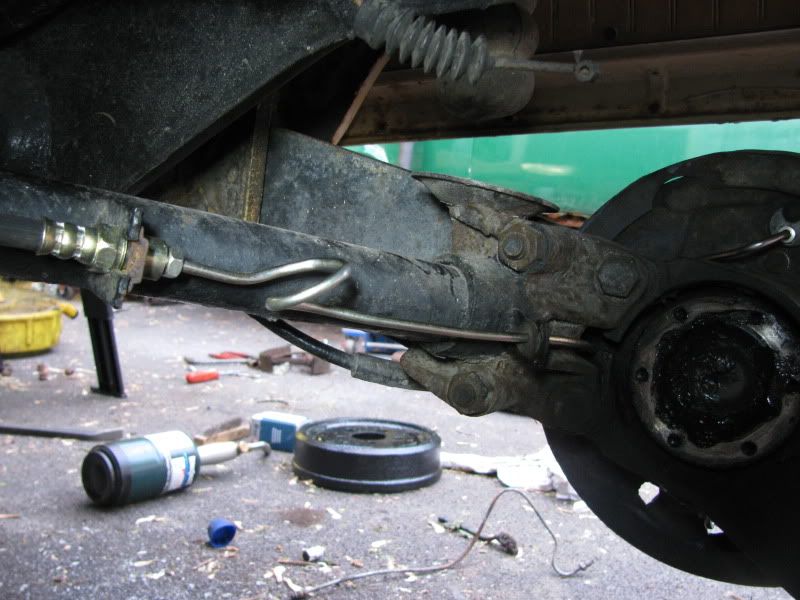
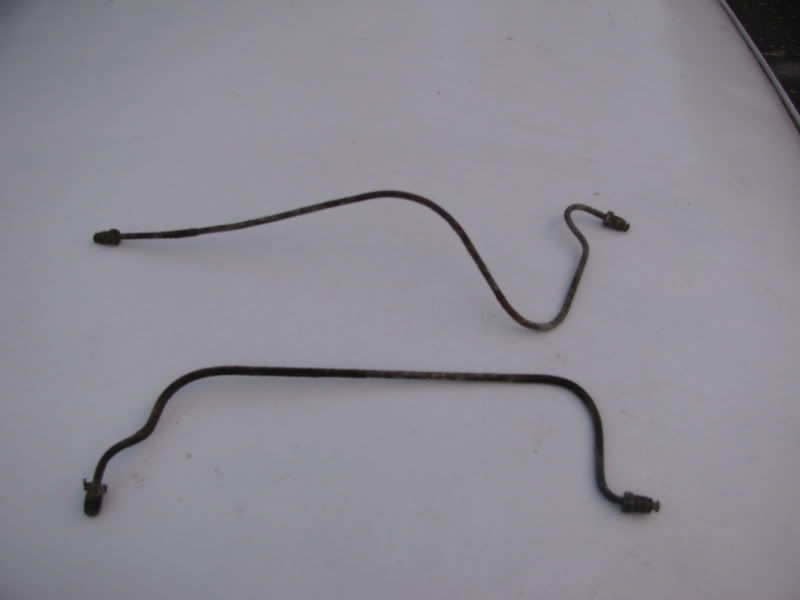
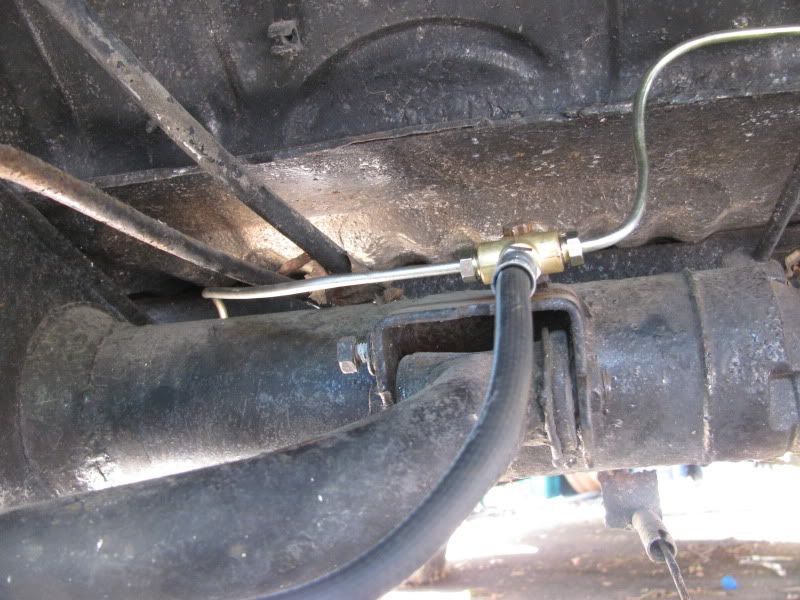
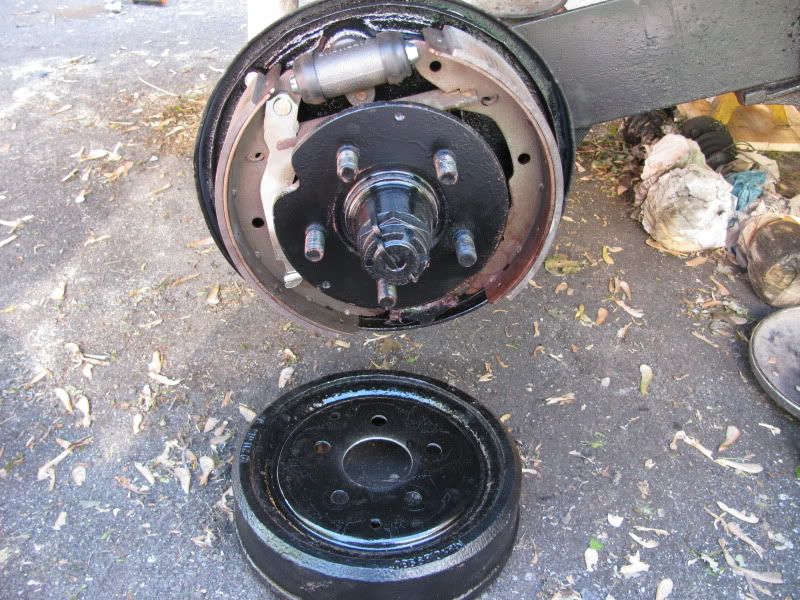
It was cold today but I wanted to at least do something to the Bus and make some progress..I've been staring at these boxes of brand new parts for at least a week now, so I decided to start on the brakes. I bought everything except the shoes from CIP1.com and so far I'm not really impressed. One of the things I ordered was a complete brake line kit. Everything in this Bus was gone when I got it, and I mean everything. Master, booster, reservoir, all of the steel lines, all of the hoses, all of the grommets, the clips for the hoses.....everything. I started by putting it up on jackstands and removing the rear wheels. Figured I could get the lines installed in the rear today, the hoses, wire brush and paint the backing plates and get the new shoes, wheel cylinders, e brake cables, etc etc. installed. Boy was I wrong......took a lot of PB B'Laster and patience to get the passenger rear drum off, but I got it eventually and was just amazed at what I saw. Cobwebs and all sorts of debris inside the drum. I took the old shoes and hardware out, removed the wheel cylinder and wire brushed the backing plate. Primed it and painted it. When I was looking at the very worn old shoes, I found that whoever had installed the shoes last decided that rather than use the proper hardware to attach the e brake lever, they would use nuts and bolts. Of course it was all frozen up with rust, the arm didn't pivot at all, and it was just a complete mess. I had to heat the star adjusters up to get them out but in the end I won the battle and will clean them up, lubricate them and reinstall them. I installed my new wheel cylinder, no problems there, and set about to get the hard lines run. I rolled under the back of the Bus to really survery what I had going on back there, and there was even less than I thought. Even the brass T fitting at the rear of the Bus was gone. Luckily I had ordered a new one, but I was surprised that even that was gone....I realized since there were no hard lines on this Bus to make patterns of the lines from, I would have to scavenge the rear lines from the '76 parts Bus so I can bend up these lines properly. It all came apart pretty easily amazingly enough, and none of the lines broke. I got all of the grommets I needed, the clips for the rear hoses, and good solid lines for patterns for the new ones. I bent the lines and much to my dismay found that every line supplied in the kit by CIP1.com is too long. I made it work by putting a loop in the line to take out the extra length, but seriously.....why bother selling a kit if it isn't even right? The lines are all individually numbered and tell the location on their website with lengths. Not only that, but their "complete" brake line kit doesn't include the short lines to the front calipers. Between having to scavenge the stuff I needed to put the lines in right and dealing with the shitty parts, darkness came faster than I wanted it to. In the end, I got the rear hoses installed, the rear brake lines bent and installed (except the one from the left rear hose to the wheel cylinder), the brass T fitting installed with hardware I had to take from the parts Bus, along with the clip for the line that goes to the right rear hose up over the nosecone of the tranny. Not as much as I wanted to get done, but I took my time and made sure it was all right and all of the factory grommets and hardware are in their proper places. Tomorrow I will install the left rear hard line and the line from the pressure regulator to the rear T fitting. I'll install the new e brake cables and the shoes and harware along with the clean, lubed and now functional adjusters. If I have time I plan to pull the booster and master along with the reservoir out of the '76 and transfer them over, then start on the front lines and hoses. Pics, as always. Sorry I didn't bring my camera out at first so they start right out with my backing plate all freshly painted.
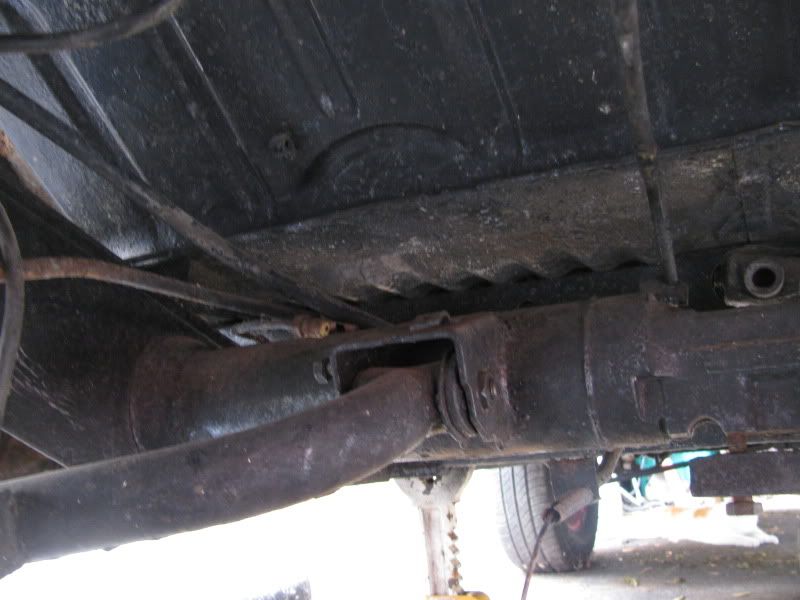
Here's what I started out with underneath....just the front to back line there and nothing else.
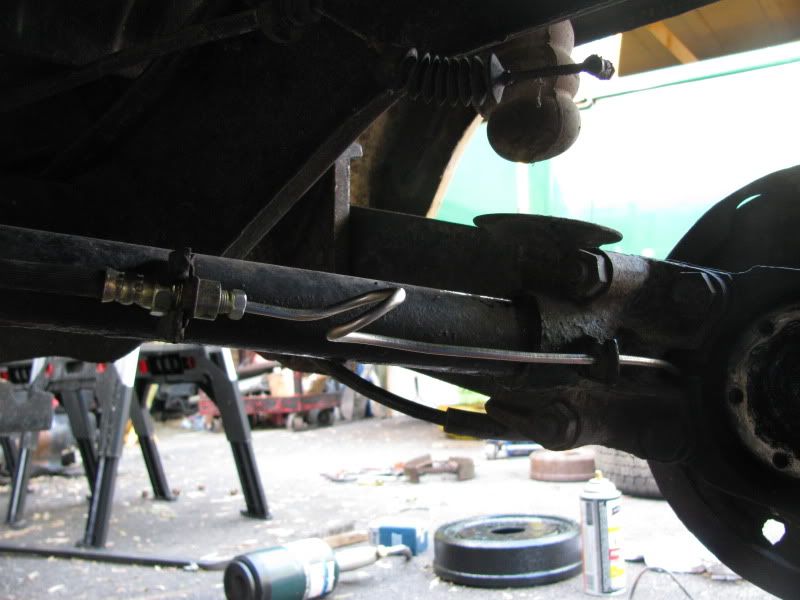
New hard line and hose to right rear. Had to make a loop to make these too long CIP1.com lines work.
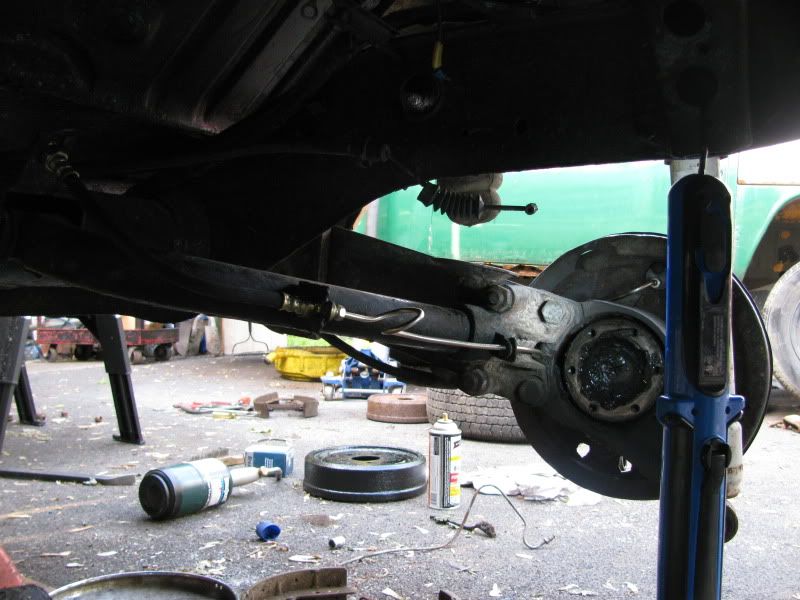
New line going from the brass t fitting to the right hose, up over the transmission. Again, had to make a loop because the line was too long.
Left rear hose and brass T fitting installed.
I almost thought about just using the original lines I took off the '76.
The lines I removed from the '76 for patterns to bend the new lines. Not in bad shape, but not really good enough that I would want to use them.
Here's what I started out with underneath....just the front to back line there and nothing else.
New hard line and hose to right rear. Had to make a loop to make these too long CIP1.com lines work.
New line going from the brass t fitting to the right hose, up over the transmission. Again, had to make a loop because the line was too long.
Left rear hose and brass T fitting installed.
I almost thought about just using the original lines I took off the '76.
The lines I removed from the '76 for patterns to bend the new lines. Not in bad shape, but not really good enough that I would want to use them.
-
gmag69
- IAC Addict!
- Location: Up in smoke man.
- Status: Offline
I'll be doing the smae to my bus soon. I got mine from BusDepot so I'll let ya know what the lines are like when I start.
Check out my Westy Resto thread. viewtopic.php?t=2063
bretski wrote:...oh, and we just bombed the moon.
-
Vdubtech
- IAC Addict!
- Location: East Syracuse, NY
- Status: Offline
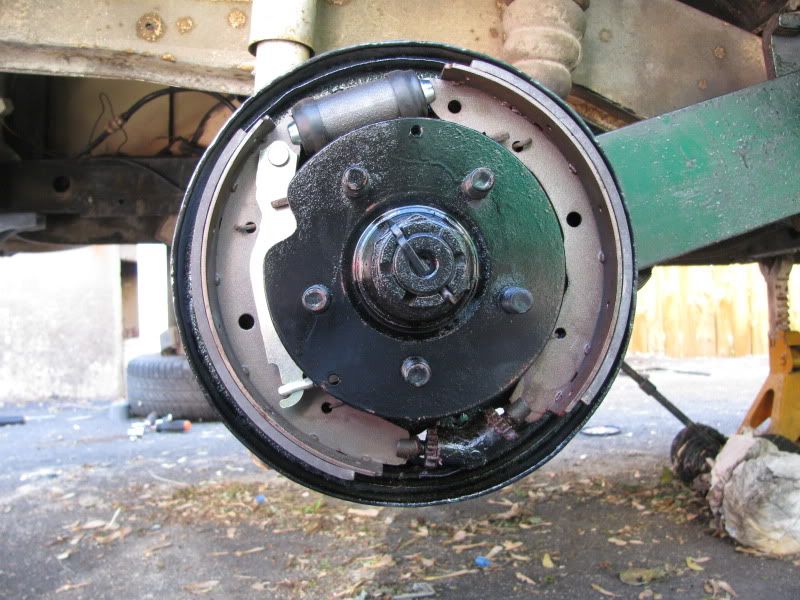
It was another chilly morning here in NY but I spent the afternoon out underneath the Bus finishing up the rear brakes. I got the left rear hard line bent and installed along with the long front to rear line bent and installed. Once again, both lines are way too long for where they should be going. Don't bother with these brake line kits, not one of the lines is even close to the right length. I'd complain to CIP1, but honestly, does anyone over there care? Hardly. I also removed the old e brake cables and installed both new ones, installed the new shoes on both sides and adjusted the rear brakes and got the drums put back on. Since both rear wheels were already off I decided to give the Vanagon alloys I got for the Bus a try. They bolted right up using the Vanagon lugs and I like the way they look. The tires will be replaced and I'll probably repaint the rims and center caps but it's definitely a different look. The driver's rear brake was just like the passenger rear...the nuts and bolt used to hold the e brake arm to the shoe was completely frozen and a complete PITA to remove. It's all brand new in there now, tomorrow I will start on the front brakes. I also found that along with the master cylinder, the booster and everything else the proportioning valve is gone too. Thank you tiny baby Jesus for parts vehicles....and now the pics.
Left rear hard line and front to back hard line bent and installed:
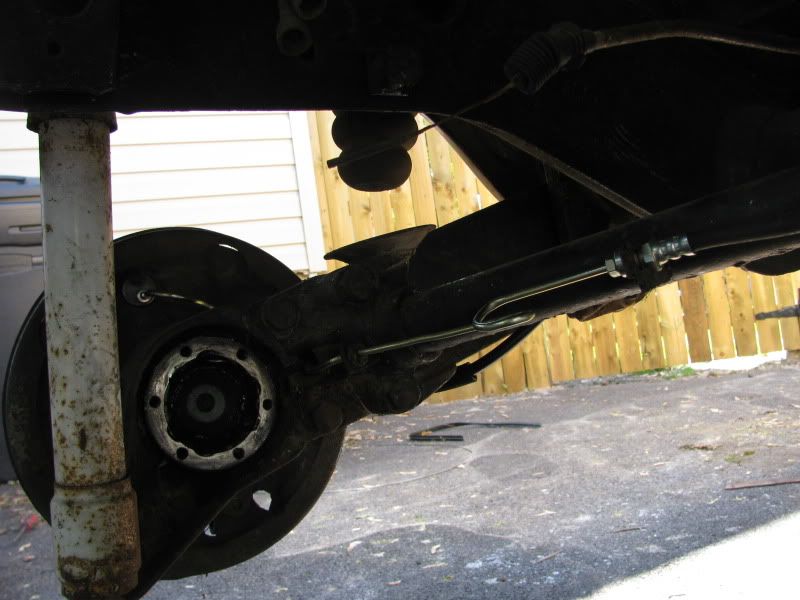
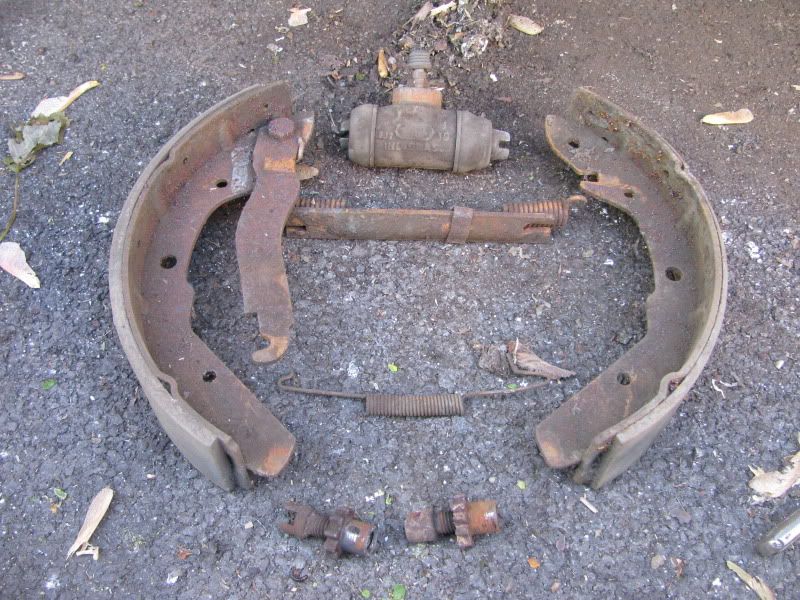
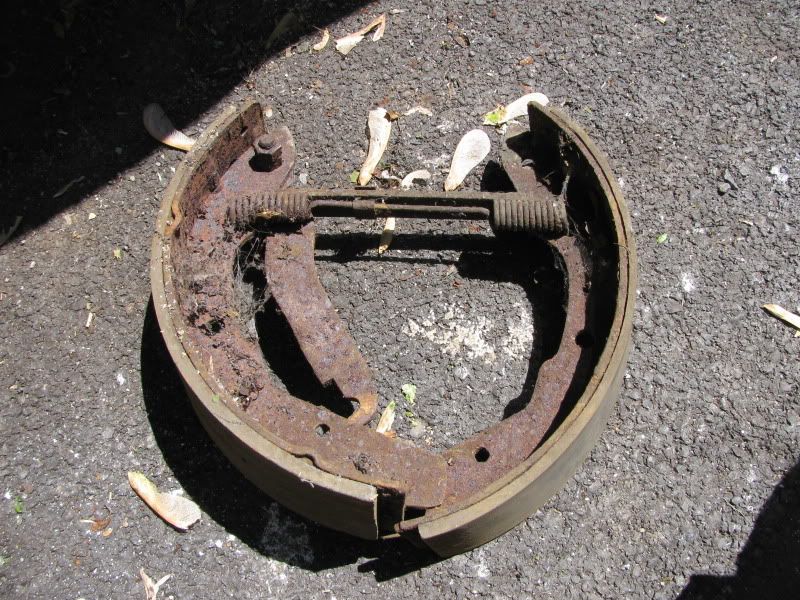
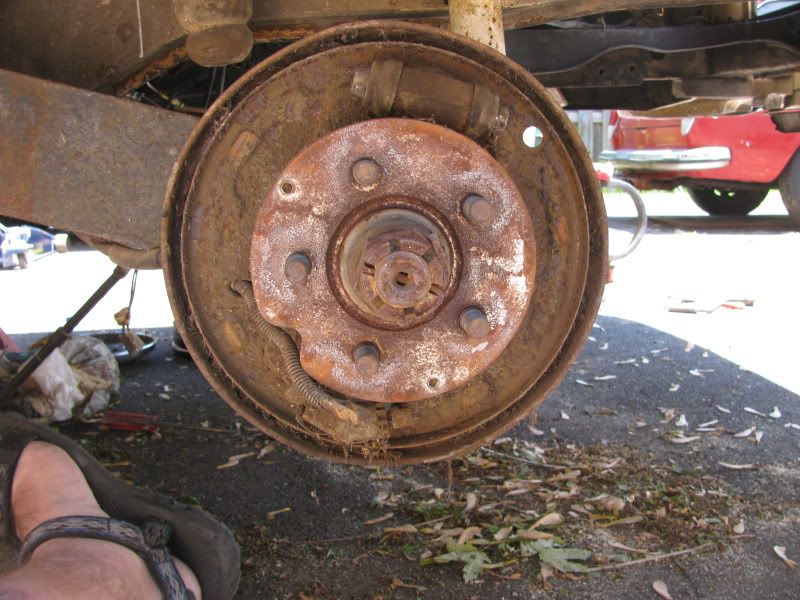
Left rear brake assembly once I finally got the drum off:
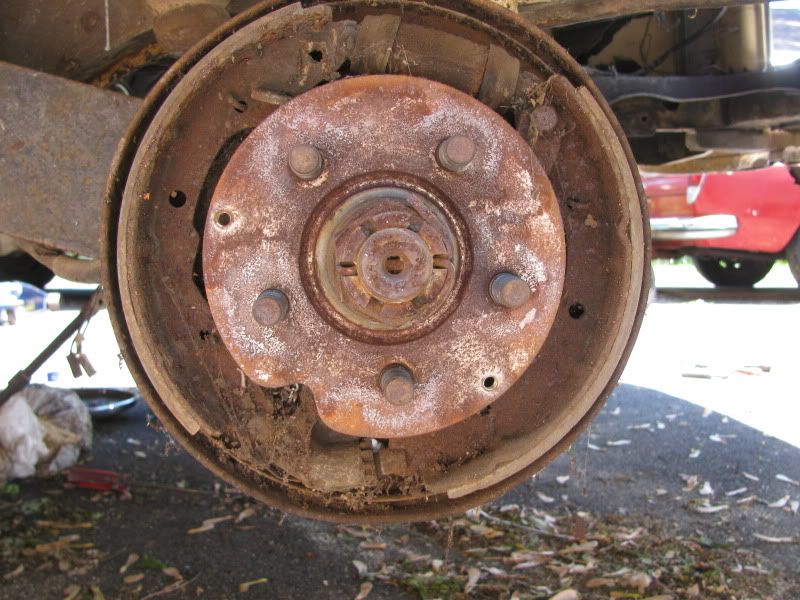
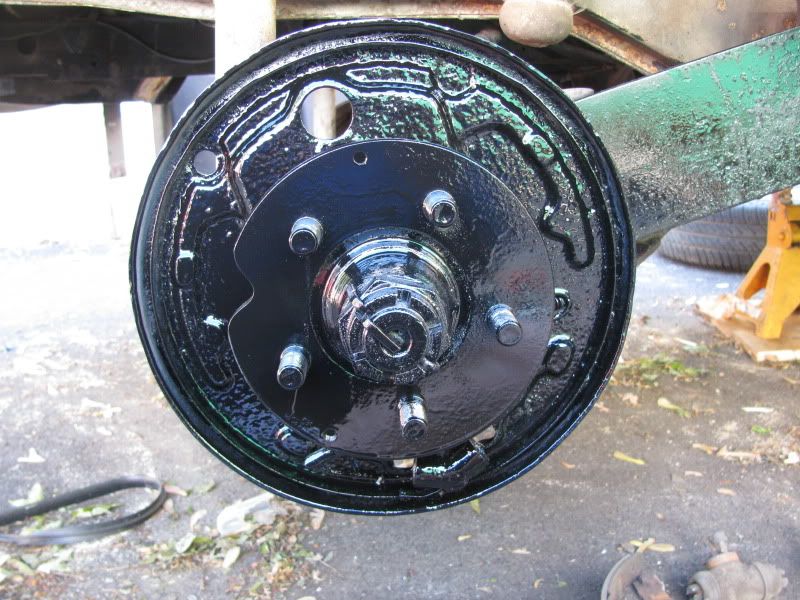
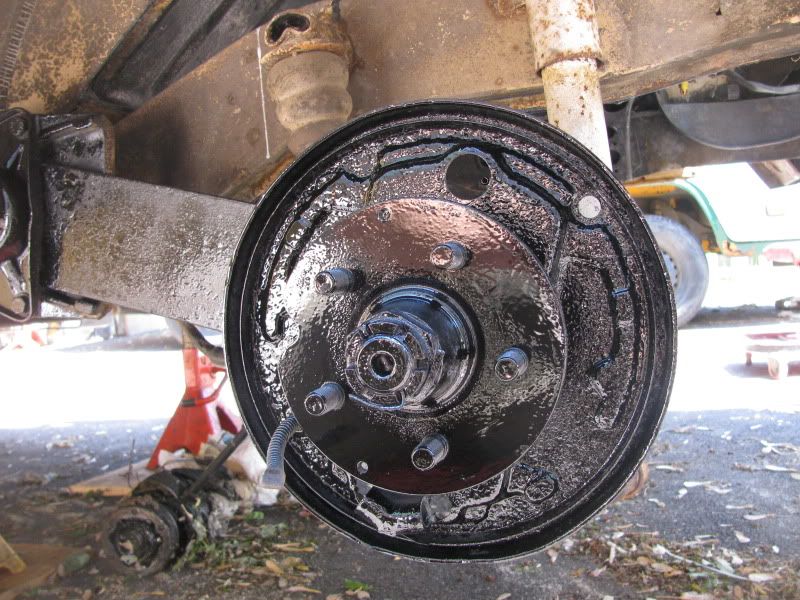
Backing plate wire brushed, primed and painted:
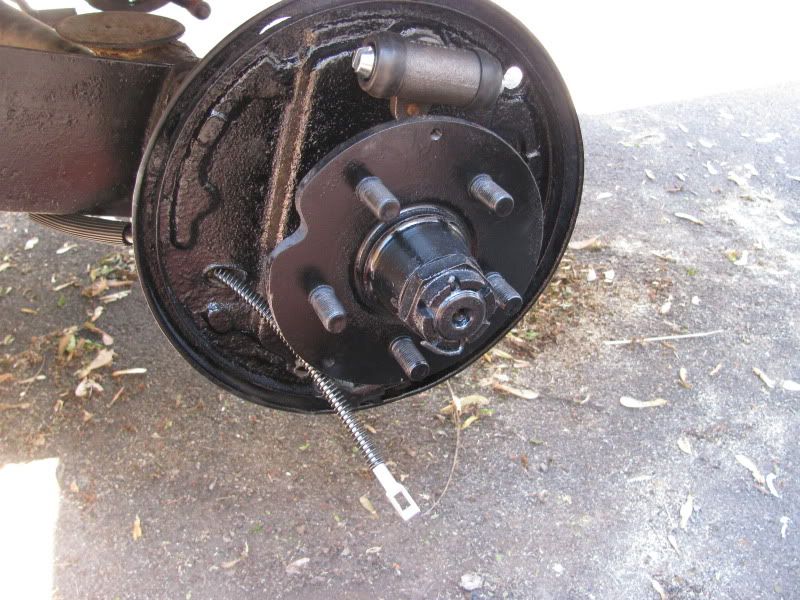
New e brake cables installed along with new wheel cylinders:
New shoes installed, star adjusters wire brushed, greased and working like new:
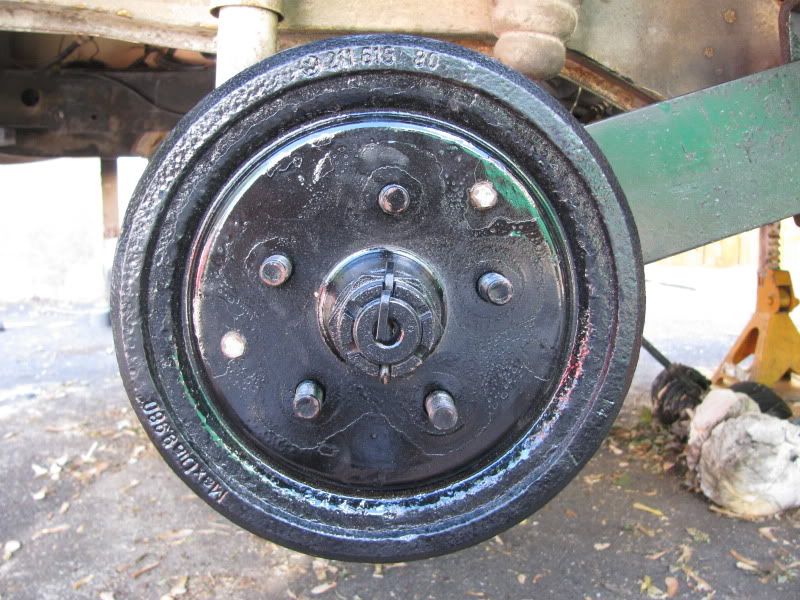
Back on the ground with the Vanagon alloys installed in the rear:
Left rear hard line and front to back hard line bent and installed:
Left rear brake assembly once I finally got the drum off:
Backing plate wire brushed, primed and painted:
New e brake cables installed along with new wheel cylinders:
New shoes installed, star adjusters wire brushed, greased and working like new:
Back on the ground with the Vanagon alloys installed in the rear:
-
gmag69
- IAC Addict!
- Location: Up in smoke man.
- Status: Offline
You're a wild man ! Out there in your flip flops wrenching on the bus. =D> it is coming right along.
Check out my Westy Resto thread. viewtopic.php?t=2063
bretski wrote:...oh, and we just bombed the moon.
-
Vdubtech
- IAC Addict!
- Location: East Syracuse, NY
- Status: Offline
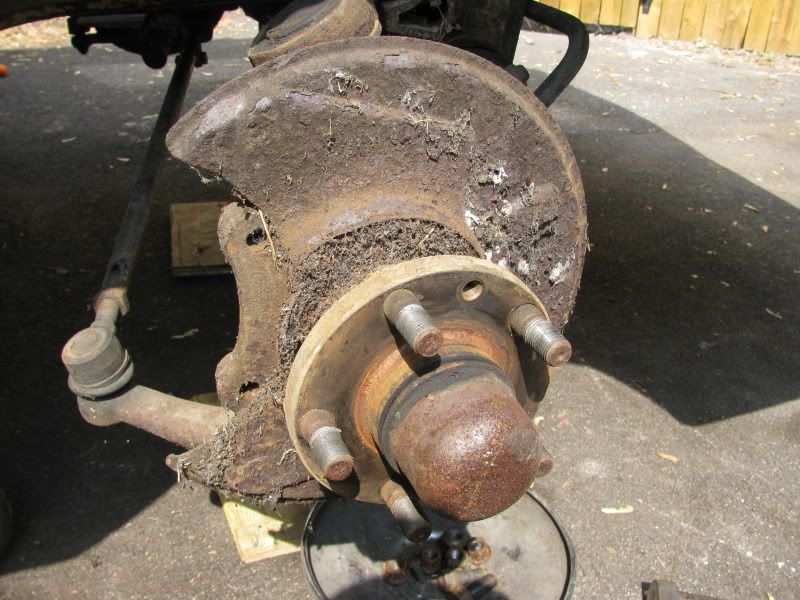
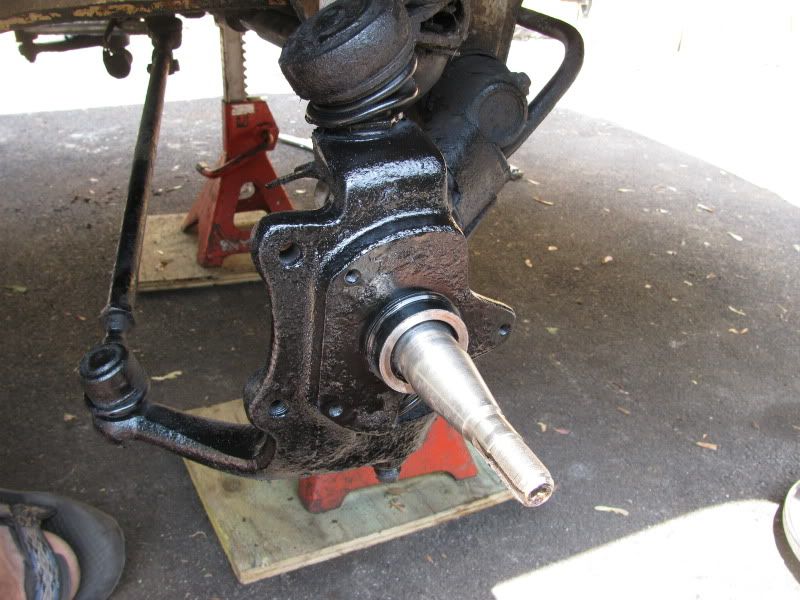
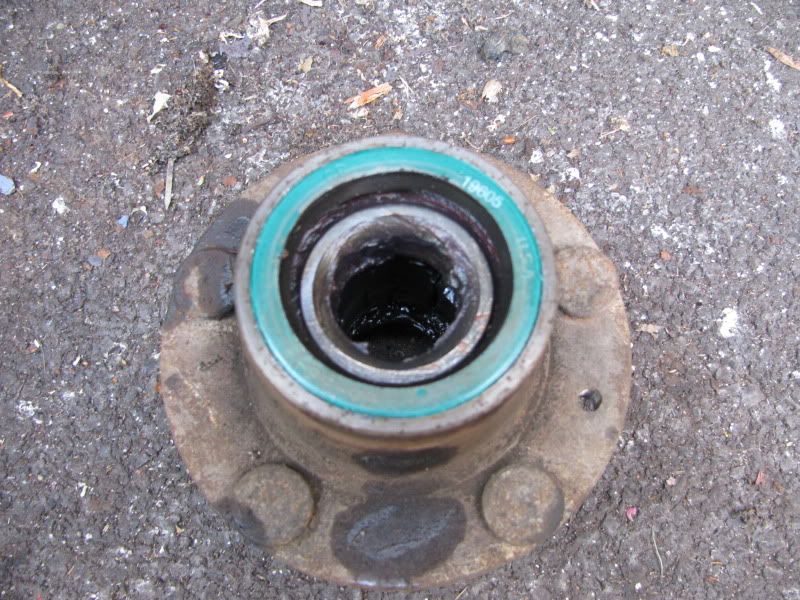
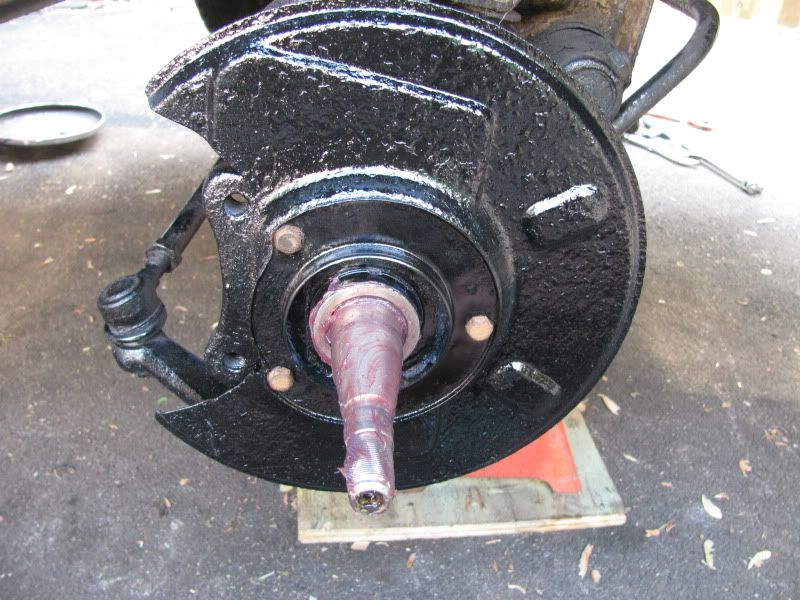
Spent some time yesterday working on the Bus...I had planned to get the front brakes all buttoneed up, the master and booster installed and the rest of the hard lines and hoses. I was struck down by a poor quality brake line kit that has lines that are ridiculously too long for their application. I took the time to remove the front brake assemblies, hubs and bearings and backing plates and get everything cleaned and painted for reassembly. I also installed the proportioning valve and made the way too long front to rear brake hard line fit where it needed to be. I didn't get as far as I wanted to but I would rather take my time and do it right than rush it and put in parts that simply will not work. Couple of pics....
-
gmag69
- IAC Addict!
- Location: Up in smoke man.
- Status: Offline
Any updates?
Check out my Westy Resto thread. viewtopic.php?t=2063
bretski wrote:...oh, and we just bombed the moon.
-
Vdubtech
- IAC Addict!
- Location: East Syracuse, NY
- Status: Offline
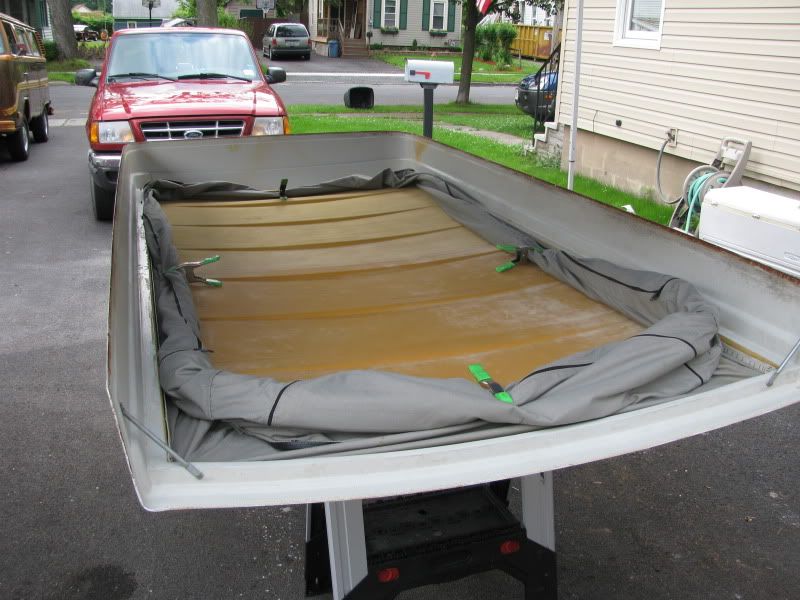
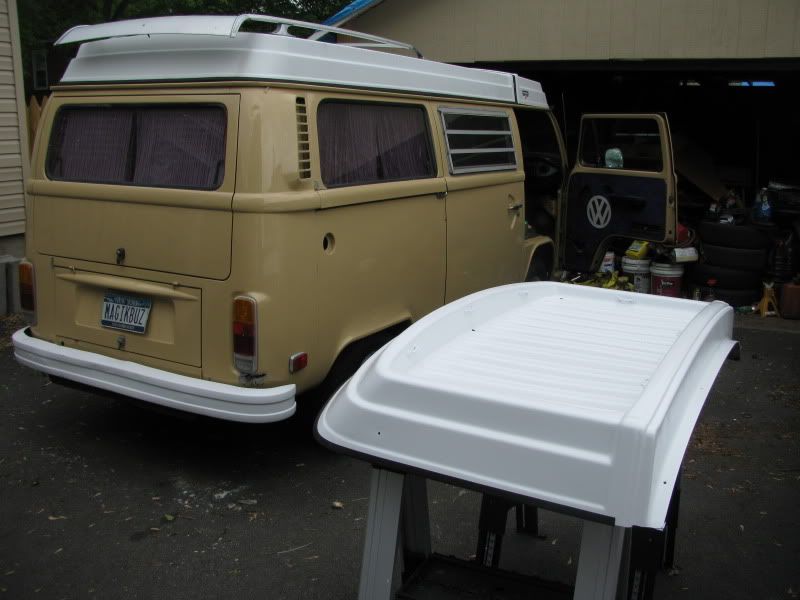
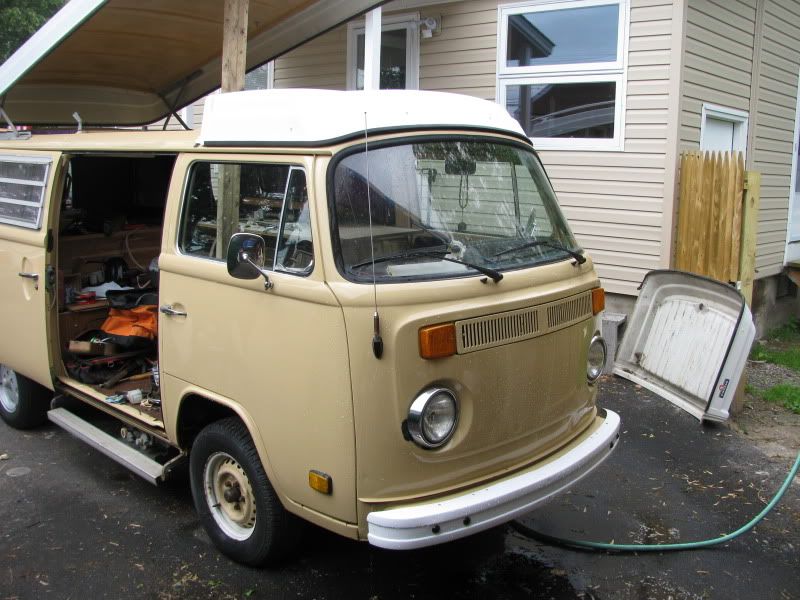
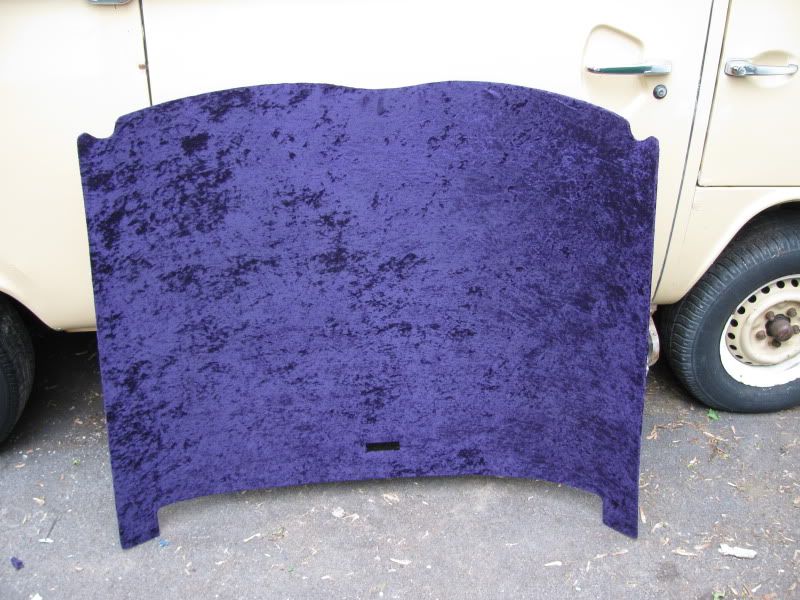
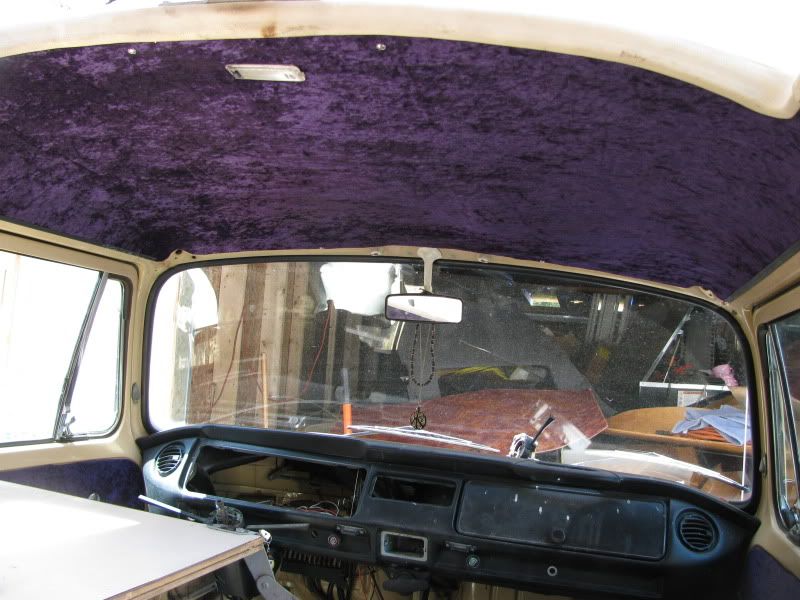
Actually yeah, nothing huge but some progress has been made in the past couple of days. I took the luggage rack off of the '76, gave it a quick wash andscuff and painted it with the white Rustoleum and a foam roller. Came out pretty good, I reinstalled the really nice seal back on it and installed it onto the roof of the Westy. The one I had put up there temporarily was in rough shape and just to help keep rain out of the pop top. Once I got that done I recovered the front section of the headliner in the purple fabric I'm using on the interior and got that hung in there. Honestly, that's about it. The next job I really want to tackle is the new canvas. I have a brand new Bus Depot canvas right here just waiting for me to get up the guts to install it. I have the '76 to use as a guide and a good staple gun, so I guess I just have to dive into it and see where it goes. I've been spending a lot of time over the past few days ridding myself of one of the fleet. The beige and white '71 Westy is being cut up and hauled away. I plan to cut it up and put it into the body of the green Westy when I take it to the scrapper. I have it down to pretty much a frame and 4 wheels now. I think it's gonna fit just fine.
After pic of repainted pop top-sorry I didn't take any before or progress pics, I just kinda dove into it.
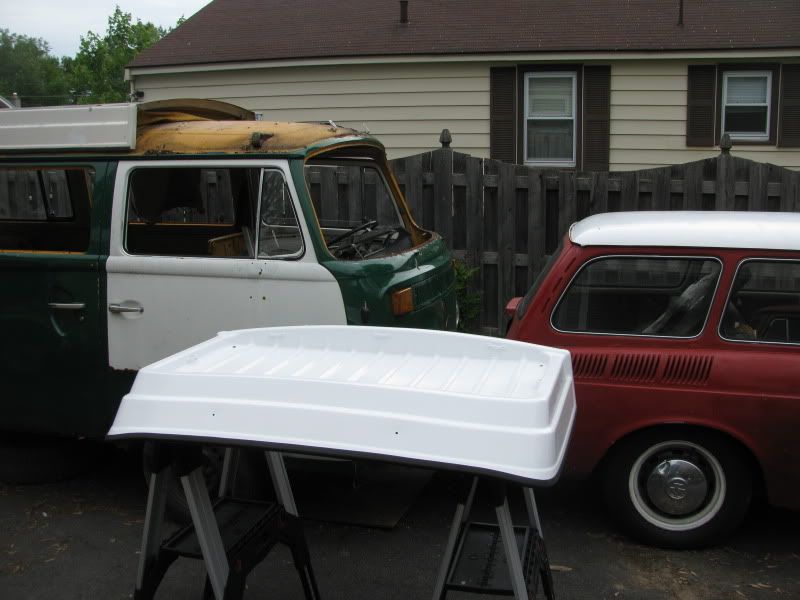
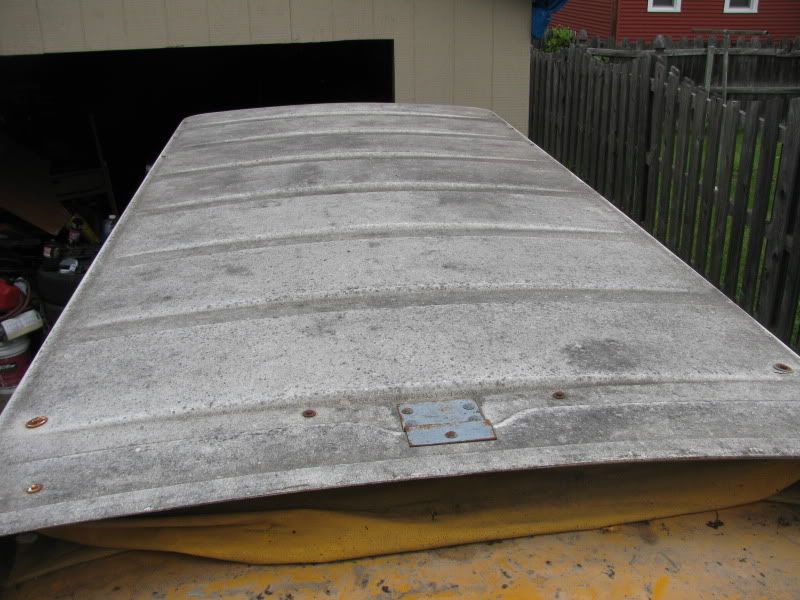
The rest of the pop top on the '76....the luggage rack was even blacker than this when I started.
Check out my new sawhorses. Adjustable height...love em.
Out with the old
Fresh coat of wax on the roof under the luggage rack before installation

Luggage rack installed-also found my sidestep in the garage and put it on
After pic of repainted pop top-sorry I didn't take any before or progress pics, I just kinda dove into it.
The rest of the pop top on the '76....the luggage rack was even blacker than this when I started.
Check out my new sawhorses. Adjustable height...love em.
Out with the old
Fresh coat of wax on the roof under the luggage rack before installation
Luggage rack installed-also found my sidestep in the garage and put it on
My '79 Westy Rebuild Thread:
http://itinerant-air-cooled.com/viewtopic.php?t=6073
http://itinerant-air-cooled.com/viewtopic.php?t=6073
-
Vdubtech
- IAC Addict!
- Location: East Syracuse, NY
- Status: Offline
-
gmag69
- IAC Addict!
- Location: Up in smoke man.
- Status: Offline
Lookin good man. Keep up the good work =D>
Check out my Westy Resto thread. viewtopic.php?t=2063
bretski wrote:...oh, and we just bombed the moon.

-
gmag69
- IAC Addict!
- Location: Up in smoke man.
- Status: Offline
Any updates? I'm dying for a Westy fix here. 
Check out my Westy Resto thread. viewtopic.php?t=2063
bretski wrote:...oh, and we just bombed the moon.
-
Vdubtech
- IAC Addict!
- Location: East Syracuse, NY
- Status: Offline
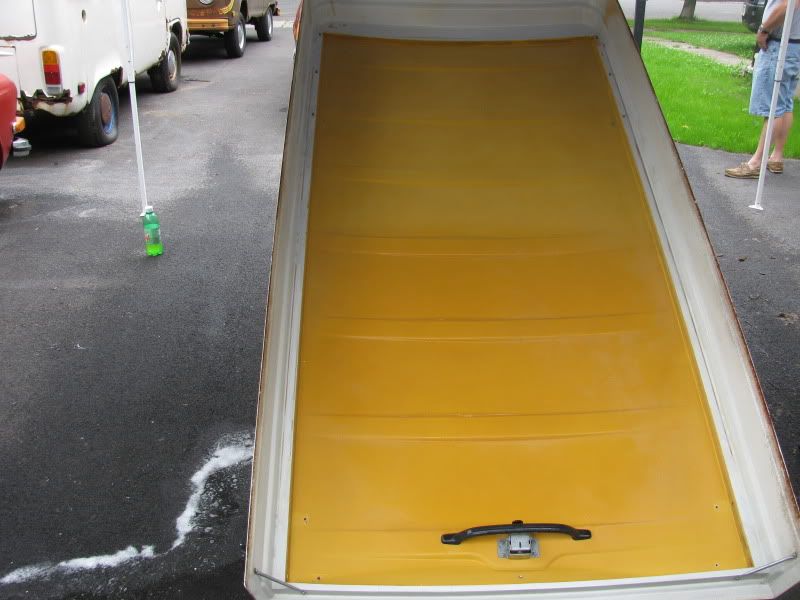
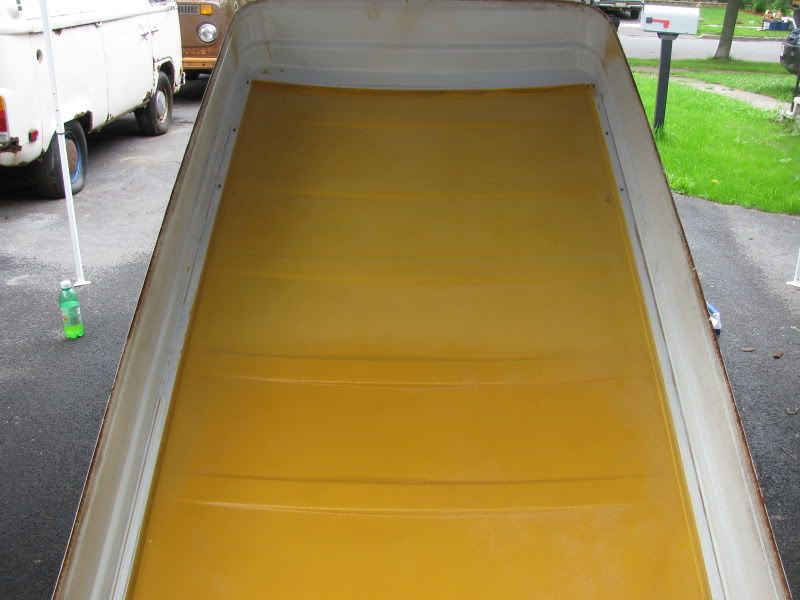
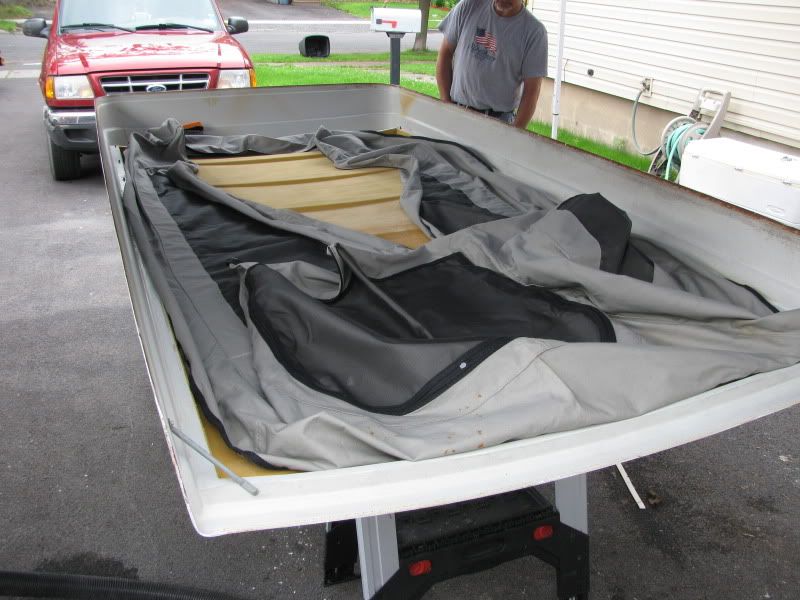
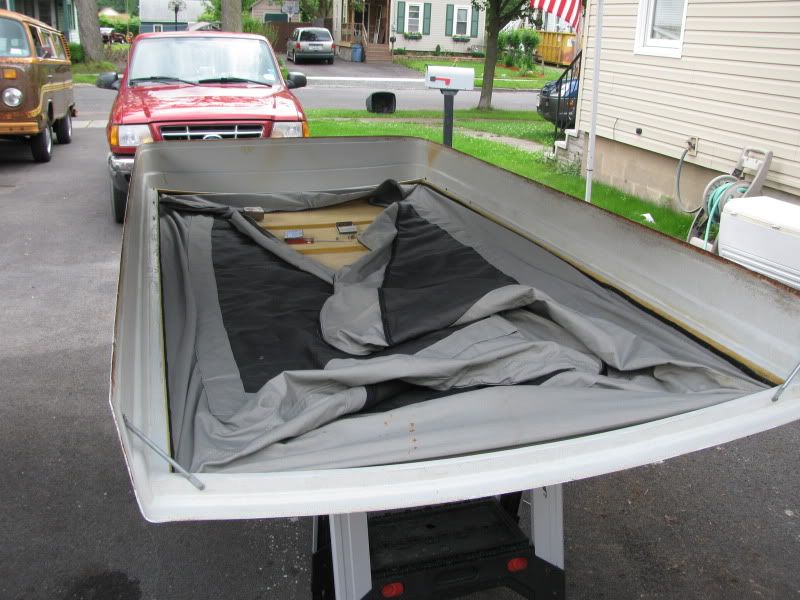
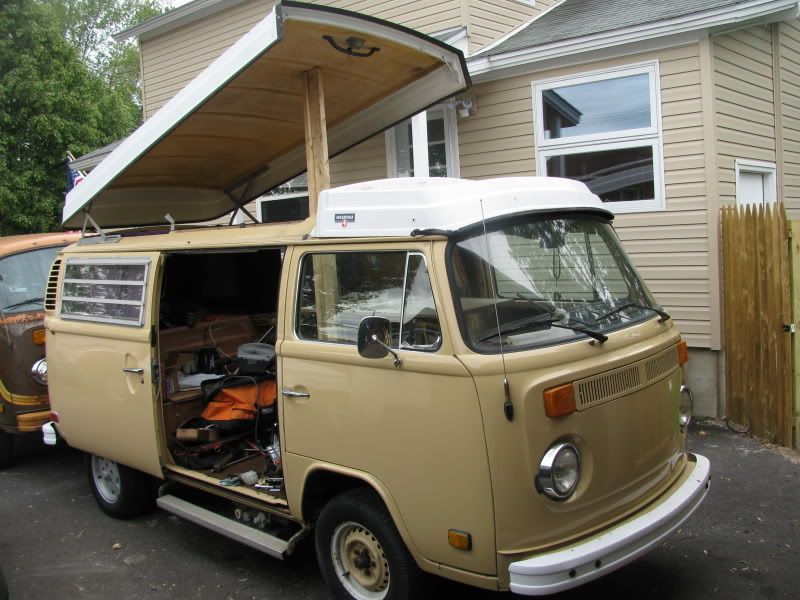
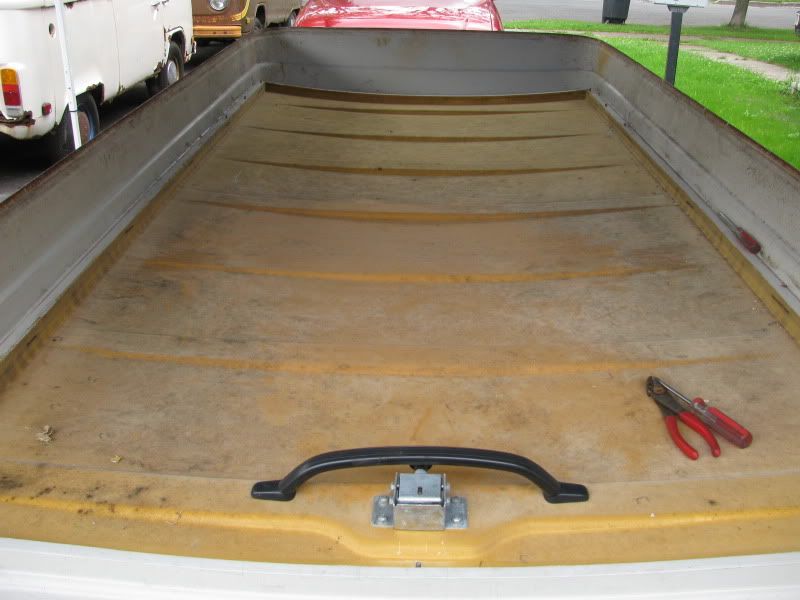
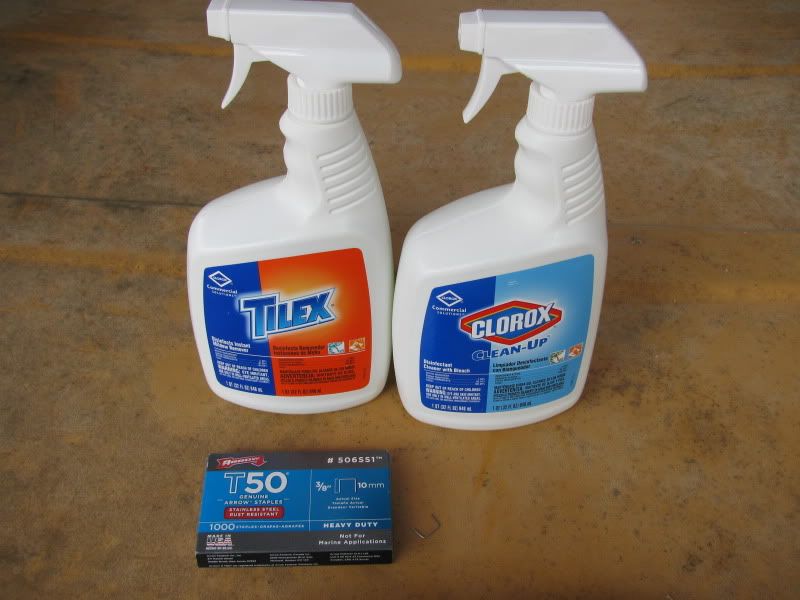
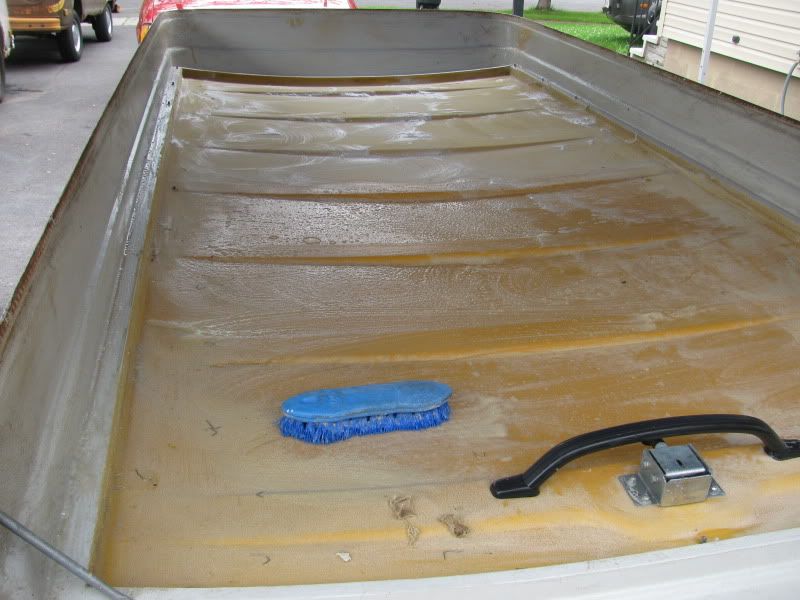
Sorry Geno, I know it's been a while since I've updated anything. I really haven't worked on it much lately. I cut up the '71 beige Westy I had and scrapped at and this week I cut up the blue '77 I had and scrapped it. Trying to downsize a bit here and get the cars out of the backyard. The driveway is full, garage is full....it's real disaster. Anyway....I spent today replacing the top and the canvas on the '79. AS you know, somewhere in its life it received some sort of "rack" bolted through the top with these massive carriage bolts. The top had no canvas and no lifting mechanism, and most of the hardware was missing also. I used the top from my other '79 that I had been storing in the basement since removing it from the camper. I also used the new canvas I bought for the other Bus. If you remember, I was planning a silver and black paint scheme with the other Westy, and as such I order a grey canvas. It's a BusDepot canvas I bought at least 3 years ago, during their first "garage sale." I got it cheap because it had a couple of rust spots on the fabric. Little CLR oughta take them right out. I extracted the top assembly from the basement, set up the EZ Up since they were calling for rain....again. I washed off the outside of the top before setting it up on jackstands. The time in the basement was not kind to it, but the paint still loos pretty good considering this was the first top I painted with Rustoleum back in '03. I set the top up on sawhorses inside facing up and set off for Home Depot to buy stainless steel staples and some tilex to kill the mold on the "fuzz" on the inside of the top. Sprayed it down witht he Tilex and I also grabbed spray bottle of Clorox Clean Up to take advantage of the bleach in it. Gave it a good scrubbing, hosed it down, and let it sit for a while to dry. It was about 1000% humidity today so it took a while. I laid out the new canvas, lines it up with the marked I made from the old canvas before I removed it, and began to drive 1.3 million staples into it. Of course I also had to sit down and remove each and every staple from the original tack strips. Got the top all stapled on and clamped the canvas up so we could get the top on the Bus safely without destroying it. I had to remove the hole riddled top that was on it first, which was easy since only the rear hinges were attached. Slid the old top off, and slid the new top in it's place. We got it bolted up front and rear, which so far was the hardest part of the job. The rest of it is just tedious, not really a whole lot of work. I got everything bolted back up, the latch and handle put back on as well as the stiffener at the front of the top. All I have left to do is installed the 3 billion little phillips head screws and the aluminum securing strips from the inside. I'll have to remove the rear part of the upper bed to make it easier to assemble the rearmost part of the canvas, but I figure I have maybe an hour's worth of work left to have it done. I pulled the canvas taught against the body of the Bus where it will get screwed down and I think the placement of the canvas will be almost perfect. I installed the seals, dry for now but I will use a little 3M moulding adhesive when I install them permanently. I still am going to scuff and repaint the poptop portion to match the freshly painted luggage rack. All in all, it took an embarrassing amount of time, but we took lots of breaks and took our time to hopefully get it right on the first try. Here are lots of pics:
**BTW-as a side note, stainless steel staples will set you back $11 for a box of 1000 at Home Depot**

**BTW-as a side note, stainless steel staples will set you back $11 for a box of 1000 at Home Depot**
My '79 Westy Rebuild Thread:
http://itinerant-air-cooled.com/viewtopic.php?t=6073
http://itinerant-air-cooled.com/viewtopic.php?t=6073
-
Vdubtech
- IAC Addict!
- Location: East Syracuse, NY
- Status: Offline