
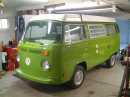
Pop Top Tom's Rebuild Thread <updated 10-17
-
poptop tom
- Old School!
- Location: La Porte, IN
- Status: Offline
-
ruckman101

- Lord God King Bwana
- Location: Up next to a volcano.
- Contact:
- Status: Offline
-
Amskeptic

- IAC "Help Desk"

- Status: Offline
Yeah, fascinating isn't it. The fitting together of an engine involves one-way compression of sealing rings or the slight mushing of imperfections in cylinder head spigot contact areas with the barrels. When you come in and retorque, you are buying some margin to help prevent the inevitable drop in torque that occurs after the first few heat cycles. Personally, I mimic a heat cycle by torquing the heads to 40 ft/lbs overnight. Then I back off each nut and retorque to spec.ruckman101 wrote:A couple of the head nuts lost torque after a couple days just sitting on the bench?
neal
Colin
BobD - 78 Bus . . . 112,730 miles
Chloe - 70 bus . . . 217,593 miles
Naranja - 77 Westy . . . 142,970 miles
Pluck - 1973 Squareback . . . . . . 55,600 miles
Alexus - 91 Lexus LS400 . . . 96,675 miles
Chloe - 70 bus . . . 217,593 miles
Naranja - 77 Westy . . . 142,970 miles
Pluck - 1973 Squareback . . . . . . 55,600 miles
Alexus - 91 Lexus LS400 . . . 96,675 miles
-
Oregon72

- IAC Addict!
- Location: Sherwood, Oregon
- Status: Offline
One of the many great logical "that makes sense" tips that Air Cooled Ranch gave me with regard to head installation is that you want to install both heads at the same time torquing in 5 foot pound increments. In other words, don't put on head 1/2 and sequence torqe it all the way to full spec. since you've done it already, it shouldn't be a problem, so I feel bad even saying this but for future ya know. What you want to do is torque head 1/2 to 5 foot pounds, then torque head 3/4 to 5 foot pounds, then go back to head 1/2 and torque to 10 foot pounds, then 3/4 to ten foot pounds, then back to head 1/2 torque to 15 pounds... and so on and so forth until you get to full spec. The idea is that you want to gradually pull everything to the centerline of the engine in an even and steady manner. Air Cooled Ranch gives the best tidbits ya'll.
Here's a tip from Oregon72 - POST SOME PHOTOS!!! And keep the faith - you're getting closer
Here's a tip from Oregon72 - POST SOME PHOTOS!!! And keep the faith - you're getting closer
-'72 Westy-
-
poptop tom
- Old School!
- Location: La Porte, IN
- Status: Offline
Good stuff! But too late! I do agree though, Jim gives good advice!Oregon72 wrote:One of the many great logical "that makes sense" tips that Air Cooled Ranch gave me with regard to head installation is that you want to install both heads at the same time torquing in 5 foot pound increments. In other words, don't put on head 1/2 and sequence torqe it all the way to full spec. since you've done it already, it shouldn't be a problem, so I feel bad even saying this but for future ya know. What you want to do is torque head 1/2 to 5 foot pounds, then torque head 3/4 to 5 foot pounds, then go back to head 1/2 and torque to 10 foot pounds, then 3/4 to ten foot pounds, then back to head 1/2 torque to 15 pounds... and so on and so forth until you get to full spec. The idea is that you want to gradually pull everything to the centerline of the engine in an even and steady manner. Air Cooled Ranch gives the best tidbits ya'll.
Here's a tip from Oregon72 - POST SOME PHOTOS!!! And keep the faith - you're getting closer
Its been two days since the 2nd torque. Valve geometry starts this a.m.! I will check torque again before starting!
I started a photobucket account, but dont really like it. I have been taking pics though! Not a ton, but surely some. I see some here like/use flickr. Is it easier to use? I wish picture posting were like it was on the samba.
Mr. Blotto wrote, "Boy - thanks for the offer, but a month in poptop tom's world means 5 years"
-
poptop tom
- Old School!
- Location: La Porte, IN
- Status: Offline
S-L-O-W and tedious is valve geometry! #1 intake and exhaust are measured. For push rod install, that is!
Did #1 intake first. Numbers were above .423, but within the 5% +- that is allowed. 1/2 lift looked good. Exhaust was less than, but in the range, and looked good!
Went to do the exhaust, and freaked out because I could hear some clunk type noise coming from inside the case when rotating the engine.
Realized the flywheel wasn't on. End play was already finished/checked, but the flywheel wasn't put on at that do due to its getting in the way with the engine stand. So I had to pull the engine off the stand, and put up on the bench and do the flywheel work. Flywheel is on. Not more cam movement, no more noises!
Tomorrow I have big aspirations of getting the remaining six done and cut. Maybe installed.
That will leave a big day friday to continue with parts installation!
Did #1 intake first. Numbers were above .423, but within the 5% +- that is allowed. 1/2 lift looked good. Exhaust was less than, but in the range, and looked good!
Went to do the exhaust, and freaked out because I could hear some clunk type noise coming from inside the case when rotating the engine.
Realized the flywheel wasn't on.
Tomorrow I have big aspirations of getting the remaining six done and cut. Maybe installed.
That will leave a big day friday to continue with parts installation!
Mr. Blotto wrote, "Boy - thanks for the offer, but a month in poptop tom's world means 5 years"
-
vwlover77
- IAC Addict!
- Location: North Canton, Ohio
- Status: Offline
Sorry if I missed it, and sorry for a dumb question...... Is this a stock rebuild? If so, then why is valve geometry not a "done deal" from the start? Due to flycutting of the head???
Don
---------------------------
78 Westy
71 Super Beetle Convertible Autostick
"When we let our compassion go, we let go of whatever claim we have to the divine." - Bruce Springsteen
---------------------------
78 Westy
71 Super Beetle Convertible Autostick
"When we let our compassion go, we let go of whatever claim we have to the divine." - Bruce Springsteen
-
Randy in Maine

- IAC Addict!
- Location: Old Orchard Beach, Maine
- Status: Offline
-
poptop tom
- Old School!
- Location: La Porte, IN
- Status: Offline
Of, for sure, Randy! Two down, six to go!Randy in Maine wrote:Do each of them separately. Non-stock cam and the re-machined heads require that.
We don't want to be tearing this one down anytime soon now do we?
Don - I purchased the Raby upgraded valvetrain kit. I sent his 42x36 valves, and porsche swivel adjusters, etc., and my vw heads to Adrian, at HeadflowMasters, to be rebuilt.
Jake's 9550 cam. Jake balanced and bushed the rods. Mahle 2.0 dished pistons. 72-74 HE's and a Thunderbird exhaust. C/R will be 7.7-1. This is a solid lifter engine, and I have Jake's push rods going in it, so measuring/cutting is involved.
The difference in length between the #1 intake and exhaust pushrods is only .37 mm. Need to have those swivels setting nicely!
PS - this is NOT a CS!
Mr. Blotto wrote, "Boy - thanks for the offer, but a month in poptop tom's world means 5 years"
-
Mr Blotto

- IAC Addict!
- Location: Northern Burbs / Chicago
- Contact:
- Status: Offline
-
airkooledchris

- IAC Addict!
- Location: Eureka, California
- Contact:
- Status: Offline
-
poptop tom
- Old School!
- Location: La Porte, IN
- Status: Offline
Whew!
Valve geometry is finished! Remaining six valves were geometrizied (is that a word?)
Pushrods were measured and cut, tips installed. Used a cut off saw to trim them down, and a grinder for final cleanup. Lifters lubed and installed. Pushrod tube seals installed and then pushrod tubes installed.
Pushrods then inserted, and rocker assemblies installed and torqued.
Great day!
I am taking pics - I promise. I wish I had them posted, but I haven't had any time to load them on to the internet. Sorry.
I know, I know. Pictures, or it didn't happen!
Mr. Blotto wrote, "Boy - thanks for the offer, but a month in poptop tom's world means 5 years"
-
sped372

- IAC Addict!
- Location: Waunakee, WI
- Status: Offline
-
vwlover77
- IAC Addict!
- Location: North Canton, Ohio
- Status: Offline
-
Bleyseng

- IAC Addict!
- Location: Seattle again
- Contact:
- Status: Offline
It still will be close due to the parts and how you are building it! woohoo, 95 hppoptop tom wrote:Of, for sure, Randy! Two down, six to go!Randy in Maine wrote:Do each of them separately. Non-stock cam and the re-machined heads require that.
We don't want to be tearing this one down anytime soon now do we?
Don - I purchased the Raby upgraded valvetrain kit. I sent his 42x36 valves, and porsche swivel adjusters, etc., and my vw heads to Adrian, at HeadflowMasters, to be rebuilt.
Jake's 9550 cam. Jake balanced and bushed the rods. Mahle 2.0 dished pistons. 72-74 HE's and a Thunderbird exhaust. C/R will be 7.7-1. This is a solid lifter engine, and I have Jake's push rods going in it, so measuring/cutting is involved.
The difference in length between the #1 intake and exhaust pushrods is only .37 mm. Need to have those swivels setting nicely!
PS - this is NOT a CS!
Geoff
77 Sage Green Westy- CS 2.0L-160,000 miles
70 Ghia vert, black, stock 1600SP,- 139,000 miles,
76 914 2.1L-Nepal Orange- 160,000+ miles
http://bleysengaway.blogspot.com/
77 Sage Green Westy- CS 2.0L-160,000 miles
70 Ghia vert, black, stock 1600SP,- 139,000 miles,
76 914 2.1L-Nepal Orange- 160,000+ miles
http://bleysengaway.blogspot.com/