
By this, do you mean that I reassemble the case, with ALL of the fasteners, without the crankshaft in it-just the hollow case, torqued to spec?then bolt up every main bearing bolt and peripheral bolt to proper torque, then get the bores measured by someone who can wield a top-drawer micrometer. We are measuring well within thousandths of an inch here.
The Irreverent Air Cooled Rebuild Adventure.
-
Jivermo
- IAC Addict!
- Status: Offline
Re: The Irreverent Air Cooled Rebuild Adventure.
-
Amskeptic

- IAC "Help Desk"

- Status: Offline
Re: The Irreverent Air Cooled Rebuild Adventure.
Yes.Jivermo wrote:By this, do you mean that I reassemble the case, with ALL of the fasteners, without the crankshaft in it-just the hollow case, torqued to spec?then bolt up every main bearing bolt and peripheral bolt to proper torque, then get the bores measured by someone who can wield a top-drawer micrometer. We are measuring well within thousandths of an inch here.
When you do a careful overhaul, you will do it again with the bearings right out their boxes and measure the actual bearing IDs then subtract the crankshaft journal diameters for each bearing position. That will be your oil clearance for the main bearings. We shoot for .002". Careful math, ain't it?
Colin
BobD - 78 Bus . . . 112,730 miles
Chloe - 70 bus . . . 217,593 miles
Naranja - 77 Westy . . . 142,970 miles
Pluck - 1973 Squareback . . . . . . 55,600 miles
Alexus - 91 Lexus LS400 . . . 96,675 miles
Chloe - 70 bus . . . 217,593 miles
Naranja - 77 Westy . . . 142,970 miles
Pluck - 1973 Squareback . . . . . . 55,600 miles
Alexus - 91 Lexus LS400 . . . 96,675 miles
-
Jivermo
- IAC Addict!
- Status: Offline
Re: The Irreverent Air Cooled Rebuild Adventure.
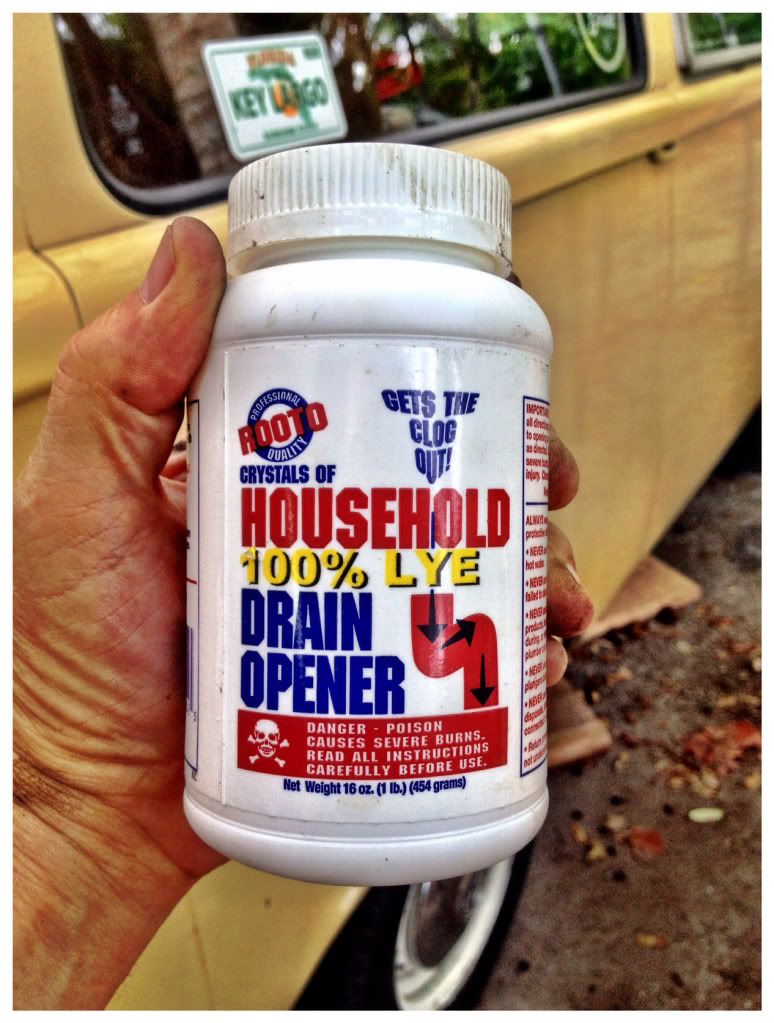
OK, got out the big guns to clean my tins, which are coated with grease and road muck. This stuff really does the job, BUT you must use it with care. #1-no children around this at all. #2-use rubber gloves and eye protection. Lye reacts violently with water, sweat, and fats, and can really burn you quickly. #3-NO ALUMINUM. Lye will eat it up, while making some nasty fumes, similar to what was last experienced in Ypres. #4-NO GALVANIZED. Use a heavy plastic garbage can, mix two containers of lye (caustic soda), 10-20 gallons of water, and immerse the tins in the soup. Make sure you have it where children cannot mess with it. Leave it in for a couple of days-it will remove everything-paint, grease, grime, oil. Saves an awful lot of scrubbing.

Remember-Steel parts only!
-
Amskeptic
- IAC "Help Desk"
- Status: Offline
Re: The Irreverent Air Cooled Rebuild Adventure.
But, but, but that's drain cleaner. Where is the violent reaction with water when you pour drain cleaner down the trap?Jivermo wrote:Lye reacts violently with water, sweat, and fats,
Remember-Steel parts only!
Colin
BobD - 78 Bus . . . 112,730 miles
Chloe - 70 bus . . . 217,593 miles
Naranja - 77 Westy . . . 142,970 miles
Pluck - 1973 Squareback . . . . . . 55,600 miles
Alexus - 91 Lexus LS400 . . . 96,675 miles
Chloe - 70 bus . . . 217,593 miles
Naranja - 77 Westy . . . 142,970 miles
Pluck - 1973 Squareback . . . . . . 55,600 miles
Alexus - 91 Lexus LS400 . . . 96,675 miles
-
Jivermo
- IAC Addict!
- Status: Offline
Re: The Irreverent Air Cooled Rebuild Adventure.
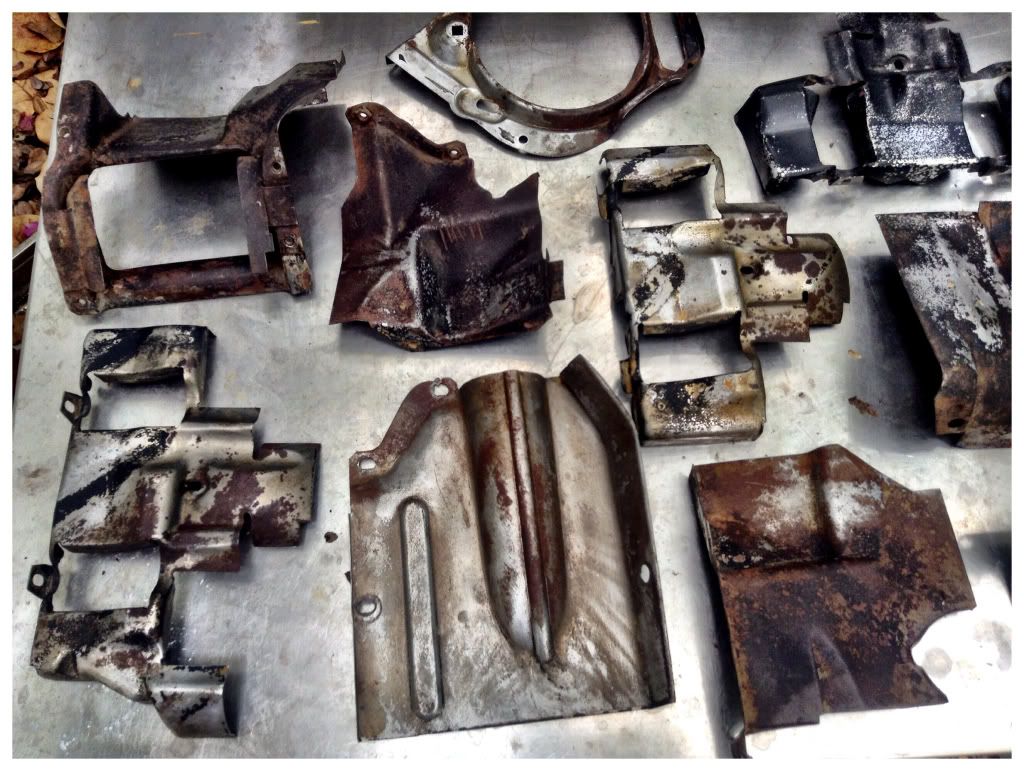
Very dirty tins after one week in a lye solution.
-
Amskeptic
- IAC "Help Desk"
- Status: Offline
Re: The Irreverent Air Cooled Rebuild Adventure.
I think you might do better with the Itinerant Air-Cooled method, those tins still need plenty of labor to get where you need to go.Jivermo wrote:Very dirty tins after one week in a lye solution.
I start with a scraper/razor blade that knocks off the grime and the old paint, follow with a wire brush to clean out the corners, sand with 80 grit on painted surfaces that need to leave, 180 for the exposed metal, followed by a test fit/metal bend as necessary, then soapy water bath, good dry, now paint.
Colin
(Road Warrior 2002 Dining Room Engine Overhaul)

BobD - 78 Bus . . . 112,730 miles
Chloe - 70 bus . . . 217,593 miles
Naranja - 77 Westy . . . 142,970 miles
Pluck - 1973 Squareback . . . . . . 55,600 miles
Alexus - 91 Lexus LS400 . . . 96,675 miles
Chloe - 70 bus . . . 217,593 miles
Naranja - 77 Westy . . . 142,970 miles
Pluck - 1973 Squareback . . . . . . 55,600 miles
Alexus - 91 Lexus LS400 . . . 96,675 miles
-
ruckman101

- Lord God King Bwana
- Location: Up next to a volcano.
- Contact:
- Status: Offline
Re: The Irreverent Air Cooled Rebuild Adventure.
That may be the first time I've seen a shot of that legendary engine. Always the artist.
I hit my tin with a power washer, degreaser wash, then a wire wheel before painting. And definitely pre-fit. I did quite a bit of "adjustment" here and there reshaping bits to play well together before I committed to paint.
neal
I hit my tin with a power washer, degreaser wash, then a wire wheel before painting. And definitely pre-fit. I did quite a bit of "adjustment" here and there reshaping bits to play well together before I committed to paint.
neal
The slipper has no teeth.
-
Jivermo
- IAC Addict!
- Status: Offline
Re: The Irreverent Air Cooled Rebuild Adventure.
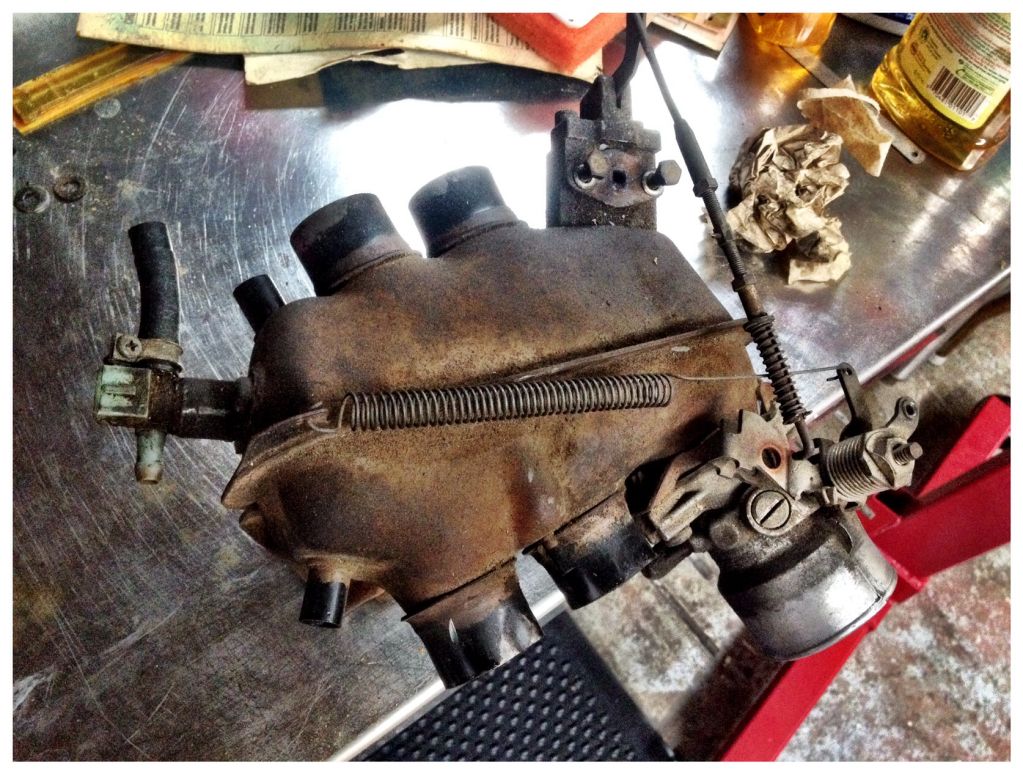
I was just stripping down the plenum, and pulled off the EGR valve. The opening in the plenum was pretty crudded up. What purpose does this thing serve? I see these are NLA. Do I just clean this up and reinstall it when I put everything back together? I saw an old post by Colin on the Samba where they can let too much oxygen into the mix and do bad things. What's up?
-
Bleyseng

- IAC Addict!
- Location: Seattle again
- Contact:
- Status: Offline
Re: The Irreverent Air Cooled Rebuild Adventure.
Jivermo wrote:Very dirty tins after one week in a lye solution.
I am though with screwing with old grimy tins as now I take em to a Powdercoating shop where they media blast the crud off and powder coat them so they look better than new. Worth every penny!
Geoff
77 Sage Green Westy- CS 2.0L-160,000 miles
70 Ghia vert, black, stock 1600SP,- 139,000 miles,
76 914 2.1L-Nepal Orange- 160,000+ miles
http://bleysengaway.blogspot.com/
77 Sage Green Westy- CS 2.0L-160,000 miles
70 Ghia vert, black, stock 1600SP,- 139,000 miles,
76 914 2.1L-Nepal Orange- 160,000+ miles
http://bleysengaway.blogspot.com/
-
Jivermo
- IAC Addict!
- Status: Offline
Re: The Irreverent Air Cooled Rebuild Adventure.
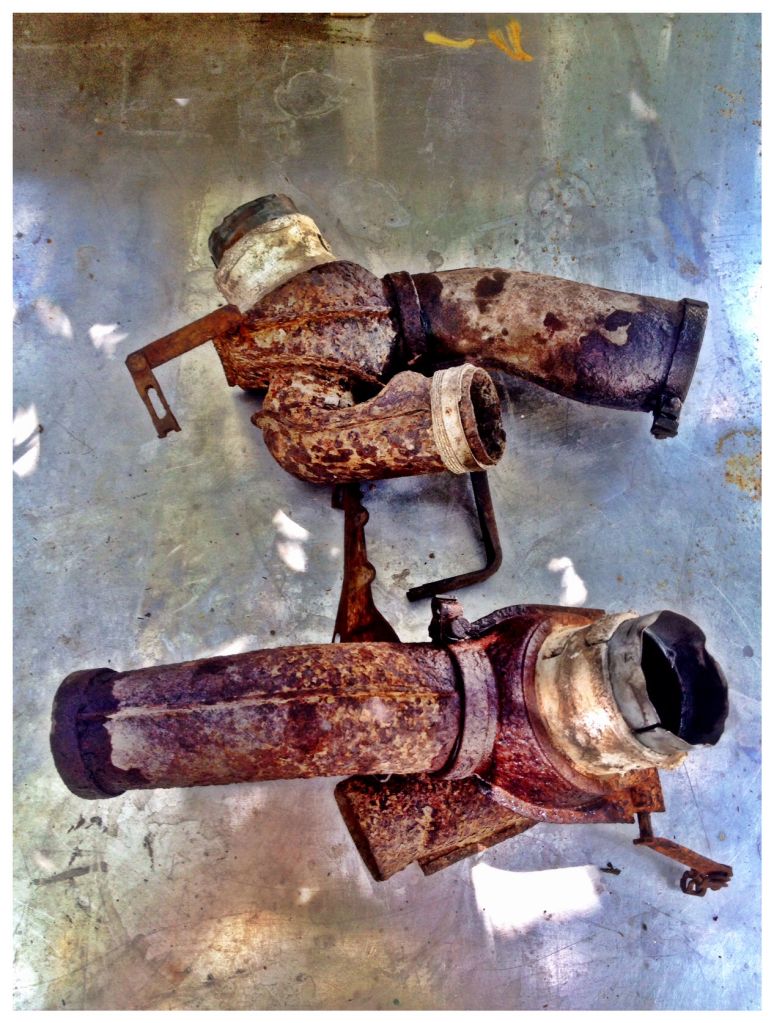
Moving past the tins for my sanity, I began on the heater flaps. As you can see, both of mine are pretty well shot by corrosion. I picked up a nice pair on the Samba, so I dismantled these carefully. The connecting tin ducting is salvageable. My question concerns the asbestos collars.
-
Jivermo
- IAC Addict!
- Status: Offline
Re: The Irreverent Air Cooled Rebuild Adventure.
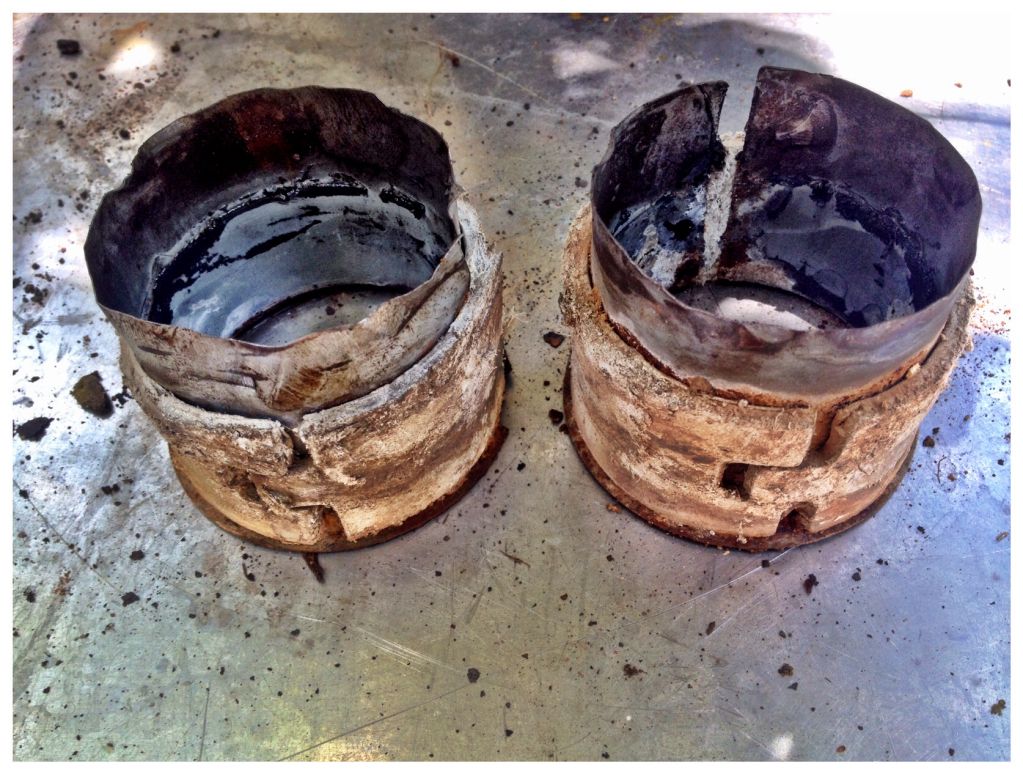
I got the two collars off without messing up the asbestos wraps. I want to reuse them, as the later Vanagon silicon replacements are NLA. I'm thinking about finger coating them with high heat silicon to essentially seal them up, ala the Chernoby sarcophagus. Or a high heat tape. I understand that the temps here get high, and frankly, it's tough to beat asbestos in an application like this.
-
airkooledchris

- IAC Addict!
- Location: Eureka, California
- Contact:
- Status: Offline
Re: The Irreverent Air Cooled Rebuild Adventure.
There are plenty of old Vanagon's in the junk yards, why not just get some of the silicon ones to swap in?
1979 California Transporter
-
Amskeptic
- IAC "Help Desk"
- Status: Offline
Re: The Irreverent Air Cooled Rebuild Adventure.
Just straighten the inner collars, insert them into the plastic heater ducts, and use grease on the insides of the collars when installing in the vehicle.Jivermo wrote: I got the two collars off without messing up the asbestos wraps. I want to reuse them, as the later Vanagon silicon replacements are NLA. it's tough to beat asbestos in an application like this.
Be careful that you don't pull a "GE In The Hudson" where GE stirred up so much PCB-laced muck trying to clean up their mess, that they made a bigger mess.
All of my VWs have the asbestos ducts, they are a health menace, but they stay together so long as the inner collars do not bond to the vehicle heat ducts or engine heater valve outlets. I use the clamps on the plastic ducts only to establish a slight friction as they are installed. The BobD had RTV slopped all over the collars and ducts, and I had a friable asbestos emergency peeling that annoying junk off.
Colin
BobD - 78 Bus . . . 112,730 miles
Chloe - 70 bus . . . 217,593 miles
Naranja - 77 Westy . . . 142,970 miles
Pluck - 1973 Squareback . . . . . . 55,600 miles
Alexus - 91 Lexus LS400 . . . 96,675 miles
Chloe - 70 bus . . . 217,593 miles
Naranja - 77 Westy . . . 142,970 miles
Pluck - 1973 Squareback . . . . . . 55,600 miles
Alexus - 91 Lexus LS400 . . . 96,675 miles
-
Jivermo
- IAC Addict!
- Status: Offline
Re: The Irreverent Air Cooled Rebuild Adventure.
I'll do that...and, most likely, you'll be here to see it done...the rate things are going!
-
Amskeptic
- IAC "Help Desk"
- Status: Offline
Re: The Irreverent Air Cooled Rebuild Adventure.
I adore assembling engines . . . .Jivermo wrote:I'll do that...and, most likely, you'll be here to see it done...the rate things are going!
Colin
BobD - 78 Bus . . . 112,730 miles
Chloe - 70 bus . . . 217,593 miles
Naranja - 77 Westy . . . 142,970 miles
Pluck - 1973 Squareback . . . . . . 55,600 miles
Alexus - 91 Lexus LS400 . . . 96,675 miles
Chloe - 70 bus . . . 217,593 miles
Naranja - 77 Westy . . . 142,970 miles
Pluck - 1973 Squareback . . . . . . 55,600 miles
Alexus - 91 Lexus LS400 . . . 96,675 miles